
Using Your Fingers to Detangle
Detangling your hair with your fingers is a gentle and effective method, especially if you have curly or textured hair that is prone to tangles. Here’s how to do it:
1. Start by sectioning your hair: Divide your hair into manageable sections using clips or hair ties. This will make the detangling process easier and prevent further tangling.
2. Apply a conditioner or detangling spray: To aid in the detangling process, apply a generous amount of conditioner or detangling spray to each section of your hair. This will provide slip and make it easier for your fingers to glide through the strands.
3. Begin detangling from the ends: Starting at the ends of your hair, gently work your fingers through the tangles and knots. Use a combing motion, working your way up to the roots. Be patient and take your time to avoid causing any breakage or unnecessary hair loss.
4. Use your fingers as a comb: Instead of using a traditional comb or brush, use your fingers as a comb to gently separate the tangled strands. This allows you to feel the knots and tangles and loosen them without causing too much stress on the hair.
5. Repeat the process: Continue working through each section of your hair, applying more conditioner or spray as needed, until all the tangles are removed. Remember to be gentle and patient throughout the process.
Using your fingers to detangle your hair not only helps to minimize damage, but it also allows you to have better control and feel for the knots and tangles. It’s a great method to use on wet or dry hair, depending on your hair’s needs.
Using a Wide-tooth Comb
A wide-tooth comb is a versatile tool that can be used to detangle and style various hair types. Here’s how to effectively use a wide-tooth comb for detangling:
1. Start with damp hair: Begin by washing your hair and gently towel-drying it until it’s damp. This will make it easier for the comb to glide through your locks without causing unnecessary breakage or pulling.
2. Apply a leave-in conditioner: To provide slip and make the detangling process smoother, apply a leave-in conditioner to your hair. This will moisturize and soften the strands, making them more manageable.
3. Divide your hair into sections: Use clips or hair ties to section your hair into manageable parts. This will help you tackle one section at a time and prevent further tangling.
4. Start from the bottom: Begin detangling at the ends of your hair using the wide-tooth comb. Slowly and gently work your way up to the roots, easing out the knots and tangles as you go. Avoid starting at the roots, as this can cause more tension and breakage.
5. Be gentle and patient: Detangling with a wide-tooth comb requires patience. If you encounter a particularly stubborn knot, resist the urge to forcefully pull at it. Instead, gently work through it, starting from the bottom and working your way up.
6. Comb in small sections: To ensure thorough detangling, comb through smaller sections of your hair at a time. This allows you to give attention to each tangle and prevents the comb from getting stuck.
7. Comb with care: Use smooth, gentle strokes with the wide-tooth comb, always moving from the ends towards the roots. Avoid aggressive combing motions that can cause breakage or damage to your hair.
Using a wide-tooth comb is an excellent option for detangling hair, especially for those with thick, curly, or textured hair. It offers more control than using your fingers alone and helps to distribute product evenly throughout the hair.
Using a Detangling Spray or Leave-in Conditioner
Detangling sprays and leave-in conditioners are excellent products that can make the detangling process much easier by providing slip and moisture. Here’s how to effectively use them:
1. Choose the right product: Look for a detangling spray or leave-in conditioner specifically formulated for your hair type. Consider factors such as moisture level, thickness, and texture when selecting a product that will best address your hair’s needs.
2. Apply to damp hair: After washing your hair, gently towel-dry it until it’s damp but not dripping wet. This slight dampness will help the product to penetrate the strands more effectively.
3. Section your hair: Divide your hair into manageable sections using clips or hair ties. This will allow you to focus on one section at a time, ensuring that the product is evenly distributed and reaches all areas.
4. Spray or apply the product: Depending on the product’s form (spray or cream), apply it to each section of your hair. If using a detangling spray, hold the bottle a few inches away from your hair and spritz it from roots to ends. If using a leave-in conditioner, place a small amount in your palm and work it through each section, focusing on the mid-lengths to the ends.
5. Let the product sit: Give the detangling spray or leave-in conditioner a few moments to work its magic. This will allow it to soften and moisturize the hair, making it easier to detangle.
6. Use your fingers or a wide-tooth comb: Once the product has had a chance to work, begin to gently detangle your hair with your fingers or a wide-tooth comb. Start from the ends and work your way up to the roots. The added slip from the product will help the comb or your fingers glide through the hair more easily.
7. Repeat as needed: If your hair is particularly tangled or prone to knots, you may need to reapply the detangling spray or leave-in conditioner as you work through each section. Don’t hesitate to add more product if necessary to keep the hair moisturized and manageable.
Using a detangling spray or leave-in conditioner can save you time and frustration when it comes to detangling your hair. The added slip and moisture make the process smoother, minimizing breakage and leaving your hair feeling soft and tangle-free.
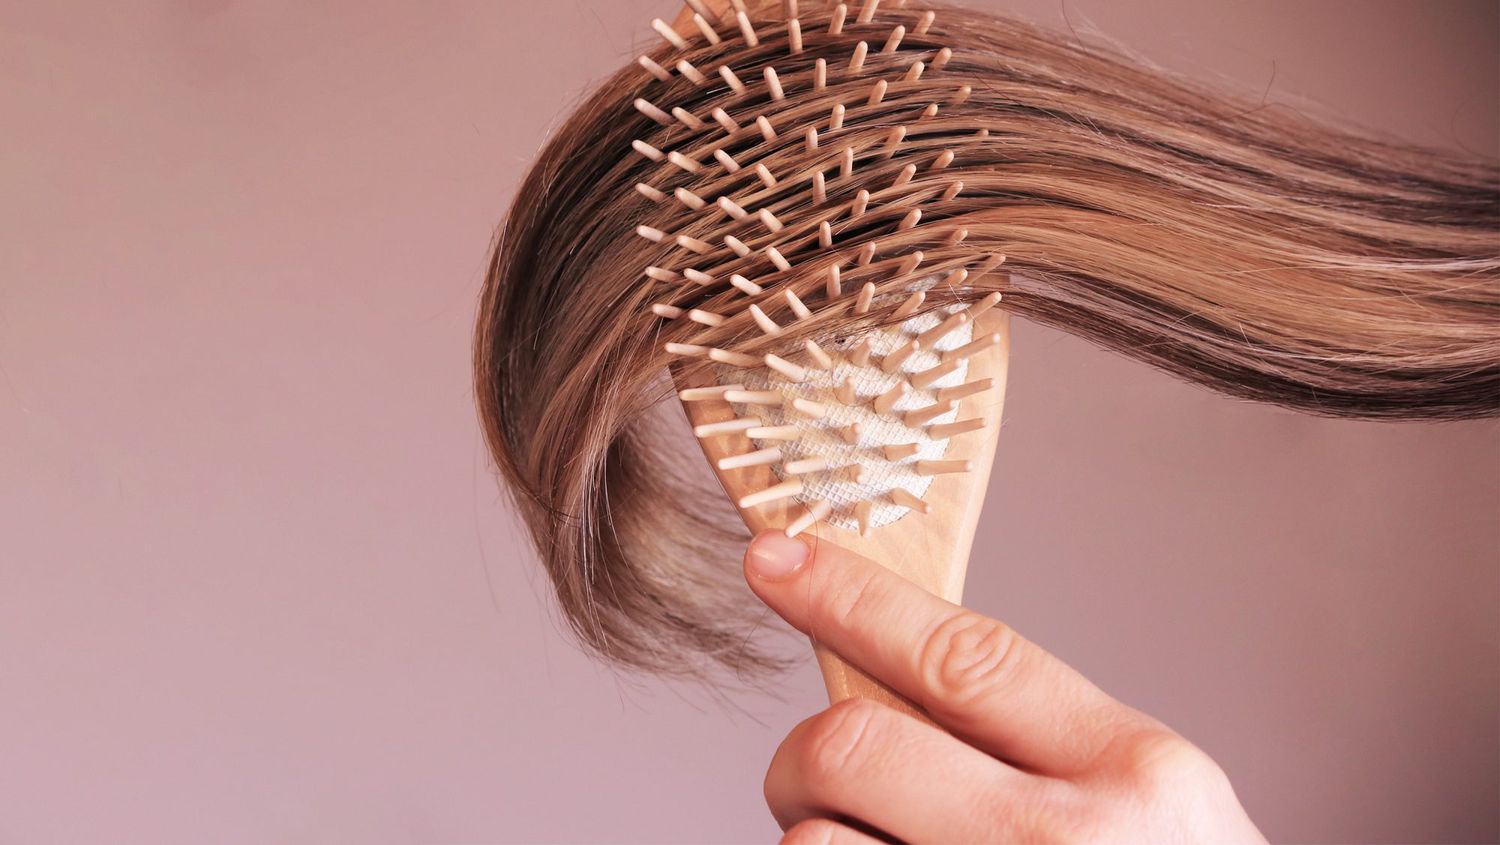
Using a Tangle Teezer or Wet Brush
A Tangle Teezer or Wet Brush is a popular detangling tool designed to glide through wet or dry hair with minimal pulling or breakage. Here’s how to effectively use one:
1. Start with damp hair: Whether you’re using a Tangle Teezer or a Wet Brush, it’s best to start with damp hair. This can be after washing your hair or lightly spritzing it with water to make it slightly damp.
2. Divide your hair into sections: Use clips or hair ties to divide your hair into manageable sections. This prevents overwhelming the brush and helps you work through each section systematically.
3. Begin at the ends: Start detangling at the ends of your hair, gently working your way up towards the roots. The flexible bristles of the Tangle Teezer or Wet Brush will help navigate through tangles while minimizing breakage.
4. Use gentle strokes: When using a Tangle Teezer or Wet Brush, apply gentle pressure and use smooth strokes to avoid causing unnecessary stress on your hair. Lightly comb through each section, focusing on tangled areas and using short strokes to tackle knots.
5. Detangle with care: If you encounter a particularly stubborn knot, hold onto the hair above the tangle firmly with one hand while gently brushing through the knot with the Tangle Teezer or Wet Brush. This helps prevent unnecessary pulling and breakage.
6. Repeat the process: Continue detangling each section of your hair, making sure to brush from ends to roots. Take your time and be patient, especially with thicker or more tangled hair.
7. Clean the brush regularly: To keep your Tangle Teezer or Wet Brush in optimal condition, clean it regularly. Remove any hair that gets trapped in the bristles and wash the brush with mild shampoo and water to remove any product buildup.
Using a Tangle Teezer or Wet Brush can be a game-changer when it comes to quickly and painlessly detangling your hair. The flexible bristles and ergonomic design make them gentle yet effective tools for tackling knots and tangles, leaving your hair smooth and manageable.
Using a Paddle Brush or Vent Brush
A paddle brush or vent brush is a versatile tool that can be used for detangling and styling various hair types. Here’s how to effectively use them:
1. Start with dry or slightly damp hair: Paddle brushes and vent brushes are best used on dry or slightly damp hair. If your hair is wet, it’s ideal to first towel-dry it to remove excess moisture.
2. Divide your hair into sections: Use clips or hair ties to divide your hair into manageable sections. This helps you work through each section systematically and prevents overwhelming the brush.
3. Start at the ends: Begin brushing at the ends of your hair, gently working your way up towards the roots. This helps prevent unnecessary pulling and breakage, especially for those with longer hair.
4. Use long, smooth strokes: When using a paddle brush or vent brush, use long, smooth strokes from roots to ends. Start at the roots and gradually move down the hair shaft, allowing the brush to glide through the strands.
5. Detangle with care: If you encounter any knots or tangles, be patient and gently work through them using the brush. Hold onto the hair above the tangle firmly with one hand while you brush through the knot with the paddle brush or vent brush.
6. Adjust pressure as needed: Some paddle brushes and vent brushes have adjustable bristles or vents. If possible, adjust the pressure to suit your hair’s needs. For thicker or more tangled hair, you may need to use slightly more pressure to effectively detangle.
7. Clean your brush regularly: To maintain the effectiveness of your paddle brush or vent brush, clean it regularly to remove any hair or product buildup. Wash the brush with mild shampoo and water, and use a comb to remove any hair stuck between the bristles.
Paddle brushes are great for smoothing and straightening, while vent brushes are designed to improve airflow and can be used for quick detangling or blow-drying. Both brushes are valuable tools for achieving a polished look and maintaining healthy hair.
Using a Bobby Pin or Hairpin for Quick Fixes
Bobby pins and hairpins are handy tools that can quickly fix loose strands, secure hairstyles, and provide temporary hold. Here’s how to effectively use them:
1. Choose the right pin: Depending on your hair type and the desired hold, select bobby pins or hairpins of appropriate size and strength. Bobby pins with ridges or coated with fabric provide better grip, while hairpins with U-shapes offer more flexibility.
2. Fix loose strands: If you have small flyaways or loose strands of hair, use a bobby pin to secure them into place. Take the loose strand and twist it slightly, then slide the bobby pin through the twisted section and secure it close to the scalp. This quick fix can give you a polished look in seconds.
3. Create simple updos: Bobby pins and hairpins are perfect for creating simple updos and securing hairstyles. Whether it’s a classic bun, a chignon, or a half-updo, use the pins to hold the hair in place. Insert the pin vertically into the hairstyle, crossing it over the section being secured to provide extra hold.
4. Anchor hairstyles: When it comes to securing hairstyles that require more hold, bobby pins and hairpins become invaluable. Use them to anchor braids, twists, or intricate updos by inserting the pins diagonally into the style, crossing over the sections for added security.
5. Conceal pins strategically: To ensure a seamless look, conceal the bobby pins or hairpins by hiding them beneath the hair. Insert the pins parallel to the scalp or in a crisscross pattern to keep them hidden. This is especially important for formal hairstyles or occasions.
6. Experiment with creative styles: Bobby pins and hairpins can also be used as decorative elements in hairstyles. Get creative and experiment with different arrangements and patterns using colored or embellished pins to add a unique touch to your look.
7. Remove carefully: When removing bobby pins or hairpins, do so with caution to avoid tangling or pulling on the hair. Gently slide them out in the opposite direction of how they were inserted, taking care not to damage or break the hair.
Bobby pins and hairpins are versatile tools that offer quick fixes and temporary hold for various hairstyling needs. With a little practice, you can easily master using these hair accessories to achieve effortless and polished looks.
Using a Silk or Satin Pillowcase for Easy Morning Detangling
A silk or satin pillowcase can be a game-changer when it comes to preventing tangles and knots while you sleep. Here’s how using one can make morning detangling a breeze:
1. Reduced friction: Unlike cotton or other materials, silk or satin pillowcases minimize friction against your hair strands. This reduces the likelihood of friction-related damage and helps to keep your hair smoother and less tangled overnight.
2. Preserve moisture: Silk and satin pillowcases are known for their moisture-retaining properties. They help to prevent the absorption of moisture from your hair, leaving it hydrated and less prone to dryness. This can significantly reduce morning tangles caused by dry hair.
3. Gentle on the hair cuticle: The smooth surface of silk or satin pillowcases is gentler on your hair cuticles compared to rougher materials. This reduces the chances of hair breakage, split ends, and snags, making detangling easier in the morning.
4. Retain hairstyle: If you’ve taken the time to style your hair the day before, a silk or satin pillowcase can help to maintain your hairstyle. It minimizes frizz and keeps your hair intact, reducing the need for extensive detangling and restyling in the morning.
5. Easy morning routine: With a silk or satin pillowcase, you’ll likely experience fewer tangles and knots upon waking up. This can significantly simplify your morning routine, as you won’t need to spend as much time and effort detangling your hair.
6. Care for different hair types: Silk or satin pillowcases are suitable for all hair types. Whether you have curly hair that easily tangles or straight hair that is prone to bedhead, using one can help to minimize the morning detangling process for everyone.
7. Additional benefits: In addition to easy morning detangling, silk or satin pillowcases offer other benefits. They are known to help regulate body temperature, reduce bedhead, and even promote healthier-looking skin.
Investing in a silk or satin pillowcase is a simple yet effective solution to morning hair tangles and knots. So, swap your regular pillowcase for a silk or satin one and wake up to smoother, more manageable hair each day.
Using a Silk or Satin Scarf or Bonnet to Protect Hair at Night
Using a silk or satin scarf or bonnet can protect your hair while you sleep by minimizing friction and keeping your hair moisturized. Here’s why incorporating one into your nighttime routine is beneficial:
1. Reduce friction: The smooth texture of silk or satin reduces friction between your hair and the surface of your pillow or bed sheets. This helps to prevent tangles, frizz, and breakage that can occur while tossing and turning during sleep.
2. Preserve moisture: Silk and satin fabrics are less absorbent than materials like cotton, so they don’t draw moisture from your hair as much. By using a silk scarf or bonnet, you can help retain the natural oils and moisture in your hair, reducing dryness and promoting healthier-looking locks.
3. Minimize hair damage: The gentle nature of silk or satin prevents your hair from getting caught on rough or abrasive surfaces. This minimizes hair breakage, split ends, and damage caused by friction, improving the overall health and appearance of your hair.
4. Protect hairstyles: Whether you’re wearing a simple updo or a complex hairstyle, a silk or satin scarf or bonnet can help protect and preserve it overnight. It helps to maintain the shape and integrity of your hairstyle, reducing the need for extensive restyling in the morning.
5. Versatile styling options: Silk or satin scarves and bonnets come in various sizes and styles, giving you the flexibility to choose the one that best suits your hair length and personal preference. You can tie the scarf in different ways or opt for a bonnet with an adjustable elastic band, ensuring a comfortable fit.
6. Suitable for all hair types: Silk or satin scarves and bonnets work well for all hair types, from natural, curly, and textured hair to straight and chemically treated hair. They provide a protective barrier regardless of your hair’s specific needs and help maintain its moisture level and overall health.
7. Promote better sleep: Aside from their hair protection benefits, silk or satin scarves and bonnets can contribute to better sleep quality. The smooth and luxurious feel of these fabrics against your skin can positively impact your comfort, allowing you to relax and sleep more soundly.
Using a silk or satin scarf or bonnet is an excellent way to protect your hair while you sleep. By reducing friction, preserving moisture, and preventing damage, you can wake up with healthier, more manageable hair every morning.
Using a DIY Natural Hair Detangler
A DIY natural hair detangler can be an affordable and effective solution for removing knots and tangles without harsh chemicals. Here’s how to make and use one:
1. Start with a base: Mix equal parts of water and a lightweight conditioner or aloe vera gel. The water helps to moisturize the hair, while the conditioner or aloe vera provides slip to ease detangling.
2. Add essential oils (optional): If desired, enhance the detangling spray by adding a few drops of essential oils like lavender, rosemary, or chamomile. These oils can provide extra nourishment for the hair and contribute to a more pleasant scent.
3. Mix and transfer to a spray bottle: Thoroughly mix the ingredients in a bowl and transfer the mixture to a clean spray bottle. This will make it easier to apply and distribute the detangler evenly through your hair.
4. Section your hair: Divide your hair into sections using clips or hair ties. This allows you to focus on one section at a time and ensures that the detangler reaches all areas of your hair.
5. Spray and comb through: Lightly spray the DIY detangler onto each section of your hair, focusing on the ends and areas with knots or tangles. Use a wide-tooth comb or your fingers to gently comb through the hair, starting from the ends and working your way up to the roots.
6. Repeat as needed: If your hair is particularly tangled, spray more detangler as necessary and continue combing through each section until all the tangles are removed. Take your time and be gentle to prevent any breakage or damage.
7. Style as desired: Once your hair is detangled, you can style it as desired. The DIY detangler can also serve as a leave-in conditioner, providing additional hydration and making your hair more manageable throughout the day.
Using a DIY natural hair detangler allows you to control the ingredients and tailor the mixture to your specific hair needs. This affordable and customizable option can help soften and detangle your hair while promoting its overall health and natural beauty.
Using a Boar Bristle Brush for Smoothing and Shine
A boar bristle brush is a fantastic tool for achieving smoother, shinier hair without relying on heat or styling products. Here’s how to effectively use a boar bristle brush:
1. Choose the right brush: Look for a high-quality boar bristle brush with natural bristles. These brushes are typically made with a combination of boar bristles and nylon bristles to provide the perfect balance of gentle detangling and effective smoothing.
2. Start with dry hair: Boar bristle brushes work best on dry hair as they help distribute the natural oils from your scalp throughout the strands. Ensure your hair is free of tangles before using the brush.
3. Section your hair: Divide your hair into manageable sections using clips or hair ties. This allows for more precise brushing and ensures that every section receives adequate attention.
4. Begin at the roots: Start brushing at the roots of your hair, using gentle and even strokes to distribute the oils from your scalp. This stimulates the scalp and promotes healthier hair growth.
5. Brush from root to tip: Once you have brushed the roots, continue brushing from the roots to the ends of your hair. The bristles help to smooth the hair cuticle and distribute the natural oils, resulting in a healthier-looking shine.
6. Be gentle and patient: Use slow, deliberate strokes and avoid pulling or tugging at your hair. Boar bristle brushes are designed to be gentle, so let the bristles do the work and take your time to prevent any breakage or damage.
7. Style as desired: After brushing your hair with a boar bristle brush, you can style it as desired. The smoothing and shine-enhancing effect of the brush can make it easier to achieve a polished look, whether you prefer a sleek ponytail, soft waves, or a chic updo.
8. Clean the brush regularly: To maintain the effectiveness of your boar bristle brush, clean it regularly. Remove any hair trapped between the bristles and wash the brush with mild shampoo and water to remove any product buildup.
Using a boar bristle brush regularly can help improve the overall health and appearance of your hair. The natural bristles work to distribute the hair’s natural oils, resulting in smoother, shinier locks that are less prone to frizz and static.