
Choosing the Right Essential Oils
When it comes to creating a room deodorizer with essential oils, selecting the right oils is essential. Not only do they provide aromatic scents, but they also offer various therapeutic benefits. Here are some factors to consider when choosing the right essential oils for your room deodorizer:
- Scent preference: Start by considering your own personal preferences. Do you prefer floral, citrusy, woody, or herbal scents? Choose essential oils that align with your scent preference to create a pleasant ambiance in your space.
- Deodorizing properties: Some essential oils have strong deodorizing properties that can help eliminate unpleasant odors. Look for oils like lavender, tea tree, eucalyptus, lemon, or peppermint, which are known for their natural deodorizing characteristics.
- Mood enhancement: Essential oils can also affect our mood and emotions. If you want to create a relaxing atmosphere, consider oils like lavender, chamomile, or ylang-ylang. For an energizing environment, go for oils such as peppermint, lemon, or grapefruit.
- Antibacterial and antifungal properties: To enhance the sanitizing properties of your room deodorizer, choose essential oils that have antibacterial and antifungal properties. Oils like tea tree, thyme, or cinnamon are excellent options to keep your space clean and fresh.
- Compatibility: It’s crucial to ensure that the essential oils you choose are compatible with the methods of diffusion or application you plan to use. Some oils are better suited for specific diffusers or room spray recipes, so check for compatibility before blending.
Remember to carefully read the labels and product descriptions of the essential oils you’re considering to ensure their purity and quality. It’s also worth noting that certain essential oils may not be safe for pets or individuals with specific health conditions, so it’s always best to do thorough research or consult with a healthcare professional when in doubt.
With the right combination of essential oils, you can create a customized room deodorizer that not only keeps your space smelling delightful but also provides additional benefits for your overall well-being.
Creating a Spray Deodorizer
A spray deodorizer is a quick and easy way to freshen up a room with essential oils. Here’s a simple recipe to create your own spray deodorizer:
- Gather your ingredients: You will need a small spray bottle, distilled water, witch hazel or vodka (as a dispersing agent), and your choice of essential oils.
- Choose your essential oils: Select a combination of essential oils that complement each other and align with your desired scent. For example, you could try a blend of lavender and lemon for a fresh and calming aroma or peppermint and eucalyptus for an invigorating scent.
- Measure and mix: Fill your spray bottle with distilled water, leaving some space at the top. Add a splash of witch hazel or vodka, which helps disperse the essential oils evenly. Then, add around 10-15 drops of your chosen essential oils to the bottle. You can adjust the amount based on your preference and the size of your spray bottle.
- Shake well: Close the spray bottle tightly and shake it well to ensure the essential oils are thoroughly mixed with the water and dispersing agent.
- Test and adjust: Before using the spray throughout the room, it’s a good idea to test it on a small area first to ensure you are happy with the scent and strength. If needed, you can add more essential oils for a stronger aroma or dilute with additional water if it’s too overpowering.
- Spritz away: Now, you’re ready to use your homemade spray deodorizer. Simply spritz it around the room, focusing on areas where odors tend to linger, such as carpets, curtains, upholstery, or near windows and doors.
Creating a spray deodorizer with essential oils provides you with a convenient and customizable way to refresh your living spaces. Whether you want to eliminate cooking smells in the kitchen or freshen up a musty room, this DIY solution is a natural alternative to commercial air fresheners.
Making a Reed Diffuser
A reed diffuser is a stylish and effective way to disperse the aroma of essential oils throughout a room. Follow these steps to create your own reed diffuser:
- Gather your materials: You will need a glass container or vase, reed diffuser sticks, a carrier oil such as sweet almond oil or fractionated coconut oil, and your choice of essential oils.
- Select your container: Choose a glass container or vase that complements your decor. Make sure it has a narrow opening to hold the reeds upright.
- Prepare the carrier oil: Fill the glass container about three-quarters full with your chosen carrier oil. You can adjust the amount based on the size of your container.
- Add essential oils: Add your preferred essential oils to the carrier oil. A recommended ratio is 20-25 drops of essential oil for every 1/4 cup of carrier oil. Experiment with different combinations to create a fragrance you love. Popular choices include lavender, bergamot, or cedarwood for a calming scent, or citrus oils like orange and grapefruit for an uplifting aroma.
- Insert the reeds: Place the reed diffuser sticks into the container, allowing them to soak up the essential oil mixture. After a couple of hours, flip the reeds to allow the opposite end to absorb the oils.
- Enjoy the fragrance: The reeds will slowly release the scent into the air. To enhance the diffusion, flip the reeds every few days or as desired.
- Refill and replace: Over time, the carrier oil will evaporate and the scent will fade. To maintain the fragrance, refill the container with fresh carrier oil and essential oils, and replace the reeds every few months.
A homemade reed diffuser not only adds a pleasant fragrance to your space but also serves as a beautiful decorative piece. Experiment with different oils and container designs to create a personalized and long-lasting aroma experience in your home or office.
Crafting a Room Spray
A room spray is a versatile and convenient way to freshen up any space with the delightful scent of essential oils. Here’s a simple guide to crafting your own room spray:
- Gather your ingredients: You will need a small spray bottle, distilled water, a dispersing agent such as witch hazel or vodka, and your chosen essential oils.
- Choose your essential oils: Select a combination of essential oils that complement each other and create the desired scent for your room spray. For a calming atmosphere, consider lavender and chamomile. For an energizing effect, try a blend of citrus oils like grapefruit and lemon.
- Measure and mix: Fill the spray bottle with distilled water, leaving a little space at the top for other ingredients. Add a small amount of the dispersing agent, like witch hazel or vodka, to help blend the essential oils with water. The ratio of dispersing agent to water is usually 1:3 or 1:4.
- Add essential oils: Now, add around 10-15 drops of your chosen essential oils to the bottle, adjusting the amount based on your preference and bottle size. Experiment with different combinations to find the perfect balance of scents.
- Shake well: Close the spray bottle tightly and shake it vigorously to mix the contents thoroughly. This will help the essential oils disperse evenly throughout the water and dispersing agent.
- Test and adjust: Before using the spray in a larger area, test it on a small surface to ensure you are satisfied with the scent and strength. If the aroma is too strong, add more water. If it is too weak, add a few more drops of essential oil.
- Spray and enjoy: Your homemade room spray is now ready for use. Simply spray it into the air, focusing on areas where you want to freshen up the scent. You can also lightly mist curtains, upholstery, or linens to infuse them with the aroma.
Creating your own room spray allows you to customize the scent and avoid the use of artificial fragrances found in commercial sprays. With just a few ingredients, you can enjoy a refreshing and all-natural aroma that brings a sense of relaxation or invigoration to your living space.
Creating a Natural Air Freshener
A natural air freshener is a fantastic way to eliminate odors and bring a refreshing scent to your living space. Here’s a simple guide to creating your own natural air freshener using essential oils:
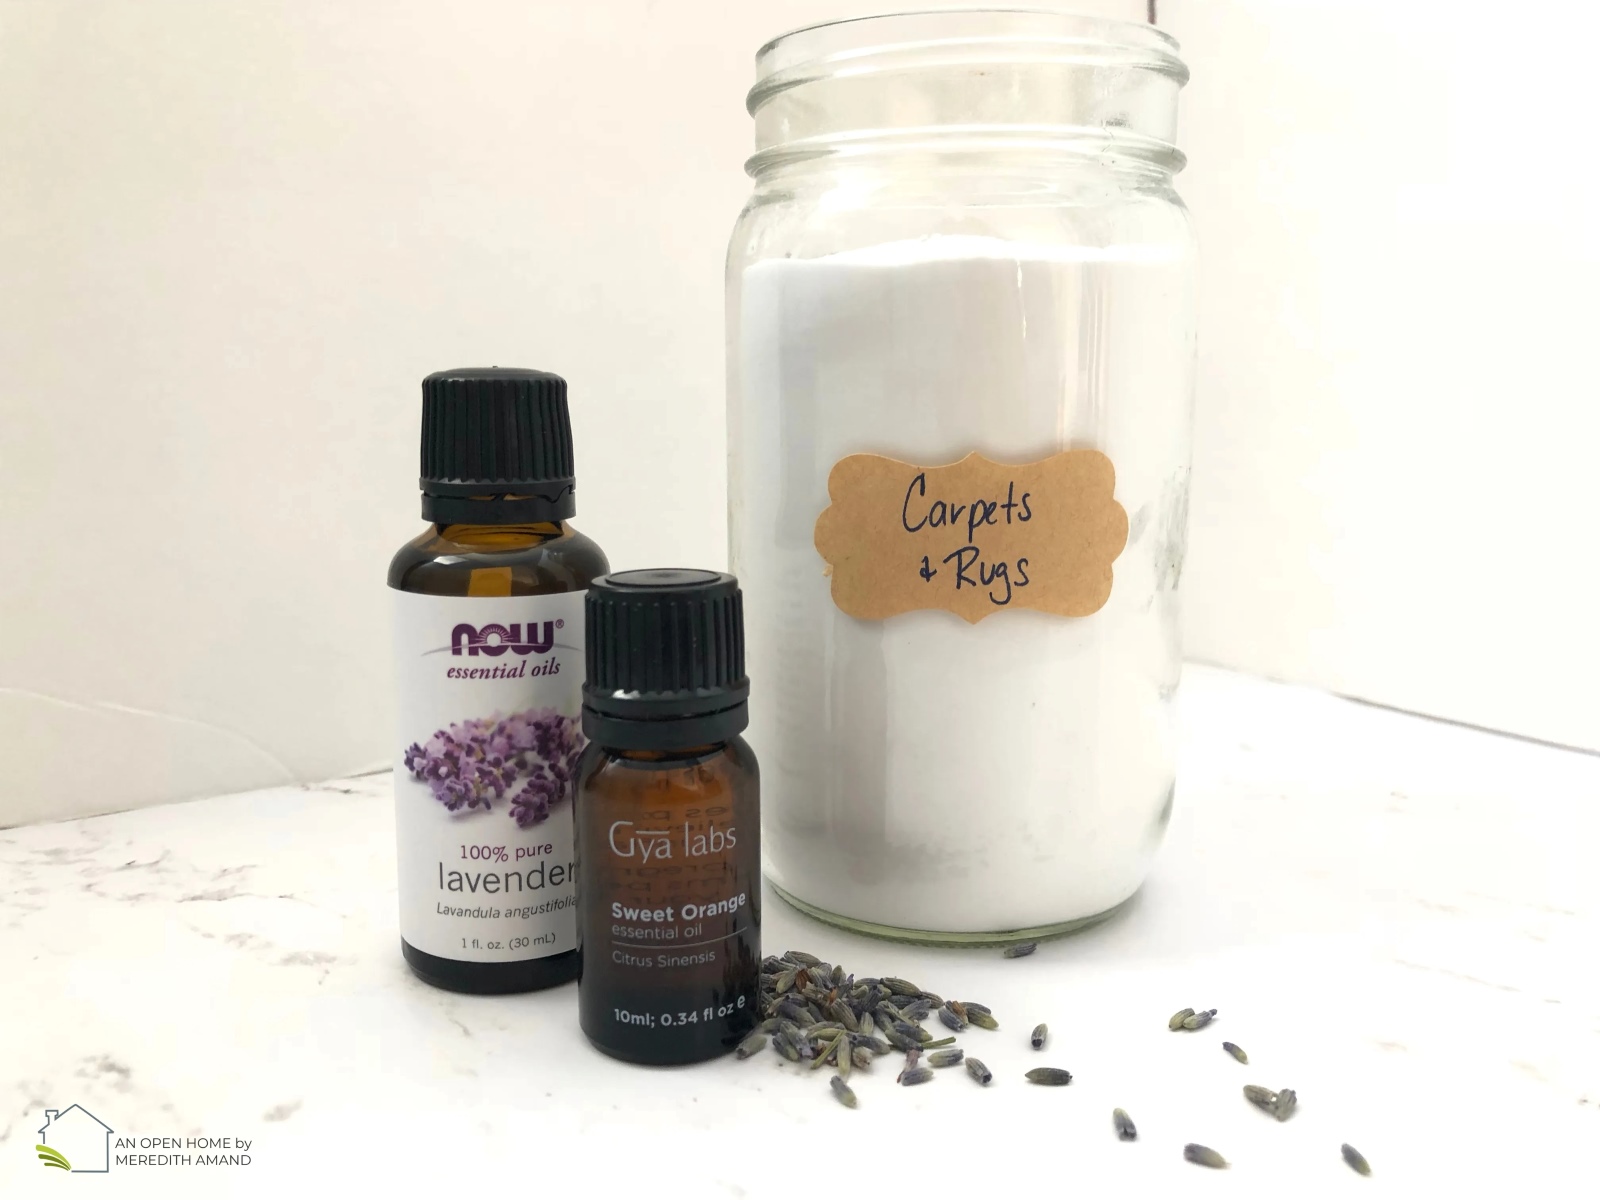
- Gather your materials: You will need a small glass jar or container with a lid, baking soda, and your choice of essential oils.
- Choose your essential oils: Select essential oils that have deodorizing properties and complement each other in terms of scent. Some popular choices include lavender, eucalyptus, lemon, or tea tree oil.
- Create the base: Fill the glass jar about halfway with baking soda. Baking soda acts as a natural odor absorber and helps to neutralize unpleasant smells in the air.
- Add essential oils: Add 10-15 drops of your chosen essential oils to the baking soda. You can adjust the amount based on your preference and the desired strength of the scent.
- Mix thoroughly: Use a spoon or a small whisk to mix the baking soda and essential oils together until well combined. This will help distribute the scent evenly throughout the air freshener.
- Cap and let sit: Put the lid on the jar and let the mixture sit for a few hours or overnight. This allows the oils to infuse into the baking soda and enhance the fragrance.
- Place and enjoy: Once the air freshener is ready, remove the lid and place the jar in an area where you want to freshen the air, such as the bathroom, kitchen, or any room with lingering odors.
- Refresh as needed: Over time, the scent of the air freshener may fade. You can simply give it a gentle shake or mix to reactivate the fragrance. When the scent is no longer noticeable, you can add a few more drops of essential oil to refresh it.
By creating your own natural air freshener, you can eliminate the need for commercial air fresheners that contain harsh chemicals. Not only does it provide a pleasant scent, but it also helps to maintain a healthier and more eco-friendly environment in your home.
Using Essential Oils in a Wax Warmer
A wax warmer is a popular method for diffusing fragrances throughout a room. While most people use wax cubes or melts, you can also use essential oils in a wax warmer to create a pleasing aroma. Here’s how you can do it:
- Select a wax warmer: Choose a wax warmer that is specifically designed for use with essential oils. Look for a model that has a removable dish or tray where you can place your oils.
- Add water: Fill the wax warmer’s dish or tray with water, leaving some space at the top. The amount of water will depend on the size of your wax warmer, but it’s typically around half full.
- Add essential oils: Add a few drops of your chosen essential oils to the water. Start with 3-5 drops and adjust the amount based on your preference and the size of the room you want to freshen. You can use a single oil or create your own blend with multiple oils.
- Heat the wax warmer: Plug in the wax warmer and turn it on. The heat will gently warm the water and essential oils, releasing their aromatic properties into the air.
- Enjoy the fragrance: As the wax warmer heats up, the essential oils will start to disperse their fragrance throughout the room. You can adjust the intensity of the scent by adding more or fewer drops of essential oils.
- Monitor and refill: Keep an eye on the water level in the wax warmer and refill it as needed. Add more essential oils when you want to refresh the scent or replace the water and oils completely when you’re ready to try a different aroma.
Using essential oils in a wax warmer is a great alternative to traditional wax cubes or melts. It allows you to customize the scent and reap the benefits of essential oil aromatherapy. Experiment with different essential oils and blends to create the perfect ambiance and atmosphere in your space.
DIY Essential Oil Sachets
Creating your own essential oil sachets is a simple and practical way to infuse your drawers, closets, or any small space with delightful scents. Follow these steps to make your own DIY essential oil sachets:
- Gather your materials: You will need small fabric squares or bags, muslin or organza bags work well for this purpose. Additionally, gather your choice of dried botanicals such as lavender buds, rose petals, or dried citrus peels, and the essential oils of your preference.
- Prepare the fabric: Cut the fabric into squares of the desired size. A good size for sachets is typically around 4×4 inches, but you can adjust it to fit your needs.
- Blend the botanicals: Mix your choice of dried botanicals together in a bowl. You can use a single botanical or create a blend with different ingredients to create a unique scent.
- Add essential oils: Sprinkle a few drops of your chosen essential oils onto the dried botanicals. Depending on the strength of the oils, 5-10 drops should be sufficient. Mix the botanicals gently to ensure the oils are evenly distributed.
- Fill the sachets: Scoop a spoonful of the scented botanical mixture onto the center of each fabric square. Be careful not to overfill, as you will need to close the sachet securely.
- Secure the sachets: Gather the corners of the fabric square and tie them together with a ribbon or string. Alternatively, you can stitch the fabric edges together to create a sealed sachet.
- Place the sachets: Put the scented sachets in your drawers, closets, or any small space where you want a pleasant aroma. They can also be tucked into luggage, gym bags, or even placed under a pillow for a soothing scent at night.
- Refresh when needed: Over time, the scent of the botanicals and essential oils may fade. To refresh the sachets, simply add a few more drops of essential oils to the fabric or replace the botanical mixture entirely.
DIY essential oil sachets are a fantastic way to naturally fragrance your surroundings. They not only provide a pleasant aroma but also offer the benefits of aromatherapy. Get creative with your fabric choices and essential oil combinations to create personalized sachets that uplift your mood and add a touch of freshness to your everyday life.
Creating a Simmer Pot Blend
A simmer pot blend is a wonderful way to fill your home with a comforting and inviting aroma. By simmering a combination of herbs, spices, and essential oils in water on the stovetop, you can create a delightful scent that permeates throughout your space. Here’s how to create your own simmer pot blend:
- Choose your ingredients: Select a variety of herbs, spices, and essential oils that complement each other and create the desired aroma. Common choices include cinnamon sticks, cloves, citrus peels, rosemary, and vanilla extract. Feel free to experiment with different combinations to find the scent that you love.
- Gather your supplies: In addition to your chosen ingredients, you will need a pot, water, and a heat source such as a stovetop burner. Make sure to use a pot that can withstand heat and will not get damaged.
- Prepare the ingredients: If using fresh herbs or citrus peels, chop them into small pieces to release their fragrance. If using whole spices, crush or break them slightly to enhance their scent. You can also use pre-ground spices or dried herbs if preferred.
- Add the ingredients to the pot: Fill the pot with water, leaving enough space to prevent it from boiling over. Add your prepared ingredients to the water, making sure to distribute them evenly.
- Simmer the blend: Place the pot on the stove and bring the water to a simmer over low heat. Once simmering, reduce the heat to the lowest setting to maintain a gentle simmer. As the mixture heats up, the aroma will be released into the air, creating a cozy and inviting atmosphere.
- Monitor the pot: Keep an eye on the simmer pot blend to ensure that there is always enough water in the pot. Refill as needed to prevent it from drying out. You can also adjust the intensity of the scent by adding more ingredients or essential oils.
- Enjoy the aromatic scent: Allow the simmer pot blend to infuse your home with its delightful fragrance. The scent will spread throughout different rooms, creating a warm and inviting ambiance.
- Discard or reuse: Once you have finished using the simmer pot blend, allow it to cool down before discarding the ingredients. When using fresh ingredients, they can be composted. If you want to reuse the ingredients for another simmer pot blend, store them in a sealed container in the refrigerator until ready to use.
Creating a simmer pot blend is a natural and inexpensive way to freshen up your home with a lovely aroma. It adds a touch of warmth and coziness to your space, making it a perfect choice for special occasions or simply to enjoy a comforting scent throughout the year.
Making a Linen Spray
A linen spray is a wonderful way to freshen up your bedding, curtains, or other linens with a delightful scent. Creating your own linen spray using essential oils is a simple and enjoyable DIY project. Here’s how you can make your own linen spray:
- Gather your materials: You will need a small spray bottle, distilled water, your choice of essential oils, and a dispersing agent such as witch hazel or vodka to help blend the oils with water.
- Select your essential oils: Choose essential oils that have a pleasing scent and are known for their relaxation or soothing properties. Lavender, chamomile, and bergamot are popular choices. You can use a single oil or create your own blend by combining different oils for a more complex aroma.
- Measure and mix: Fill the spray bottle with distilled water, leaving some space at the top. Add a small amount (about 1 teaspoon) of the dispersing agent, like witch hazel or vodka, to help emulsify the oils with the water. Then, add 10-15 drops of your chosen essential oils to the bottle.
- Shake well: Close the spray bottle tightly and shake it vigorously to ensure all the ingredients are well mixed. This will help distribute the essential oils and dispersing agent evenly throughout the water.
- Test and adjust: Before using the linen spray directly on your linens, it’s a good idea to test it on a small, inconspicuous area to ensure it doesn’t cause any discoloration or damage. If the scent is too strong, you can add more water. If it’s too weak, you can add a few more drops of essential oil.
- Spray your linens: Once you’re satisfied with the scent and strength of the spray, lightly mist it onto your linens from a distance of about 6-8 inches. Focus on areas such as pillows, bedsheets, curtains, or even your closet to infuse them with a fresh and pleasant aroma.
- Allow to dry: After spraying your linens, allow them to air dry completely before using or folding. This will allow the water to evaporate, leaving behind the scent of the essential oils.
Making your own linen spray not only freshens up your linens but also provides a calming and relaxing experience for a better night’s sleep. Experiment with different essential oil combinations to find the scent that suits your preferences and enhances your overall well-being.
Using Essential Oil Diffusers
Essential oil diffusers are a popular and effective way to enjoy the aroma and therapeutic benefits of essential oils in your home or office. These devices disperse the oils into the air, creating a pleasant and soothing atmosphere. Here’s how to use essential oil diffusers:
- Select your diffuser: There are various types of essential oil diffusers available, including ultrasonic diffusers, nebulizing diffusers, and heat diffusers. Choose the one that best suits your preferences and needs.
- Add water: For most types of diffusers, you will need to add water to the designated water reservoir. Follow the instructions provided with your specific diffuser to determine the recommended water level.
- Add essential oils: Next, add a few drops of your chosen essential oils to the water in the diffuser. Follow the recommended oil-to-water ratio provided by your diffuser’s manufacturer. You can use a single oil or create your own blend for a customized aroma.
- Turn on the diffuser: Plug in your diffuser and turn it on according to the instructions. Depending on the type of diffuser, you may need to select your desired settings, such as diffusing duration or mist intensity.
- Enjoy the aroma: As the diffuser operates, it will release a fine mist or vapor of water and essential oils into the air. The aroma will gradually fill the room, creating a relaxing and pleasant environment.
- Adjust settings: Many diffusers offer adjustable settings, such as timers, mist output levels, or even LED lights for ambiance. Customize the settings based on your preferences and the desired intensity of the scent.
- Clean and maintain: To ensure the longevity and proper functioning of your diffuser, it’s important to clean it regularly as per the manufacturer’s instructions. This helps prevent oil buildup and ensures that the diffuser continues to disperse the oils effectively.
- Experiment with oils: Have fun exploring different essential oils and their unique properties. Whether you want to promote relaxation, boost energy, or freshen the air, there is an essential oil blend or single oil for every mood and need.
Using essential oil diffusers is an excellent way to enjoy the benefits of aromatherapy at home or in the workplace. Experiment with different oils and diffuser types to find the combination that suits your preferences and creates the perfect aromatic ambiance for you.