
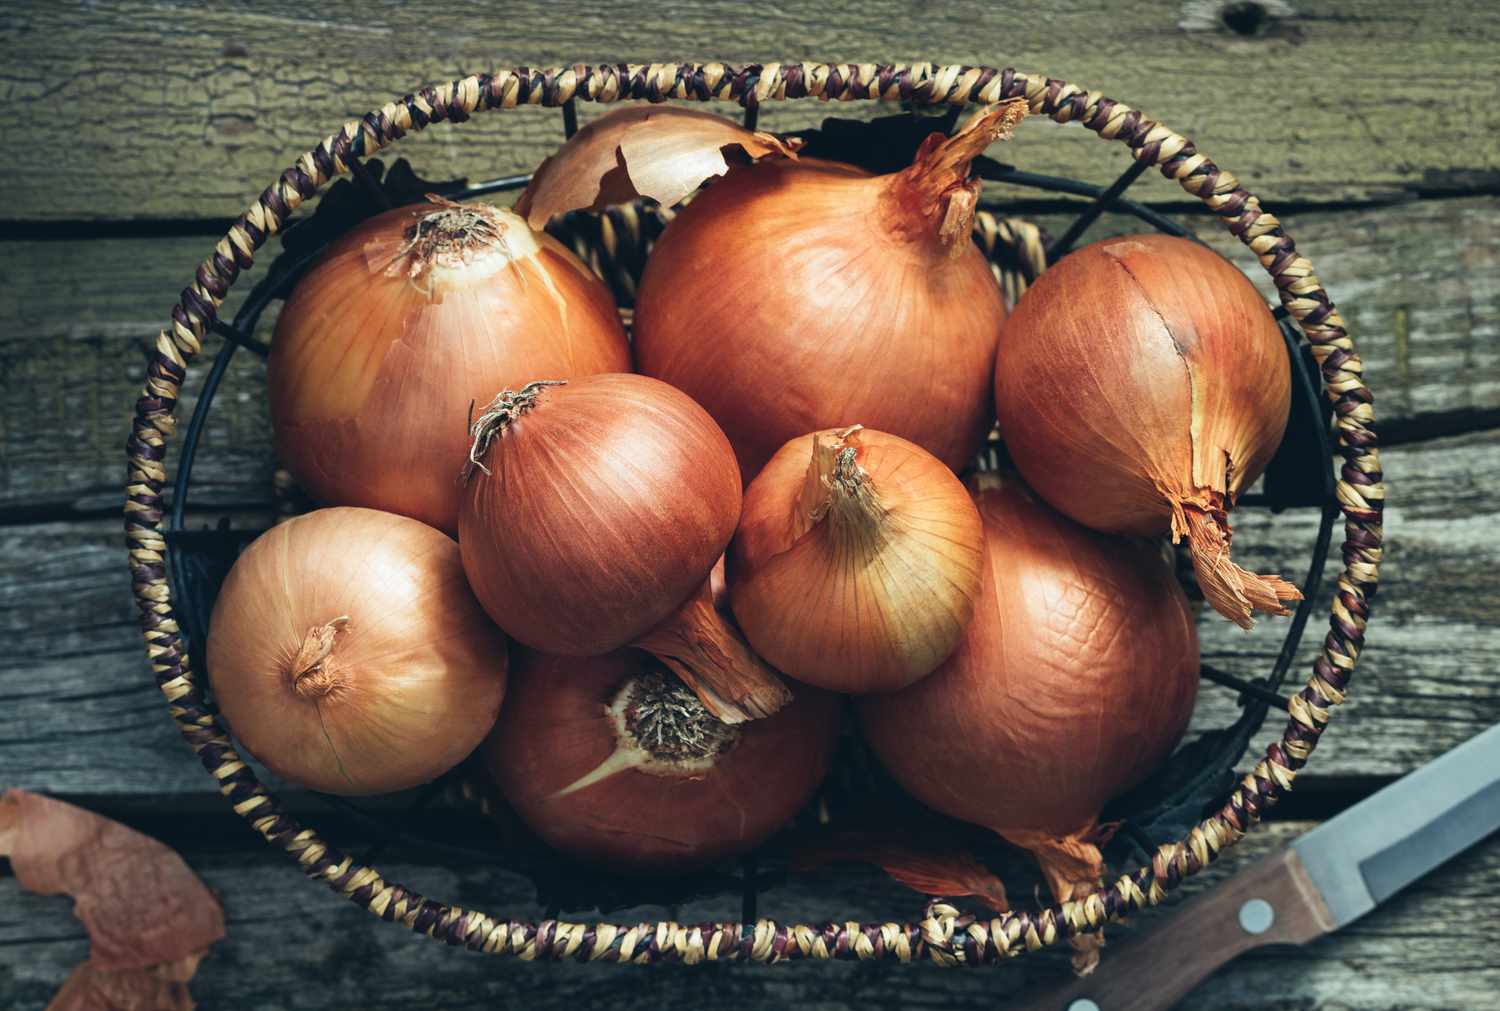
Signs of Onion Bulbs Ready for Planting
Before diving into the process of planting onion bulbs, it is essential to know when they are ready to be planted. By identifying the signs of readiness, you can ensure that your onion bulbs have the best chance of flourishing.
The first sign to look out for is the size of the bulb itself. Mature onion bulbs are typically around 2-3 inches in diameter. If your bulbs have reached this size, it is a good indication that they are ready to be planted.
Another sign of readiness is the firmness of the onion bulb. Gently squeeze the bulb and if it feels firm and solid, it is a positive indication that it is prepared for planting.
The presence of dried or withered outer layers is also a sign that the onion bulb is mature and ready for planting. As the bulb matures, the outer layers will dry up and become papery in texture. If you notice this happening, it is a clear indication that the bulb is ready for planting.
Finally, examining the tops of the onion bulbs can provide valuable insight into their readiness. Mature onion bulbs will have thick, green tops that are beginning to bend over or flop to the side. This signifies that the bulb has completed its growth cycle and is ready to be planted.
By keeping an eye out for these signs of readiness, you can ensure that your onion bulbs are planted at the perfect time to maximize their growth potential. Remember, planting onion bulbs at the right stage of maturity is crucial for a successful harvest later on.
Preparing the Soil for Onion Bulbs
Creating the ideal growing conditions for onion bulbs starts with preparing the soil. By taking the time to properly prepare the soil, you can provide a nutrient-rich environment that promotes healthy growth and development of your onion bulbs.
The first step in preparing the soil is to clear the area of any weeds or debris. Remove any grass, rocks, or other obstacles that may hinder the growth of your onion bulbs. This will help ensure that the bulbs have access to ample space and nutrients.
Next, it’s important to test the pH level of the soil. Onions prefer a slightly acidic soil with a pH range of 6.0 to 6.8. Testing the pH will give you an idea of the soil’s acidity and allow you to make any necessary adjustments. If the pH is too high, you can lower it by adding organic matter such as compost or peat moss.
Adding organic matter to the soil is the next step in preparing it for onion bulbs. This can be done by incorporating well-decomposed compost or aged manure into the soil. Organic matter improves soil structure, retains moisture, and provides essential nutrients for the plants.
Before planting, loosen the soil to a depth of at least 6 inches. Use a garden fork or tiller to break up any compacted soil and create a loose, crumbly texture. This will allow the onion bulbs to establish their roots easily and access the nutrients they need for growth.
Lastly, consider adding a slow-release fertilizer specifically formulated for onions. This will give your onion bulbs an extra boost of nutrients throughout their growth cycle. Follow the instructions on the fertilizer package for application rates and timing.
By following these steps and preparing the soil properly, you are setting up your onion bulbs for success. The nutrient-rich soil will provide a solid foundation for healthy growth, ensuring a bountiful harvest of flavorful onions.
Choosing the Right Location
The success of your onion bulbs greatly depends on selecting the right location for planting. By choosing the optimal site, you can provide the ideal conditions for your onions to thrive and produce a plentiful harvest.
When selecting a location for your onion bulbs, it is important to consider the amount of sunlight the area receives. Onions thrive in full sun, which is typically defined as at least six hours of direct sunlight per day. Choose a spot in your garden that receives ample sunlight to ensure proper growth and development.
In addition to sunlight, it is crucial to ensure that the soil in the chosen location has good drainage. Onions prefer well-drained soil to prevent the bulbs from sitting in waterlogged conditions, which can lead to rot. Avoid areas with compacted or heavy clay soil, as these can impede drainage. If your soil is heavy, consider amending it with organic matter to improve its drainage capacity.
Another factor to consider when selecting a location is the proximity to other plants. Onions benefit from being planted in isolation or with other compatible plants. Avoid planting onions near plants that require a different pH level or have competing root systems. Onions are known to have a strong aroma, which can help deter pests, so strategically placing them near susceptible plants can help protect your garden.
Furthermore, consider the overall space available for your onion bulbs. Onions require sufficient space for their roots to grow and bulbs to develop. Ensure that there is enough room for the bulbs to expand without overcrowding. Adequate spacing allows for proper airflow and minimizes the risk of disease and pest infestation.
Lastly, consider accessibility and convenience when selecting a location. Choose an area that is easily accessible for planting, maintenance, and harvesting. This will make your gardening tasks more efficient and enjoyable.
By considering these factors and choosing the right location for your onion bulbs, you are setting them up for success. The right amount of sunlight, well-drained soil, and appropriate spacing will contribute to healthy growth and a bountiful onion harvest.
Spacing and Arrangement of Onion Bulbs
Proper spacing and arrangement of onion bulbs are crucial for optimal growth and development. By giving each bulb enough room to grow and ensuring a well-organized layout, you can maximize the potential yield of your onion crop.
When it comes to spacing, the general rule of thumb is to leave about 4-6 inches of space between each bulb. This allows the onions to have enough room for their roots to spread and for the bulbs to develop fully. Spacing them too closely can lead to competition for resources and result in smaller bulbs.
Consider the mature size of the specific onion variety you are planting to determine the appropriate spacing. Larger varieties may require slightly more space, while smaller varieties can be planted closer together. Consult the seed packet or product information for specific spacing guidelines for the variety you are planting.
It is also important to pay attention to the arrangement of the onion bulbs. One common method is to plant them in rows, with the bulbs spaced evenly within each row. This allows for easier maintenance and harvesting. Leave enough space between rows to comfortably walk and tend to the plants, usually about 12-18 inches apart.
An alternative arrangement is the “square foot gardening” method, where you plant onion bulbs in a grid pattern, allowing for closer spacing. In this method, each bulb is planted at the corners of a square, with about 4-6 inches of space between them. This efficient use of space can be ideal for small gardens or raised beds.
Consider using garden markers or stakes to mark the positions of each bulb. This will help you maintain organization and prevent accidentally disturbing the bulbs during maintenance tasks. It will also make it easier to keep track of different onion varieties if you are planting multiple types.
By properly spacing and arranging your onion bulbs, you are creating an environment that promotes healthy growth. Ample space allows for better air circulation and helps minimize the risk of diseases, while organized rows or grids make maintenance and harvesting more efficient.
Digging Holes for Onion Bulbs
The process of digging holes for your onion bulbs is a crucial step in ensuring their successful establishment and growth. By creating the right size and depth of holes, you provide the bulbs with a suitable environment for root development and nutrient absorption.
Start by preparing the soil before digging the holes. Ensure that the soil is well-loosened and free from large clumps or debris. This will make it easier to dig the holes and allow the onion bulbs to establish themselves more easily.
The size of the holes should be based on the size of the onion bulbs you are planting. As a general guideline, make the holes approximately 2-3 times the diameter of the bulb. This will provide enough space for the roots to spread out as they grow. For instance, if you have onion bulbs that are around 2 inches in diameter, dig holes that are about 4-6 inches wide.
The depth of the holes is equally important. The rule of thumb is to dig holes that are deep enough for the bottom of the bulb to be level with or slightly above the soil surface. This helps prevent excessive burying of the bulbs, which can hinder their growth. Onions prefer to be lightly buried, as they will push themselves deeper into the soil as they grow. Aim for a hole depth of around 1-1.5 inches for most onion varieties.
When digging the holes, space them according to the desired plant spacing and arrangement. Ensure that there is enough distance between each hole to prevent overcrowding and competition for resources. Use a garden trowel or small shovel to dig the holes, making clean and precise cuts to create neat, evenly sized planting pockets.
As you dig the holes, make sure to maintain the integrity of the soil structure around the holes. Avoid compacting the soil or creating overly loose pockets, as this can affect the stability of the bulbs and their access to nutrients and water.
Taking the time to dig the right size and depth of holes for your onion bulbs will contribute to their successful establishment. This step sets the foundation for healthy root development and allows the bulbs to access the nutrients they need for optimal growth.
Planting Depth for Onion Bulbs
Understanding the proper planting depth for onion bulbs is crucial for their successful growth and development. Planting them at the correct depth allows for the proper emergence of shoots, root establishment, and bulb formation.
As a general guideline, onion bulbs should be planted with the bottom of the bulb just level with or slightly above the soil surface. This shallow planting depth is ideal for onion bulbs, as they will naturally push themselves deeper into the soil as they grow. Planting them too deep can hinder their growth and result in smaller bulbs.
Onion bulbs typically need to be planted at a depth of around 1-1.5 inches. This depth allows the emerging shoots to break through the soil easily, while still providing adequate soil coverage to protect the bulbs and promote root development.
When planting multiple onion bulbs, maintain consistent planting depths across all of them. This will ensure uniform growth and make it easier to care for and harvest the onions later on.
It is important to note that different onion varieties may require slight adjustments in planting depth. Some larger varieties may benefit from being planted slightly deeper, while smaller varieties may be planted slightly shallower. Always refer to the specific planting instructions provided by the seed supplier or on the seed packet for the recommended planting depth for the specific onion variety you are growing.
When placing the onion bulbs in the planting holes, ensure that they are positioned with the root side down and the pointed end facing upwards. This orientation allows for easier root development and proper emergence of the shoots.
Gently backfill the soil around the bulbs, being careful not to compact it too much. Lightly firm the soil to ensure good contact between the bulbs and the surrounding soil. Avoid overpacking or pressing down on the soil, as this can hinder root growth and moisture penetration.
By planting your onion bulbs at the appropriate depth, you are providing them with the best conditions for successful growth. Remember to adjust the planting depth based on the size and variety of the onion bulbs, and consistently maintain the proper depth across all of your plantings.
Covering the Onion Bulbs
After planting your onion bulbs at the appropriate depth, it is essential to cover them properly. Properly covering the bulbs provides insulation, helps retain moisture, and protects them from harsh environmental conditions. Here are some key steps to follow when covering your onion bulbs:
1. Begin by gently spreading a layer of soil over the planted bulbs. Use your hands or a small gardening tool to carefully distribute the soil, ensuring that it covers the bulbs evenly. Aim for a layer that is around half an inch thick.
2. Avoid packing down the soil too tightly as this can hinder root growth and disrupt the emergence of shoots. Instead, lightly press down on the soil to make sure it comes into contact with the bulbs and provides good insulation.
3. Some gardeners prefer to use organic material, such as straw or mulch, to cover onion bulbs. This can help retain moisture in the soil, regulate soil temperature, and discourage weed growth. If using organic material, spread a thin layer over the soil, ensuring that it does not smother the bulbs or impede their growth.
4. Keep in mind that onion bulbs need access to oxygen, so avoid burying them too deeply with excessive soil or organic material. The bulbs should be just below the soil surface, with the tips and shoots emerging from the soil once they start growing.
5. Water the newly covered onion bulbs gently to settle the soil and provide initial moisture. Avoid heavy watering, as this can wash away the soil and expose the bulbs. Use a gentle stream of water or a watering can to dampen the soil surface without causing erosion.
6. Monitor the soil moisture levels regularly and adjust watering as needed. Onions prefer moist soil, but avoid overwatering, as it can lead to rotting. Aim for consistent soil moisture throughout the growing season.
By covering your onion bulbs properly, you are creating a favorable environment for their growth. The soil cover provides insulation, moisture retention, and protection from external elements, ensuring that your onion bulbs can thrive and produce a healthy crop.
Watering and Mulching Onion Bulbs
Proper watering and mulching are essential for the health and vigor of onion bulbs. These practices help maintain consistent soil moisture, regulate temperature, suppress weed growth, and promote overall plant growth. Here’s what you need to know about watering and mulching your onion bulbs:
Watering:
Onion bulbs require consistent moisture throughout their growing season, but it is crucial not to overwater them. Allow the soil to dry out slightly between watering sessions to prevent the bulbs from becoming waterlogged or rotting. Use your finger or a moisture meter to gauge the moisture level of the soil before watering.
When watering, aim to moisten the soil to a depth of about 6 inches. This encourages the onion roots to grow deeper and promotes overall plant health. Watering in the morning is ideal, as it allows the foliage to dry before evening, reducing the risk of fungal diseases.
As the onion bulbs approach maturity, you can gradually reduce the frequency of watering to allow the outer layers of the bulb to dry out and cure before harvest. This helps improve their storage potential.
Mulching:
Applying a layer of organic mulch around your onion bulbs offers several benefits. Mulching helps retain soil moisture, regulate soil temperature, suppress weed growth, and provide an additional layer of protection.
Once the onion bulbs have become established and are a few inches tall, apply a layer of mulch around them. Organic materials such as straw, shredded leaves, or grass clippings make excellent mulches for onions. Spread a layer of mulch that is around 2-3 inches thick, being careful not to cover the onion bulbs themselves.
Mulching helps conserve moisture by preventing the evaporation of water from the soil surface. It also helps regulate soil temperature, keeping it cooler during hot summer months and warmer during cool weather.
Additionally, the mulch acts as a natural barrier against weeds. By suppressing weed growth, it reduces competition for nutrients and water, allowing your onion bulbs to thrive.
Regularly inspect the mulch layer to ensure it remains in place and is free from any signs of mold or rot. If necessary, replenish or replace the mulch to maintain its effectiveness.
By providing consistent moisture through proper watering and utilizing mulch to regulate moisture and suppress weeds, you are setting the stage for healthy onion bulb growth. These practices help create an environment conducive to successful onion cultivation and maximize your chances of a bountiful harvest.
Ensuring Proper Sunlight for Onion Bulbs
Sunlight is a crucial factor in the growth and development of onion bulbs. Providing adequate sunlight ensures that the plants receive the energy they need for photosynthesis and the production of healthy foliage and bulbs. Here are some tips for ensuring proper sunlight for your onion bulbs:
Choose the Right Location:
When selecting a location for planting onion bulbs, opt for a spot that receives full sun. Full sun is defined as at least six hours of direct sunlight per day. Avoid areas that are heavily shaded or prone to constant shade, as this can result in weak and sparse growth of onion plants.
Clear Obstacles:
Prior to planting, ensure that the selected area is clear of any obstructions that may cast shade over the onion bulbs. Trim overhanging branches or nearby plants that may block sunlight. Removing obstacles allows the onion plants to receive ample sunlight throughout the day.
Spacing Considerations:
Proper spacing is essential to ensure each onion bulb receives adequate sunlight. Avoid overcrowding the plants, as this can lead to shading and competition for light. Follow the recommended spacing guidelines for the specific onion variety you are growing. Sufficient spacing allows the leaves to spread out and capture sunlight more effectively.
Directional Placement:
If possible, align the rows or planting beds in a north-south direction. This helps maximize the amount of sunlight the onion plants receive. By planting in this orientation, the plants can capture sunlight from the east in the morning and the west in the afternoon, ensuring a more balanced distribution of sunlight throughout the day.
Regular Pruning:
As the onion plants grow, keep an eye on any neighboring plants that may encroach on their sunlight. Prune or trim back larger plants that cast shade over the onion bulbs. This practice allows the onions to receive unobstructed sunlight and maintain optimal growth.
Monitoring and Adjusting:
Regularly monitor the amount of sunlight your onion bulbs receive. Observe any changes in sunlight patterns due to the changing seasons or nearby objects that may cast shade. Adjust the positioning of the plants or make necessary modifications to maintain adequate sunlight exposure.
By ensuring proper sunlight for your onion bulbs, you are providing them with the energy they need to flourish. Remember to select a sunny location, clear obstacles, provide sufficient spacing, consider directional placement, and monitor sunlight levels to ensure the best possible growing conditions for your onion crop.
Caring for Onion Bulbs during Growth
Caring for onion bulbs during their growth stage is crucial for promoting healthy development and maximizing the potential yield. By providing the appropriate care and attention, you can ensure that your onion bulbs have the best chance of success. Here are some key tips for caring for onion bulbs during their growth:
Watering:
Onions require consistent moisture throughout their growing season. Water the plants regularly, ensuring that the soil remains evenly moist but not waterlogged. Avoid overwatering, as this can lead to root rot and other fungal diseases. It is best to water at the base of the plants, directing the water towards the soil rather than wetting the foliage, which can be susceptible to disease.
Weeding:
Keep the area around the onion bulbs free from weeds. Weeds compete with the onion plants for nutrients, water, and sunlight. Regularly inspect the planting area and remove any weeds that sprout. Be careful when weeding not to damage the delicate onion bulbs or their shallow root systems. Mulching can also help suppress weed growth and reduce the need for frequent weeding.
Fertilizing:
Onions have specific nutritional requirements, and fertilizing can help ensure they receive the necessary nutrients for optimal growth. Prior to planting, incorporate a balanced fertilizer into the soil based on soil test results. As the onions grow, you can supplement their nutrition with a side-dressing of fertilizer once or twice during their growing season, following the instructions on the fertilizer package. Avoid over-fertilizing, as this can lead to excessive leaf growth at the expense of bulb development.
Pest and Disease Control:
Monitor the onion plants for any signs of pests or diseases. Common onion pests include onion maggots, thrips, and aphids. If pests are identified, use appropriate organic or chemical controls to manage them. Diseases such as onion leaf blight and downy mildew can also affect the plants. Remove any affected leaves or plants promptly to prevent the spread of diseases and maintain overall plant health.
Support and Staking:
In regions with strong winds or heavy rainfall, consider providing support or staking for the onion plants. This helps prevent the plants from bending or breaking under the weight of their foliage and can improve air circulation, reducing the risk of disease. Use stakes or supports that are tall and sturdy enough to accommodate the growth of the onion plants.
Harvesting:
Monitor the onion bulbs closely as they near maturity. Harvest them when the tops of the plants have turned brown and fallen over. Carefully lift the bulbs from the soil using a garden fork or trowel, ensuring not to damage them. Allow the bulbs to dry in a warm, well-ventilated area for a few weeks before storing them.
By providing proper care during the growth stage, you are setting your onion bulbs up for success. Regular watering, weeding, fertilizing, pest control, and timely harvesting will help ensure healthy plant development and a bountiful onion harvest.
Harvesting Onion Bulbs
The moment of harvesting onion bulbs is an exciting time for gardeners. It signifies the completion of the onion’s growth cycle and the reward of a fresh and flavorful harvest. To ensure that your onion bulbs are harvested at the right time and handled properly, follow these essential steps:
Observing Maturity:
One of the key indicators of onion bulb maturity is the condition of the onion tops. As the onion bulbs approach readiness for harvest, the tops will begin to yellow and flop over. Typically, this occurs in late summer or early fall, depending on the onion variety and growing conditions in your area. Monitor the tops of the onions closely and initiate the harvest when they have dried up and fallen over.
Preparing the Soil:
Prior to harvesting, prepare the soil surrounding the onion bulbs by gently loosening it with a garden fork or trowel. This will help facilitate the removal of the bulbs without damaging them or their delicate root systems. Take care not to injure the bulbs while loosening the soil.
Harvesting Technique:
To harvest the onion bulbs, gently lift them out of the loosened soil. Insert a garden fork or trowel into the soil a couple of inches away from the bulb, angling it slightly to lift the bulb without damaging it or the surrounding bulbs. If the bulbs are resistant to being lifted, you can carefully dig around them to loosen the soil further.
Curing the Bulbs:
After harvesting, allow the onion bulbs to cure before storage. Curing helps the bulbs develop a dry outer layer, enhancing their storage potential. Lay the harvested bulbs in a warm, dry, and well-ventilated area, such as a garden shed or garage. Arrange them in a single layer, ensuring good air circulation around each bulb. Avoid direct exposure to sunlight, as this can cause the bulbs to sunburn or become discolored.
Storing the Bulbs:
Once the onion bulbs have cured, remove any excess dirt or loose outer layers of skin. Inspect the bulbs for any signs of damage or disease, and discard any bulbs that are compromised. Store the cured onion bulbs in a cool, dry, and well-ventilated place. A mesh bag or a crate with good airflow is an ideal storage option. Keep the bulbs away from moisture, extreme temperatures, and exposure to light, as these factors can reduce their storage life.
Utilizing Green Onions:
In addition to harvesting mature onion bulbs, green onions can be harvested earlier in the growth cycle. Green onions, also known as scallions or spring onions, are young onion plants harvested before the bulb fully develops. Simply cut the tops of the green onions as needed, leaving the bulb and roots in the ground. This allows for continuous harvesting and a fresh supply of tender green onion shoots.
By following these steps for harvesting onion bulbs, you can ensure the maximum flavor, quality, and storage life of your harvested onions. Enjoy the fruits of your labor in various culinary creations, fully appreciating the rewards of growing your own onions.