
Benefits of Planting Irises at the Right Depth
When it comes to planting irises, the depth at which you plant them plays a crucial role in their overall health and blooming potential. Planting irises at the right depth provides several benefits that can enhance their growth and beauty. Here are some key advantages of planting irises at the optimal depth:
- Improved Root Development: Planting irises at the appropriate depth allows their roots to establish themselves properly. The roots will have enough room to grow and spread, ensuring a strong foundation for the plant. This leads to improved nutrient uptake, water absorption, and overall plant health.
- Enhanced Flower Production: Proper planting depth encourages the irises to produce more flowers. When the rhizomes are positioned correctly in the soil, they receive the right amount of warmth and access to light. This optimal positioning promotes abundant flower production, resulting in a stunning display in your garden.
- Prevention of Rhizome Rot: Planting irises at the correct depth helps prevent rhizome rot, a common problem faced by gardeners. If irises are planted too deep, the excess moisture can lead to rotting of the rhizomes, which can be detrimental to their growth and survival. By planting them at the recommended depth, you can reduce the risk of fungal diseases and ensure their longevity.
- Promotion of Sturdy Stems: Planting irises at the right depth encourages the development of sturdy stems. This is essential for keeping the flowers upright and preventing them from flopping over due to weak stems. Properly planted irises are better equipped to withstand strong winds and heavy rains, ensuring that your garden remains beautiful even during inclement weather.
- Facilitation of Division: Planting irises at the optimal depth makes it easier to divide and replant them when necessary. When the rhizomes are positioned correctly, they are easier to access, allowing you to separate them into smaller clumps without causing damage. This facilitates the process of propagation and expansion of your iris collection.
By understanding the benefits of planting irises at the right depth, you can ensure that these stunning flowers thrive in your garden. Taking this simple step can have a significant impact on their overall health, blooming potential, and longevity, transforming your garden into a vibrant and colorful oasis.
Factors to Consider Before Planting Irises
Before you start planting irises in your garden, there are several important factors to consider. Taking these into account will ensure that you provide the optimal growing conditions for your irises, resulting in healthy plants and beautiful blooms. Here are some key factors to keep in mind:
- Sun Exposure: Irises thrive in full sun conditions. Before planting, assess the location you have in mind and ensure that it receives at least 6-8 hours of direct sunlight each day. Inadequate sunlight can lead to weak growth, fewer flowers, and increased vulnerability to diseases.
- Soil Quality: Irises prefer well-draining soil that is fertile and rich in organic matter. Before planting, test your soil’s pH level to ensure it falls within the ideal range of 6.0-7.5. If necessary, amend the soil with compost or other organic matter to improve its texture and nutrient content.
- Watering Needs: While irises require regular watering, they are susceptible to root rot if the soil remains consistently wet. Ensure that the planting site has proper drainage to prevent waterlogged conditions. Water your irises deeply but infrequently, allowing the soil to dry out slightly between waterings.
- Climate Suitability: Irises come in different varieties, and some are better suited to specific climates. Research the particular iris varieties that thrive in your region and choose those that are best adapted to your local climate. This will increase the chances of success and ensure that your irises thrive.
- Spacing: Proper spacing is essential to allow for adequate airflow and prevent overcrowding. When planting irises, leave sufficient space between each rhizome to allow for future growth. Typically, spacing irises 12-24 inches apart is recommended, depending on the variety.
By considering these factors before planting irises, you can create an environment that is conducive to their growth and blooming success. Understanding and meeting the specific needs of your irises will ensure that they thrive in your garden and provide you with years of beauty and enjoyment.
How to Determine the Ideal Depth for Planting Irises
Planting irises at the correct depth is crucial for their overall health and blooming potential. While the depth may vary slightly depending on the iris variety, the following steps will guide you in determining the ideal depth for planting irises:
- Inspect the Rhizomes: Before planting, carefully examine the rhizomes of the iris. They should be firm and plump, with healthy roots attached. Remove any dead or damaged portions before proceeding.
- Prepare the Soil: Ensure that the soil is well-drained, loose, and amended with organic matter. This will provide an ideal growing environment for the iris rhizomes.
- Measure the Rhizome: Using a ruler or measuring tape, measure the length of the iris rhizome. Most iris varieties have recommended planting depths between 1 and 2 inches, measured from the top of the rhizome to the soil surface.
- Consider Soil Type: Different soil types may require slight adjustments to the planting depth. If you have heavy clay soil, it is advisable to plant the rhizomes slightly shallower to avoid waterlogged conditions. On the other hand, if you have sandy soil, consider planting them slightly deeper to provide more support.
- Mark the Planting Depth: Once you have determined the appropriate planting depth based on the rhizome length and soil type, mark the desired depth on a gardening tool or stick. This will serve as a guide during the planting process.
- Planting the Irises: Dig a hole in the prepared soil using a trowel or a garden fork. Place the rhizome in the hole, ensuring that the top of the rhizome aligns with the marked planting depth. Gently cover the rhizome with soil, ensuring that no roots are exposed.
- Water and Mulch: After planting, water the irises well to settle the soil around the roots. Apply a layer of organic mulch around the plants to help retain moisture and suppress weed growth.
By following these steps, you can confidently determine the ideal depth for planting your irises. Remember to consider the specific variety, soil type, and growing conditions in your garden to ensure optimal growth and blooming of your irises.
Tips for Planting Irises at the Right Depth
Planting irises at the correct depth is essential for their overall success and blooming potential. Here are some tips to ensure that you are planting irises at the optimal depth:
- Follow the Recommended Depth: Consult reliable gardening resources or the instructions provided by the iris supplier to determine the recommended planting depth for the specific iris variety you are planting. Following these guidelines will help you establish the ideal depth for your irises.
- Avoid Planting Too Deep: Planting irises too deep can lead to issues such as poor flowering, weakened stems, and rhizome rot. Ensure that you do not bury the rhizomes too deep in the soil, as it can hinder their growth and overall health.
- Consider Your Climate: Take into account the climate of your region when determining the planting depth. In colder climates, planting irises slightly deeper can provide added protection against frost. However, in warmer climates with well-draining soil, planting at the recommended depth is usually sufficient.
- Avoid Direct Sun Exposure on Rhizomes: When planting irises, ensure that the rhizomes are not exposed directly to sunlight. This can cause the rhizomes to overheat and lead to damage. Plant them deep enough so that they are covered by soil or provide shade over the rhizome area.
- Check Soil Drainage: Irises prefer well-draining soil and do not tolerate soggy conditions. Before planting, assess the soil drainage in the chosen location. If the soil is heavy or tends to retain water, consider adding organic matter or creating raised beds to improve drainage.
- Inspect Rhizomes Regularly: After planting, keep an eye on the irises for signs of improper planting depth. If you notice that the rhizomes are being pushed up above the soil surface, carefully make adjustments by gently pressing them back down to the recommended depth.
- Label Your Irises: To avoid confusion and ensure proper care, label your planted irises with their varieties. This will help you keep track of their specific planting depth requirements and allow for easier maintenance and future division.
- Water Properly: After planting, water your irises thoroughly and maintain regular watering as needed. Deep watering encourages the development of strong roots and helps the irises establish themselves in their new environment.
By following these tips, you can ensure that you are planting your irises at the right depth. This will promote healthy growth and vibrant blooms, allowing you to enjoy the beauty of irises in your garden for years to come.
Common Mistakes to Avoid When Planting Irises
While planting irises is a relatively straightforward process, there are some common mistakes that gardeners often make. Avoiding these mistakes will help ensure the successful establishment and growth of your irises. Here are some common mistakes to watch out for when planting irises:
- Planting Too Deep: One of the most common mistakes is planting irises too deep in the soil. This can lead to poor flowering, weak stems, and an increased risk of rhizome rot. Ensure that you follow the recommended planting depth for your specific iris variety.
- Planting Too Shallow: On the other hand, planting irises too shallow can expose the rhizomes to excessive sunlight and air, which can dry them out and cause damage. Make sure to plant them at the adequate depth to protect the rhizomes while allowing for proper growth.
- Overcrowding: Planting irises too close together can result in overcrowding, limiting airflow and increasing the risk of disease. Proper spacing is essential to allow each plant enough room for healthy growth and optimal blooming.
- Failure to Prepare the Soil: Neglecting to prepare the soil properly before planting is a common mistake. Irises prefer well-draining soil, so it is important to amend heavy clay soils with organic matter or create raised beds to improve drainage.
- Ignoring the Sun Exposure: Irises require ample sunlight to thrive and produce vibrant blooms. Planting them in shaded areas or areas with insufficient sunlight will result in weak growth and limited flowering. Choose a location that receives at least 6-8 hours of direct sunlight each day.
- Watering Improperly: Irises require regular watering, especially during dry spells. However, overwatering can lead to rot, while underwatering can result in stunted growth and poor flowering. Find the right balance by watering deeply but infrequently, allowing the soil to dry out between waterings.
- Not Dividing Regularly: Failure to divide and replant irises regularly can lead to overcrowding and reduced blooming. Dividing the rhizomes every three to four years allows for rejuvenation and promotes vigorous growth.
- Forgetting to Label Varieties: Irises come in a wide range of color and variety options. Forgetting to label the specific varieties you plant can lead to confusion when it comes to maintenance, dividing, and enjoying their distinct characteristics. Label them properly at planting time to avoid any confusion.
By being aware of and avoiding these common mistakes when planting irises, you can set the stage for success. Pay attention to the planting depth, spacing, sunlight, soil preparation, and regular maintenance to ensure that your irises flourish and bring beauty to your garden.
Best Practices for Planting Irises in Different Soil Types
Irises can thrive in a variety of soil types, but it is important to take into consideration the specific characteristics of your soil when planting them. Here are some best practices for planting irises in different soil types:
- Clay Soil: If you have heavy clay soil, it is crucial to improve drainage to prevent waterlogging and root rot. Add organic matter such as compost or well-rotted manure to lighten the soil and enhance its drainage capabilities. Creating raised beds can also help improve drainage for your irises.
- Sandy Soil: Sandy soil is well-draining but often lacks nutrients and moisture retention. Incorporate plenty of organic matter, such as compost or peat moss, into the sandy soil before planting. This will help improve its water-holding capacity and provide essential nutrients for the irises.
- Loam Soil: Loam soil is the most ideal for irises, as it provides a good balance of drainage and moisture retention. Irises planted in loam soil generally require less amending and can be planted closer to the recommended depth. Ensure the soil is loose and friable for excellent root development.
- Acidic Soil: Irises prefer slightly acidic to neutral soil, with a pH range of 6.0-7.5. If your soil is highly acidic, consider adding lime to raise the pH to the optimal range. Conduct a soil test to determine the pH level and adjust accordingly before planting.
- Alkaline Soil: If your soil is alkaline, with a pH above 7.5, it is recommended to add elemental sulfur to lower the pH to the desired range. Acid-loving amendments, such as peat moss or elemental sulfur, can help create a more favorable growing environment for your irises.
- Compacted Soil: Compacted soil can restrict root growth and impair water penetration. Before planting irises, loosen compacted soil by cultivating it with a garden fork or adding organic matter. This will improve aeration and allow the roots to establish and grow more effectively.
- Poor Drainage Soil: In areas with poor drainage, consider raised bed gardening for your irises. Create elevated planting areas and incorporate well-draining soil or amendments to allow excess water to escape more easily. This will help prevent waterlogging and the associated issues it can cause.
- General Tips: Regardless of your soil type, it is important to amend the soil with compost or well-rotted organic matter before planting irises. This will contribute to improved soil structure, nutrient availability, and moisture retention, creating a more favorable environment for your irises.
By adapting your planting practices to suit the specific soil type in your garden, you can ensure that your irises receive the optimal growing conditions they need. Whether it’s clay, sandy, loam, acidic, alkaline, compacted, or poorly draining soil, with proper preparation and amendments, you can create a soil environment that promotes healthy growth and abundant blooming of your irises.
Adjusting Planting Depth for Different Iris Varieties and Cultivars
When it comes to planting irises, it’s important to note that the ideal planting depth may vary slightly among different iris varieties and cultivars. Considering these variations will help you adjust the planting depth to ensure optimal growth and blooming for each specific type. Here are some guidelines for adjusting planting depth based on different iris varieties and cultivars:
- Bearded Irises: Bearded irises are the most common type of iris and are known for their showy blooms. For most bearded irises, the recommended planting depth is about 1 to 2 inches. However, some dwarf or miniature bearded irises may require planting at a shallower depth of around 1 inch.
- Siberian Irises: Siberian irises have elegant and graceful blooms that add beauty to any garden. When planting Siberian irises, aim for a planting depth of around 2 to 3 inches. This slightly deeper planting depth provides good stability for their long, slender rhizomes.
- Japanese Irises: Japanese irises are renowned for their large, intricate flowers that often feature beautiful watercolor-like patterns. These irises prefer a slightly deeper planting depth compared to other varieties. Aim for a planting depth of around 4 to 6 inches to accommodate their larger and more robust rhizomes.
- Species Irises: Species irises encompass a wide range of iris types, including the delicate Iris reticulata and the hardy Iris ensata. It’s important to research the specific depth requirements for each species iris you are planting, as they can vary. In general, aim for a planting depth of around 2 to 4 inches for most species irises.
- Dwarf and Miniature Irises: Dwarf and miniature irises are smaller in size but still offer beautiful blooms. These irises often have more delicate rhizomes and require a shallower planting depth of around 1 to 2 inches. Planting them at a slightly shallower depth will provide adequate coverage without burying their diminutive rhizomes too deep.
- Tall Bearded Irises: Tall bearded irises are known for their striking height and vibrant colors. When planting tall bearded irises, adjust the depth based on the height of the rhizomes. Typically, aim for a planting depth of around 1 to 2 inches below the soil surface, taking into consideration the potential height of the upcoming foliage and flowering stems.
These are general guidelines for adjusting the planting depth based on different iris varieties and cultivars. It’s important to research and refer to specific recommendations provided by reliable sources or the iris supplier for the exact planting depth for each variety. By adjusting the planting depth accordingly, you will give each iris variety and cultivar the best chance to thrive and showcase its unique beauty in your garden.
How Deep to Plant Bearded Irises
Bearded irises are one of the most popular and well-loved types of irises, known for their vibrant colors and distinctive “beard” that adorns the flower. When it comes to planting bearded irises, the depth at which you plant them is crucial for their overall health and blooming potential. Here are some guidelines on how deep to plant bearded irises:
- Recommended Depth: The general rule of thumb for planting bearded irises is to position the rhizome about 1 to 2 inches below the soil surface. This depth provides ample cover for the rhizome while allowing the foliage and flowering stem to emerge above the ground.
- Adjustment for Soil Type: Depending on your soil type, you may need to make slight adjustments to the planting depth. If you have heavy clay soil that retains moisture, it is advisable to plant the rhizome slightly shallower, around 1 inch below the soil surface, to prevent waterlogging and avoid rotting. If you have loose, sandy soil, you can plant the rhizome slightly deeper, around 2 inches below the soil surface, to provide more stability.
- Positioning the Rhizome: When planting bearded irises, position the rhizome horizontally just below the soil surface. Spread the roots out in the soil, ensuring they are in direct contact with the soil for proper nutrient absorption. Avoid burying the rhizome too deep, as this can lead to poor flowering and stem weakness.
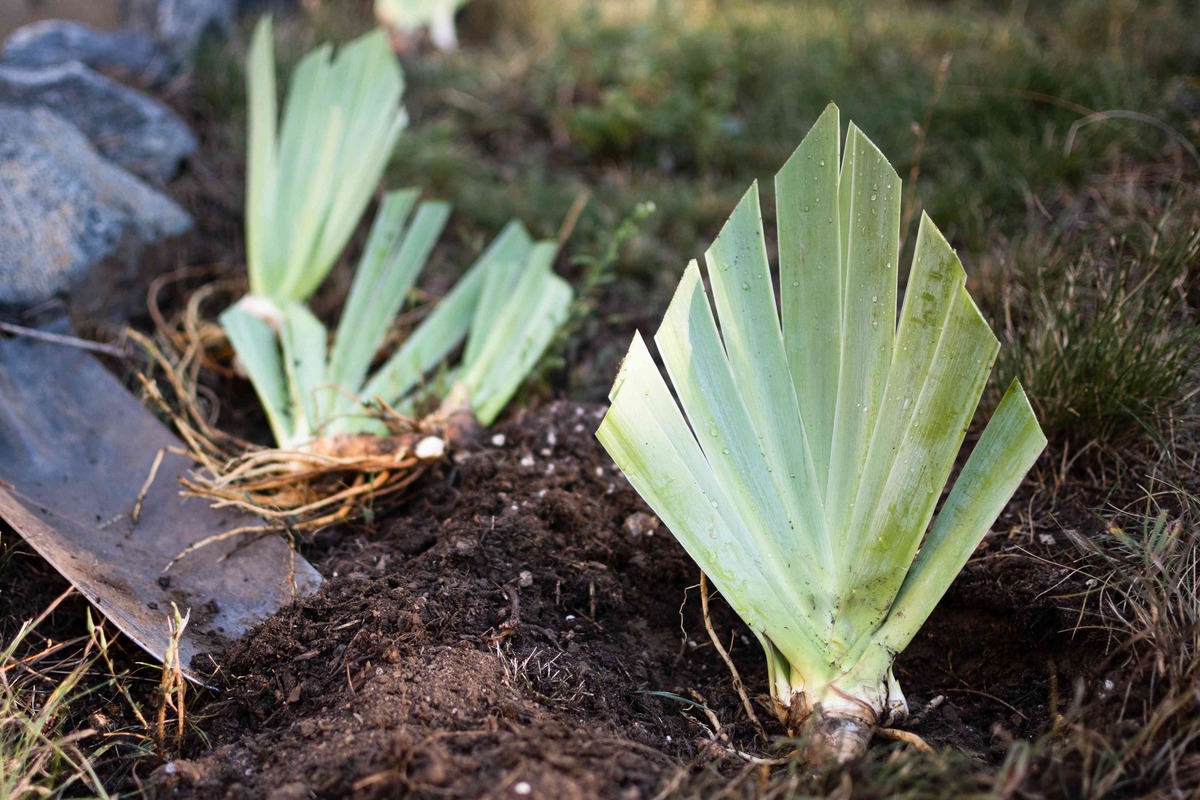
- Exposing the Fan: The “fan” refers to the foliage that emerges from the rhizome. When planting bearded irises, it is important to avoid burying the fan too deep in the soil. The foliage should be just above or at the soil surface to ensure proper sunlight exposure and encourage healthy growth.
- Dividing and Replanting: Over time, bearded irises can become overcrowded, leading to reduced blooming. It is recommended to divide and replant bearded irises every three to four years. When dividing, ensure that each divided clump has at least one healthy rhizome and plant them at the same depth as the original rhizomes.
- Mulching: After planting bearded irises, apply a layer of organic mulch around the plants. Mulching helps to retain moisture, regulate soil temperature, and suppress weed growth. However, be mindful not to cover the rhizomes with mulch, as this can trap moisture and potentially lead to rot.
By following these guidelines and adjusting the planting depth as necessary, you can ensure that your bearded irises thrive and produce stunning blooms year after year. Paying attention to the depth, rhizome positioning, and proper care practices will contribute to healthy growth, vibrant flowers, and an impressive display of bearded irises in your garden.
Planting Irises in Containers: Depth Considerations
Planting irises in containers is a great way to enjoy these beautiful flowers in a compact space or if you have limited garden area. When it comes to planting irises in containers, there are some specific depth considerations that need to be taken into account to ensure their successful growth and blooming. Here are some guidelines for planting irises in containers:
- Container Size: Choose a container that provides enough space for the iris rhizomes to grow and develop. A container with a diameter of at least 12 inches and a depth of 8-10 inches is generally recommended. This will allow ample room for root expansion and prevent overcrowding.
- Drainage: Proper drainage is critical for irises planted in containers. Ensure that your container has drainage holes at the bottom to allow excess water to escape. Add a layer of gravel or small stones to the bottom of the container to further improve drainage.
- Soil Mix: Use a well-draining soil mix specifically formulated for containers. A mix that contains a combination of garden soil, compost, and perlite or vermiculite helps provide good soil structure, drainage, and nutrients for the irises. Avoid using heavy or compacted soil that can lead to waterlogged conditions.
- Adjusting Planting Depth: When planting irises in containers, the depth is slightly different compared to planting them in the ground. Position the rhizome in the container so that the top is just level with the soil surface. Avoid burying the rhizome too deep, as this can lead to rotting. Provide enough soil at the top of the container to adequately cover the roots.
- Watering: Container-grown irises may require more frequent watering than those planted in the ground. Monitor the moisture level in the container and water thoroughly when the top inch of the soil feels dry. Avoid overwatering to prevent waterlogged conditions, which can lead to root rot.
- Fertilizing: Irises in containers benefit from regular feeding. Apply a balanced, slow-release fertilizer according to the package instructions. This will provide the necessary nutrients for healthy growth and abundant blooming.
- Maintenance: Regularly monitor the health of the irises in containers. Remove any dead or yellowing foliage and ensure proper airflow around the plants. If necessary, divide and replant irises in larger containers every three to four years to prevent overcrowding.
By considering these depth considerations and following the guidelines for planting irises in containers, you can successfully grow and enjoy these captivating flowers in a small space. With proper care and attention, container-grown irises can thrive and provide a beautiful display of color and elegance for your patio, balcony, or any other small-scale gardening area.
When and How to Divide and Replant Irises
Dividing and replanting irises is an essential task that helps maintain the health, vigor, and blooming potential of these stunning flowers. Knowing when and how to divide and replant irises will ensure their continued success in your garden. Here are some guidelines to follow:
- Timing: The best time to divide and replant irises is after they have finished blooming and the foliage has started to yellow. In most regions, this occurs in late summer or early fall. Dividing irises during this period allows them to establish new roots before winter dormancy.
- Assessing the Need: Irises typically benefit from division every three to four years. Signs that indicate it’s time to divide include overcrowding, reduced blooming, smaller flowers, and a decline in overall plant health. However, if your irises are still producing abundant blooms and have ample space, you may be able to delay division for a year or two.
- Preparing the Irises: Before dividing, carefully dig up the clump of irises using a garden fork or shovel. Gently remove the entire clump from the ground, taking care not to damage the rhizomes and roots. Shake off excess soil to reveal the rhizomes and assess their health and size.
- Dividing the Rhizomes: Using a sharp and clean knife, divide the rhizomes into smaller clumps. Each division should have at least one healthy rhizome and a fan of leaves. Trim any damaged or rotting portions from the rhizomes. Discard any weak or diseased rhizomes to avoid spreading problems to healthy ones.
- Replanting: Select a new planting location for the divided irises, ensuring that it receives adequate sunlight and has well-draining soil. Dig a hole wide and deep enough to accommodate the roots and rhizomes. Position the rhizomes horizontally in the hole, covering them with soil so that the tops are slightly above the soil surface.
- Watering and Mulching: After replanting, water the newly divided irises thoroughly to settle the soil. Maintain regular watering until they establish. Apply a layer of organic mulch around the plants, taking care to keep it away from the rhizomes. Mulching helps conserve moisture, suppress weed growth, and insulate the plants during winter.
- Care after Division: After dividing and replanting irises, provide them with proper care. Continue regular watering to keep the soil consistently moist, but avoid overwatering. Remove any yellowing or dead foliage to maintain a tidy appearance and reduce the risk of disease.
Dividing and replanting irises not only promotes their vigor and blooming but also allows you to expand your iris collection and share the joy of these flowers with others. By following the appropriate timing and techniques, you can ensure the continued health and vitality of your irises year after year.