
Ways to Organize Your Toothbrush Holder
Keeping your toothbrush holder organized is not only hygienic but also helps in maintaining a clean and clutter-free bathroom. Here are several effective ways to organize your toothbrush holder:
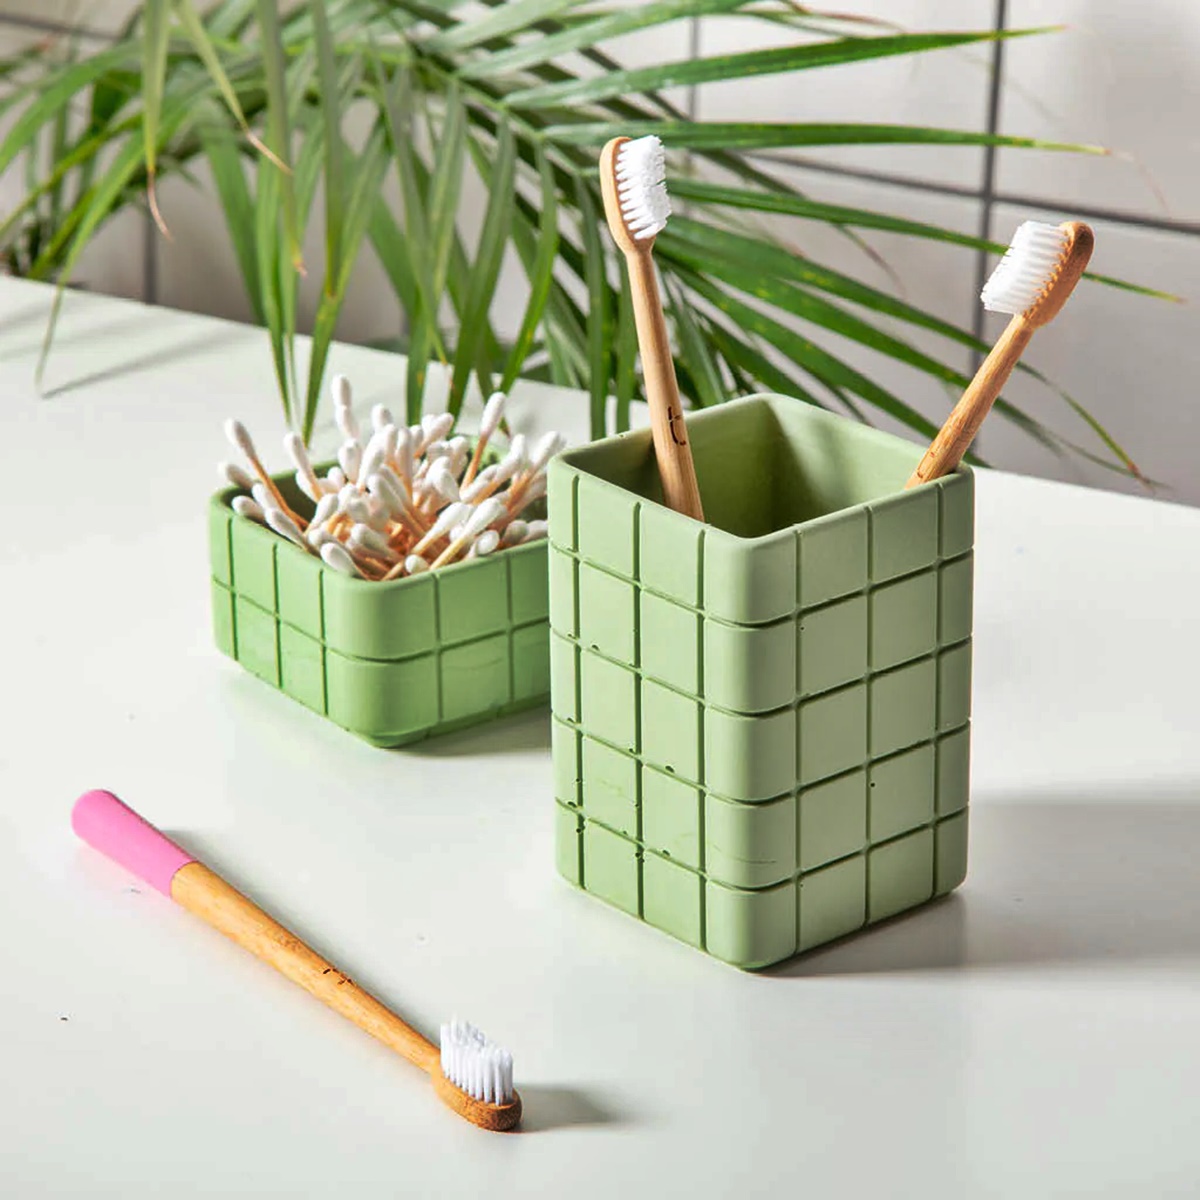
1. Keep Your Toothbrushes Upright: One of the simplest yet effective ways to organize your toothbrush holder is by ensuring that your toothbrushes are standing upright. This allows for proper airflow and helps prevent bacteria from accumulating.
2. Use Separate Compartments: If you are sharing your toothbrush holder with family members or have multiple toothbrushes, consider using separate compartments for each toothbrush. This helps prevent cross-contamination and makes it easier to identify each person’s toothbrush.
3. Clean and Dry Regularly: To maintain optimal hygiene, make it a habit to regularly clean and dry your toothbrush holder. Use warm water and mild soap to clean the holder thoroughly, then allow it to air dry before placing toothbrushes back in.
4. Utilize Additional Slots: Many toothbrush holders come with additional slots or compartments. Take advantage of these by using them to store toothpaste, dental floss, or other oral care products. This helps keep everything in one place and avoids clutter on the bathroom countertop.
5. Wall-Mounted Toothbrush Holders: Consider installing a wall-mounted toothbrush holder if you have limited counter space. These holders can be attached to the wall, keeping the countertop free and making it easier to clean around the area.
6. Use a Toothbrush Holder with a Cover for Travel: If you travel frequently or need to carry your toothbrush with you, invest in a toothbrush holder with a cover. This not only protects the bristles from getting dirty but also prevents accidental damage during transit.
7. Decorate Your Toothbrush Holder: Add a touch of personal style to your toothbrush holder by decorating it. Use stickers, paint, or other creative methods to make it unique and visually appealing. Just make sure the decorations are easy to clean and won’t harbor bacteria.
8. Repurpose Your Toothbrush Holder: If you find that you no longer need a toothbrush holder or have an extra one lying around, consider repurposing it for other items. It can be used to hold makeup brushes, pens, or even as a small flower pot. Let your creativity guide you!
By implementing these organizing techniques, you can ensure that your toothbrush holder remains clean, functional, and visually appealing. Choose the methods that work best for you and enjoy a well-organized bathroom space.
Keep Your Toothbrushes Upright
Keeping your toothbrushes upright is a simple yet effective way to organize your toothbrush holder. By doing so, you can maintain proper airflow, promote faster drying, and prevent the buildup of bacteria. Here are some tips to keep your toothbrushes upright:
1. Use Vertical Slots: Look for a toothbrush holder with vertical slots that can hold your toothbrushes in an upright position. This design allows for better airflow, ensuring that your toothbrushes dry more quickly after each use.
2. Align the Bristles: When placing your toothbrushes in the holder, make sure to align the bristles in a vertical position. This ensures that the bristles are exposed to the air and can dry thoroughly.
3. Avoid Overcrowding: When organizing your toothbrush holder, avoid overcrowding the slots. Giving each toothbrush enough space to stand upright allows for proper air circulation and reduces the risk of cross-contamination between bristles.
4. Clean the Holder Regularly: Regular cleaning of your toothbrush holder is essential to maintaining hygiene. Remove the toothbrushes from the holder and thoroughly clean the slots using warm water and mild soap. Rinse well and allow the holder to air dry before placing the toothbrushes back in.
5. Separate Toothbrushes: If you share your toothbrush holder with other family members, ensure that each toothbrush has its own designated slot. This prevents the bristles from touching and helps maintain personal hygiene.
6. Consider a Standalone Holder: If you prefer a more portable solution, you can opt for a standalone toothbrush holder. These are designed to keep your toothbrush upright even when traveling or in smaller bathroom spaces.
7. Choose a Holder with Drainage Holes: Look for a toothbrush holder that has drainage holes at the bottom. This allows any excess water to drain away, reducing the likelihood of bacteria growth and keeping your toothbrushes dry.
8. Keep the Holder Elevated: To prevent water pooling at the bottom of the toothbrush holder, place it on a raised platform or use a holder with built-in elevation. This helps promote better airflow and faster drying.
9. Replace Old or Worn-Out Holders: Over time, toothbrush holders can become worn out or accumulate grime that is difficult to remove. If your toothbrush holder is no longer in good condition, consider replacing it with a new one to maintain optimal hygiene.
By keeping your toothbrushes upright in a clean and well-ventilated holder, you can ensure that your toothbrushes dry quickly and remain hygienic for each use. Incorporate these tips into your toothbrush organization routine for a more organized and healthy bathroom space.
Use Separate Compartments for Each Family Member or Toothbrush
When it comes to organizing your toothbrush holder, using separate compartments for each family member or toothbrush can help maintain hygiene and prevent cross-contamination. Here are some valuable tips for implementing this effective organizational method:
1. Divided Toothbrush Holders: Look for toothbrush holders with built-in dividers or compartments. These dividers create separate spaces for each toothbrush, ensuring that they don’t come into contact with one another.
2. Color-Coded Holders: Assign a specific color toothbrush holder to each family member. This makes it easy to identify whose toothbrush belongs to whom and eliminates the chances of mixing them up.
3. Personalized Labels: Attach personalized labels to the toothbrush holders or designate specific slots for each family member. This adds a personal touch and eliminates any confusion about which toothbrush belongs to which individual.
4. Individual Travel Containers: When traveling, provide each family member with their own individual travel container for their toothbrush. These containers can keep the toothbrush protected and separate in a compact and hygienic way.
5. Removable Compartments: If your toothbrush holder doesn’t have separate compartments, consider using removable dividers or plastic cups. These can be easily inserted into the holder to create individual spaces for each toothbrush.
6. Regularly Clean and Replace Holders: To maintain hygiene, make sure to regularly clean the separate compartments or divided toothbrush holders. Remove any debris or toothpaste residue and rinse with warm water. If the compartments are removable, give them a thorough clean to prevent bacteria buildup.
7. Encourage Proper Toothbrush Placement: Teach each family member to place their toothbrush in their designated compartment after use. This habit helps maintain order and prevents accidental mixing of toothbrushes.
8. Consider Different Holder Types: If each family member prefers a different type of toothbrush holder, consider using multiple holders to accommodate their preferences. This ensures that everyone has their own dedicated space for their toothbrush.
9. Upgrade to Expandable Holders: If you have limited counter space or frequently change the number of toothbrushes in your household, opt for expandable toothbrush holders. These holders can adapt to accommodate the changing needs of your family.
By using separate compartments for each family member or toothbrush, you can create a more organized and hygienic toothbrush holder. These compartments help prevent the spread of bacteria and dental hygiene mix-ups, providing peace of mind for the entire family.
Clean and Dry the Toothbrush Holder Regularly
To maintain optimal hygiene and prevent the buildup of bacteria, it is important to clean and dry your toothbrush holder regularly. By incorporating this habit into your oral care routine, you can ensure a clean and healthy environment for your toothbrushes. Here are some key tips for cleaning and drying your toothbrush holder:
1. Use Warm Water and Mild Soap: Start by removing all toothbrushes from the holder. Rinse the toothbrush holder using warm water to remove any loose debris. Then, use a mild soap or dishwashing liquid to thoroughly clean the holder. Make sure to scrub all the crevices and slots to remove any lingering toothpaste residue or bacteria.
2. Scrub with a Toothbrush or Bottle Brush: For more stubborn residue, you can use a cleaning tool like a toothbrush or small bottle brush to scrub the holder gently. This helps to dislodge any trapped dirt or grime that may be hiding in the corners or hard-to-reach areas.
3. Rinse Thoroughly: After cleaning, rinse the holder thoroughly with warm water to ensure that all soap residue is removed. This step is crucial to prevent any soapy taste or residue from transferring onto your toothbrushes.
4. Allow the Holder to Air Dry: Once rinsed, it is important to let the toothbrush holder air dry completely. Place it upside down on a clean, dry surface or use a dish rack to allow proper airflow. Avoid using towels or paper towels to dry the holder, as they can introduce lint and moisture that may promote bacterial growth.
5. Clean Frequency: It is recommended to clean your toothbrush holder at least once a week or more frequently if needed. Regular cleaning minimizes the risk of bacterial growth and helps maintain a sanitary environment for your toothbrushes.
6. Check for Mold or Mildew: During the cleaning process, inspect the toothbrush holder for any signs of mold or mildew. If you notice any, thoroughly clean the affected areas using a mixture of equal parts water and vinegar. Rinse well and allow it to air dry completely before using it again.
7. Replace the Holder if Necessary: If your toothbrush holder is old, cracked, or no longer effectively holds your toothbrushes, it may be time to replace it. A worn-out holder can harbor bacteria and compromise the hygiene of your toothbrushes.
8. Encourage Family Members to Participate: Make cleaning the toothbrush holder a family effort. Encourage everyone to take turns cleaning and drying the holder, promoting a sense of responsibility and ensuring that it is regularly maintained.
By incorporating regular cleaning and drying habits into your toothbrush holder maintenance routine, you can ensure that your toothbrushes stay clean, hygienic, and free from harmful bacteria. This simple yet important step contributes to your overall oral health and well-being.
Utilize Additional Slots for Toothpaste or Floss
When organizing your toothbrush holder, take advantage of any additional slots or compartments to keep your toothpaste and dental floss within easy reach. By utilizing these spaces effectively, you can declutter your bathroom countertop and have a dedicated spot for all your oral care essentials. Here’s how you can make the most of the extra slots:
1. Store Toothpaste Tubes: Place your toothpaste tubes in an available slot within the toothbrush holder. This not only keeps them upright but also prevents them from rolling around and potentially getting lost or dirty in the bathroom cabinet.
2. Secure Dental Floss: Many toothbrush holders feature slots or loops specifically designed to hold dental floss. Take advantage of these designated spaces to keep your floss neatly organized and easily accessible whenever you need it.
3. Use Mini Containers: If your toothbrush holder doesn’t have dedicated slots for toothpaste or floss, you can use small containers or cups to keep them nearby. Simply place these containers in any available compartments of the toothbrush holder for convenient storage.
4. Opt for Multi-functional Holders: Consider investing in toothbrush holders with built-in compartments that can accommodate toothpaste and floss. These multi-functional holders provide a more streamlined and organized solution for your oral care essentials.
5. Keep Products Separate: To prevent cross-contamination or hygiene concerns, store toothbrushes, toothpaste, and floss in separate compartments or slots within the toothbrush holder. This ensures that each item has its own designated space, minimizing the risk of bacteria transfer.
6. Regularly Clean the Slots: Just like the toothbrush slots, it’s important to regularly clean the additional slots where toothpaste or floss are stored. Remove any residue or build-up using warm water and mild soap, and rinse thoroughly before returning the items to their respective compartments.
7. Check for Expired Products: As you organize your toothbrush holder, be mindful of any expired or nearly-empty toothpaste tubes or floss containers. Discard these to declutter the holder and make room for fresh, usable products.
8. Consider Travel-Sized Options: If you frequently travel or have limited counter space, consider using travel-sized toothpaste or a compact floss dispenser. These smaller options take up less space in the toothbrush holder while still providing you with the essential oral care items.
By utilizing the additional slots or compartments in your toothbrush holder, you can keep your toothpaste and floss conveniently within reach while maintaining a well-organized and clutter-free bathroom countertop. Incorporate these tips to streamline your oral care routine and create a designated spot for all your oral hygiene essentials.
Make Use of Wall-Mounted Toothbrush Holders
If you have limited counter space or want to keep your toothbrushes off the bathroom countertop, a wall-mounted toothbrush holder can be a practical and space-saving solution. By utilizing wall-mounted holders, you can create a clean and organized bathroom environment. Here are some tips on making the most of wall-mounted toothbrush holders:
1. Installation Considerations: Before installing a wall-mounted toothbrush holder, consider the layout of your bathroom. Choose a location that is easily accessible, preferably near the sink area, and at a convenient height for all family members.
2. Easy-to-Clean Design: Look for a wall-mounted toothbrush holder with a design that is easy to clean and maintain. Opt for holders with removable cups or compartments that can be easily washed, ensuring that no toothpaste residue or bacteria build up over time.
3. Ventilated Design: Choose a wall-mounted toothbrush holder with a well-ventilated design. This allows proper airflow around the toothbrushes, helping them to dry more quickly and preventing the growth of bacteria.
4. Individual Slots or Cups: Look for a wall-mounted toothbrush holder that offers individual slots or cups for each toothbrush. This helps to keep the toothbrushes separated and prevents cross-contamination.
5. Sturdy Mounting: Ensure that the wall-mounted toothbrush holder is securely mounted to the wall. Use appropriate screws or adhesive, following the manufacturer’s instructions, to prevent accidents or damage to the holder over time.
6. Multi-Purpose Holders: Consider wall-mounted toothbrush holders that offer additional storage options. Some holders may have compartments for toothpaste, dental floss, or even a cup for rinsing after brushing.
7. Personalized Hooks: Choose a toothbrush holder with personalized hooks or labels for each family member. This allows everyone to have their own designated space for their toothbrush, keeping them easily accessible and preventing mix-ups.
8. Minimalist Design: Opt for a sleek and minimalist design for your wall-mounted toothbrush holder. This not only adds a touch of elegance to your bathroom but also makes cleaning and maintenance easier without any unnecessary crevices or corners.
9. Consider Multiple Holders: If you have a larger family or multiple bathrooms, consider installing multiple wall-mounted toothbrush holders in different locations. This ensures that everyone has their own space for their toothbrush and reduces clutter in a shared bathroom.
By making use of wall-mounted toothbrush holders, you can maximize your vertical space, keep your toothbrushes organized and easily accessible, and create a clean and clutter-free bathroom countertop. Choose a holder that suits your needs and style preferences, and enjoy the benefits of a well-organized bathroom space.
Use a Toothbrush Holder with a Cover for Travel
When you’re on the go or traveling, it’s important to keep your toothbrush clean and protected. Using a toothbrush holder with a cover provides a convenient and hygienic solution to safeguard your toothbrush and keep it in optimal condition. Here are some key tips for utilizing a toothbrush holder with a cover for travel:
1. Compact and Portable Design: Look for a toothbrush holder that is specifically designed for travel. These holders are made to be compact and lightweight, making them easy to pack in your suitcase, bag, or even pocket.
2. Hygienic Protection: The primary benefit of using a toothbrush holder with a cover is that it helps protect your toothbrush from external contaminants. The cover acts as a barrier, preventing dust, dirt, and other particles from coming into contact with the bristles.
3. Ventilation and Drying: Choose a toothbrush holder with a cover that provides ventilation or small air holes. This allows air to circulate around the bristles and helps the toothbrush dry more effectively while being protected.
4. Bristle Protection: A toothbrush holder with a cover not only safeguards the bristles but also prevents accidental bending or damaging of the toothbrush during travel. The cover acts as a cushion and provides additional protection against impacts or pressure.
5. Separate Compartment for Toothpaste: Some travel toothbrush holders come with separate compartments or built-in space for toothpaste. This allows you to conveniently store both your toothbrush and toothpaste in one compact container, minimizing the need for additional packaging.
6. Easy to Clean: Choose a travel toothbrush holder that is easy to clean. Look for holders with removable compartments or dishwasher-safe features, allowing for thorough cleaning and sanitization after each trip.
7. Personalized Design: Opt for a toothbrush holder with a cover that comes in different colors or designs. This helps to personalize your toothbrush holder, making it easy to identify your own toothbrush when traveling with others.
8. Sustainability Considerations: Look for toothbrush holders made from eco-friendly materials to reduce your environmental impact. Consider options made from recycled plastics or biodegradable materials, ensuring that you can maintain sustainable practices even while traveling.
9. Regular Cleaning and Maintenance: It’s important to clean the toothbrush holder and cover regularly, especially after returning from a trip. Disassemble the holder, clean it with warm water and mild soap, and allow it to air dry completely before storing it for future use.
By using a toothbrush holder with a cover for travel, you can keep your toothbrush clean, protected, and ready for use wherever you go. Make sure to choose a holder that suits your needs and incorporates these tips to maintain optimal oral hygiene even while on the move.
Decorate Your Toothbrush Holder for Added Style
Who says toothbrush holders have to be boring? Adding a touch of style and personalization to your toothbrush holder not only enhances the overall aesthetic of your bathroom but also makes the holder more enjoyable to use. Here are some tips to decorate your toothbrush holder for added style:
1. Colorful Stickers or Decals: Add a pop of color to your toothbrush holder by applying colorful stickers or decals. Choose designs that match your bathroom decor or reflect your personal style, such as floral patterns, geometric shapes, or favorite quotes.
2. DIY Paint Job: Get creative and give your toothbrush holder a fresh look by painting it yourself. Use acrylic paints or spray paints to create unique designs or experiment with different color combinations that complement your bathroom theme.
3. Washi Tape Accents: Washi tape, with its wide range of colors and patterns, offers an easy way to add decorative accents to your toothbrush holder. Simply wrap a strip of washi tape around the holder or create your own artistic patterns for a fun and playful touch.
4. Personalized Names or Initials: Use adhesive letters or vinyl cutouts to add a personal touch to your toothbrush holder. Spell out your name or initials to make it uniquely yours and prevent mix-ups among family members sharing the bathroom.
5. Minimalist Design: If you prefer a clean and minimalist look, opt for a toothbrush holder with a simple and sleek design. This can add a touch of elegance and sophistication to your bathroom without any additional decorations.
6. Nature-Inspired Accents: Create a natural and calming ambiance by incorporating nature-inspired elements into your toothbrush holder decor. Attach small artificial flowers, seashells, or pebbles to the holder to bring a touch of the outdoors indoors.
7. Vintage or Retro Theme: If you’re a fan of vintage or retro aesthetics, decorate your toothbrush holder accordingly. Look for vintage-inspired patterns or retro motifs that evoke a sense of nostalgia and add a unique charm to your bathroom decor.
8. Personalized Toothbrush Holder Labels: Create custom labels for each toothbrush holder slot using printable labels or adhesive vinyl. This not only adds a stylish touch but also helps to organize and differentiate toothbrushes for each family member.
9. Changeable Decor: Embrace the opportunity to change your toothbrush holder decor according to seasons or special occasions. Swap out stickers, decals, or other decorative elements to match festive themes or to simply refresh the look of your bathroom.
By decorating your toothbrush holder, you can transform a simple everyday item into a stylish and personalized accessory for your bathroom. Let your creativity shine and have fun experimenting with different decorations that reflect your unique taste and personality.
Repurpose Your Toothbrush Holder for Other Items
Don’t limit the use of your toothbrush holder to just holding toothbrushes. With a little creativity, you can repurpose it for other items and give it a new lease of life. Here are some clever ideas to repurpose your toothbrush holder:
1. Makeup Brush Holder: Use your toothbrush holder to store and organize your makeup brushes. The slots that are designed for toothbrushes work perfectly for holding makeup brushes upright, allowing easy access and keeping them organized.
2. Pencil or Pen Organizer: Repurpose your toothbrush holder to hold your pens, pencils, markers, or other writing instruments. The separate compartments and slots are ideal for keeping your writing tools organized on your desk or in your home office.
3. Art Supplies Organizer: Use the divided slots of the toothbrush holder to store and organize art supplies such as paintbrushes, colored pencils, or markers. This way, you’ll have easy access to your supplies while keeping them neatly organized.
4. Kitchen Utensil Holder: If you have a toothbrush holder with wide slots, repurpose it as a kitchen utensil holder. Use it to store and organize your cooking spoons, spatulas, whisks, or other frequently used kitchen utensils on your countertop.
5. Desk Organizer: Keep your desk clutter-free by using a toothbrush holder to organize small office supplies. Store items like paper clips, binder clips, pushpins, sticky notes, and other small stationery items for easy access and a tidy workspace.
6. Plant Pot: Get creative and repurpose a toothbrush holder as a small plant pot. Add a small plant or succulent to brighten up your desk, bathroom, or kitchen. Just make sure to line the holder with a plastic bag or waterproof liner to avoid water leakage.
7. Bathroom Organizer: Use the toothbrush holder to store cotton swabs, cotton balls, or small hair accessories like bobby pins or hair ties. The compartments can help keep these bathroom essentials neatly organized and easily accessible.
8. Craft Supply Organizer: If you’re into arts and crafts, repurpose your toothbrush holder to hold your craft supplies such as beads, buttons, small scissors, paintbrushes, or glue sticks. This repurposed holder will keep your craft essentials organized and within reach.
9. Smartphone or Tablet Stand: If your toothbrush holder has a flat surface, it can be repurposed as a stand for your smartphone or tablet. Place your device in the upright position in the holder, providing a convenient hands-free viewing experience.
By thinking outside the box and repurposing your toothbrush holder, you can find creative solutions for organizing various items in your home or office. Let your imagination guide you, and discover the versatility of this simple but versatile bathroom accessory.