
Safety Precautions
When working with electrical components, it is crucial to prioritize safety to prevent accidents and ensure a successful project. Here are some essential safety precautions to keep in mind when wiring a lamp holder:
- Turn off the Power: Before you start working on the lamp holder, make sure the power to the circuit is turned off. This will minimize the risk of electric shock.
- Use Insulated Tools: Use insulated pliers and screwdrivers specifically designed for electrical work. This will provide a layer of protection against electric shock.
- Wear Protective Gear: It’s important to wear safety glasses and insulated gloves to protect your eyes and hands from any potential hazards.
- Inspect the Components: Before starting the wiring process, inspect all the components, including the lamp cord, lamp holder, and plug, for any signs of damage or wear. Replace any damaged components to ensure safe operation.
- Avoid Overloading the Circuit: Make sure you know the maximum wattage that the lamp holder is designed to handle and do not exceed it. Overloading the circuit can lead to overheating and potential fire hazards.
- Properly Ground the Lamp: Ensure that the lamp holder is properly grounded to prevent electrical shocks. This is especially important if the lamp is metal or has metal parts.
- Consult a Professional: If you are unsure about any aspect of the wiring process, it is always best to consult with a professional electrician. They can guide you through the process and ensure that everything is done correctly and safely.
By following these safety precautions, you can significantly reduce the risk of accidents and ensure that your wiring project is completed safely. Remember, electrical work can be hazardous if not done properly, so never compromise on safety.
Tools and Materials Required
Before starting the process of wiring a lamp holder, it is important to gather all the necessary tools and materials. Having everything prepared beforehand will make the task easier and more efficient. Here is a list of the tools and materials you will need:
- Wire Cutters/Strippers: You will need wire cutters/strippers to cut and strip the lamp cord wires.
- Insulated Pliers: Insulated pliers will help you securely connect the wires and handle them safely.
- Insulated Screwdriver: An insulated screwdriver is essential for attaching the lamp holder and securing any screws.
- Lamp Cord: Select a lamp cord that is appropriate for your project in terms of length and gauge. Ensure that it is rated for the wattage you plan to use.
- Lamp Holder: Choose a lamp holder that is compatible with the lamp cord and the style of lamp you are working with.
- Plug: Depending on your project, you may need a plug to provide power to the lamp.
- Wire Nuts: Wire nuts are used to securely connect the lamp cord wires together.
- Electrical Tape: Electrical tape is used for insulation and to secure any loose connections.
- Tape Measure: A tape measure will help you accurately measure the length of the lamp cord.
- Scissors: Scissors will be handy for cutting electrical tape and trimming excess wire.
- Lampshade: Finally, don’t forget the lampshade to complete your project. Choose one that matches the style and size of your lamp.
Having these tools and materials ready will make the wiring process smooth and efficient. Ensure that all the tools are in good working condition and that the materials you are using are of high quality. It’s important to use the right tools for the job to ensure a safe and successful outcome.
Step 1: Gather the Necessary Components
Before starting the process of wiring a lamp holder, it is important to gather all the necessary components. By ensuring you have everything you need, you can avoid unnecessary interruptions and complete the task efficiently. Here are the components you will need:
- Lamp Cord: Select a lamp cord that matches the requirements of your project, such as the desired length and appropriate gauge.
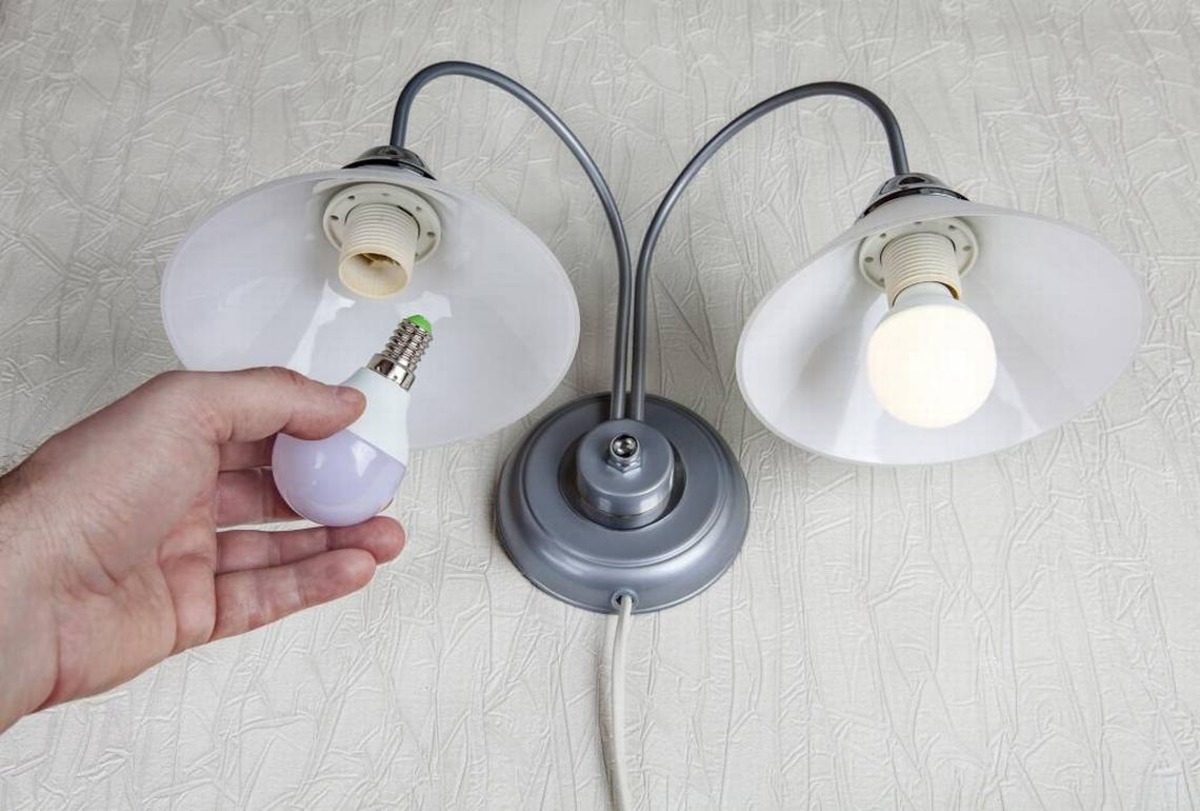
- Lamp Holder: Choose a lamp holder that is compatible with the lamp cord you have selected and suitable for the style of lamp you are working with. Consider factors such as the size, design, and functionality of the lamp holder.
- Plug: Depending on your project, you may need a plug to connect the lamp cord to a power source. Ensure that the plug is compatible with the lamp cord and meets safety standards.
- Wire Nuts: Wire nuts are used to secure and connect the wires. Ensure that you have enough wire nuts to make the necessary connections.
- Electrical Tape: Electrical tape is essential for insulating the connections and providing added safety. Choose high-quality electrical tape that is suitable for electrical applications.
- Tools: Gather the necessary tools for the wiring process, including wire cutters/strippers, insulated pliers, an insulated screwdriver, scissors, and a tape measure.
Make sure that all the components are in good condition and free from any defects or damage. Inspect the lamp cord, lamp holder, plug, wire nuts, and electrical tape for any signs of wear or deterioration. If you notice any issues, it is recommended to replace them with new components for optimal safety and functionality.
Having all the necessary components ready will make the wiring process more convenient and efficient. It allows you to focus on the task at hand without any interruptions. By carefully selecting high-quality components and inspecting them for any defects, you can ensure a successful and safe wiring project.
Step 2: Preparing the Lamp Cord
Once you have gathered all the necessary components, the next step in wiring a lamp holder is to prepare the lamp cord. Preparing the lamp cord involves a few simple but important steps to ensure proper connections and safe operation. Follow the instructions below to prepare the lamp cord:
- Measure the Cord Length: Determine the desired length of the lamp cord based on your project requirements. Use a tape measure to measure and mark the appropriate length.
- Cut the Lamp Cord: Using wire cutters, carefully cut the lamp cord to the measured length. Ensure that the cut is clean and straight, without any frayed ends.
- Remove the Outer Insulation: Locate the end of the lamp cord where you made the cut. Use a sharp utility knife or wire strippers to carefully cut through the outer insulation, making a shallow incision. Be cautious not to cut into the inner wires.
- Peel off the Outer Insulation: Gently peel off the outer insulation to expose the inner wires. Take your time and be careful not to damage or strain the inner wires during this process.
It is important to note that lamp cords typically have two conductors, a neutral wire and a hot wire. The neutral wire is usually identified by a rib, ridge, or smooth side, while the hot wire is typically identified by a colored coating or printing on the insulation.
By preparing the lamp cord correctly, you will have a neatly trimmed cord with exposed wires ready for the next step in the wiring process. Remember to handle the cord with care, avoiding any unnecessary twisting, pulling, or bending that could damage the wires. Following these steps will ensure that the lamp cord is ready for secure and proper connections to the lamp holder.
Step 3: Stripping the Lamp Cord Wires
After preparing the lamp cord, the next step in wiring a lamp holder is to strip the wires to expose the conductor inside. Stripping the lamp cord wires is essential to create clean and secure connections. Follow these steps to strip the lamp cord wires:
- Inspect the Cut End: Examine the cut end of the lamp cord to ensure that the inner wires are intact and not damaged during the preparation process. Trim any frayed or damaged sections to create a clean edge.
- Identify the Neutral and Hot Wires: Take note of the identification features on the lamp cord, such as a rib, ridge, smooth side, colored coating, or printing on the insulation. These markings distinguish the neutral and hot wires.
- Use Wire Strippers: Select the appropriate gauge setting on your wire strippers based on the size of the lamp cord wires. Place the wire strippers around the insulation, ensuring that only the insulation is held and not the conductor underneath.
- Rotate and Pull: Gently rotate the wire strippers around the lamp cord, maintaining a firm grip. Pull the wire strippers towards the end of the cord to remove the insulation. Be cautious not to score or nick the conductor while stripping the insulation.
- Strip Proper Length: Strip the insulation to expose the correct length of the conductor required for connecting to the lamp holder. This length is typically around 1/2 to 3/4 inches, but refer to the specifications or instructions provided with your lamp holder for the recommended length.
- Inspect the Stripped Wires: After stripping, examine the exposed wires to ensure that they are clean, undamaged, and free from any stray strands or insulation remnants. Trim any excess or uneven strands if necessary.
Remember to handle the stripped wires with care and avoid any excessive bending or twisting that could weaken or damage the conductor. Stripping the lamp cord wires correctly ensures a solid and reliable electrical connection when attaching them to the lamp holder in the next steps.
Step 4: Connecting the Lamp Holder Wires
With the lamp cord wires properly stripped, the next step in wiring a lamp holder is to connect the lamp holder wires to the lamp cord. This connection is crucial for the proper functioning of the lamp. Follow these steps to connect the lamp holder wires:
- Identify the Lamp Holder Wires: Examine the lamp holder and identify the two wires attached to it. In most cases, one wire may be smooth or labeled as the neutral wire, while the other may be ribbed or labeled as the hot wire. Refer to the instructions or markings on the lamp holder if uncertain.
- Match the Lamp Holder and Cord Wires: Match the corresponding lamp holder wire with the respective lamp cord wire. Connect the smooth or neutral wire from the lamp holder to the identified neutral wire of the lamp cord. Connect the ribbed or hot wire from the lamp holder to the identified hot wire of the lamp cord.
- Twist the Wires: Hold the matched lamp holder wire and lamp cord wire together and twist them clockwise using insulated pliers. Apply firm pressure to ensure a secure and tight connection.
- Secure the Connection: After twisting the wires together, use a wire nut to securely fasten the connection. Place the wire nut over the twisted wires and twist it clockwise until it is tight and secure. Ensure that there are no exposed wires outside of the wire nut.
- Check the Connection: Gently tug on the connected wires to ensure that they are firmly and securely attached. If the wires come apart, re-twist them and secure them again with a wire nut.
- Insulate the Connection: Wrap electrical tape tightly around the wire nut and the connected wires, covering the entire connection. This provides an extra layer of insulation and protection.
It is important to make sure that the lamp holder wires are securely connected to the lamp cord wires. A loose or weak connection can lead to improper electrical flow, which can affect the functioning of the lamp and pose a safety risk. Taking the time to properly match, twist, secure, and insulate the wires will ensure a reliable and safe connection between the lamp holder and the lamp cord.
Step 5: Attaching the Lamp Holder
After connecting the lamp holder wires to the lamp cord, the next step in wiring a lamp holder is to attach the lamp holder securely. This step ensures that the lamp holder is properly held in place for safe operation. Follow these steps to attach the lamp holder:
- Position the Lamp Holder: Decide on the desired position for the lamp holder on your lamp base or fixture. Take into consideration factors such as the design, functionality, and aesthetics of the lamp.
- Thread the Lamp Cord: Carefully thread the lamp cord through the opening or socket of the lamp holder. Guide the cord through without causing any tangles or loops.
- Align the Screw Holes: Align the screw holes or attachment points on the lamp holder with the corresponding holes or brackets on the lamp base or fixture. Ensure a proper fit and alignment before proceeding.
- Secure with Screws or Clamps: Depending on the design of the lamp holder and the lamp base or fixture, use the appropriate screws or clamps to secure the lamp holder in place. Insert the screws or tighten the clamps firmly but not excessively, ensuring a secure attachment without damaging the lamp holder.
- Double Check the Electrical Connections: Before proceeding, double check the electrical connections between the lamp holder wires and the lamp cord wires. Ensure that they are still securely connected and properly insulated without any exposed wires.
It is crucial to take your time during this step to ensure that the lamp holder is securely attached. A loose or unstable lamp holder can pose safety risks and affect the stability of the lamp. By following these steps, you can ensure a sturdy and reliable attachment of the lamp holder to the lamp base or fixture.
Step 6: Testing the Connection
After successfully attaching the lamp holder, it is important to test the connection to ensure that the wiring has been done correctly and that the lamp is functioning properly. Testing the connection is a crucial step to ensure both safety and functionality. Follow these steps to test the connection:
- Make Sure it’s Off: Before testing, ensure that the lamp is turned off and unplugged from the power source. This will prevent any accidental electric shocks or short circuits during the testing process.
- Plug in the Lamp: Plug the lamp into a properly grounded outlet or extension cord. Ensure that the connection is secure and that the plug is inserted fully.
- Turn the Lamp On: Switch on the lamp or use the appropriate mechanism to turn it on. If the lamp has a knob or switch, toggle it to the “on” position.
- Observe the Lamp: Observe the lamp closely to see if it lights up as it should. Check for any flickering, dimming, or abnormal behavior that could indicate a wiring issue.
- Verify the Lamp Settings: If your lamp has adjustable settings, such as a dimmer switch or multiple brightness levels, test each setting to ensure they work properly.
- Inspect the Wiring: While the lamp is turned on, carefully inspect the lamp cord and lamp holder wiring for any signs of overheating, sparking, or unusual smells. These can indicate potential issues that require immediate attention.
- Turn the Lamp Off: Once you have finished testing, switch off the lamp and unplug it from the power source. Allow the lamp to cool down before proceeding with any further adjustments or modifications.
By following these steps and conducting a thorough test, you can ensure that the wiring connection is functioning properly and that the lamp is safe to use. In case you notice any issues during the testing process, it is recommended to consult a professional electrician for further assistance. Remember, safety is of utmost importance when dealing with electrical components, so never overlook the testing step.
Step 7: Securing the Lamp Holder
After testing the connection and ensuring that the lamp is functioning properly, the next step in wiring a lamp holder is to secure it in place. Properly securing the lamp holder is essential for the stability and safety of the lamp. Follow these steps to securely fasten the lamp holder:
- Double Check the Alignment: Before proceeding, double check the alignment of the lamp holder. Ensure that it is properly positioned and aligned with the lamp base or fixture. Adjust it if necessary.
- Tighten the Screws or Clamps: Use a screwdriver or the appropriate tool to tighten any screws or clamps that secure the lamp holder to the lamp base or fixture. Ensure that they are tightened sufficiently, but be cautious not to overtighten and damage the lamp or lamp holder.
- Check for Stability: Gently shake or wiggle the lamp to test the stability of the lamp holder. Ensure that it is securely fastened and does not move or wobble excessively. If there is any instability, revisit the attachment and tighten the screws or clamps if needed.
- Inspect the Lamp Holder: Take a moment to visually inspect the lamp holder for any signs of damage, loose parts, or other issues. Ensure that it is in good condition and free from defects that could compromise its functionality or safety.
Securing the lamp holder properly ensures that the lamp remains stable and prevents any accidental detachment or movement that could lead to damage or hazards. Careful attention to the attachment and regular inspections will help maintain the longevity and safety of the lamp holder.
Step 8: Final Testing and InspectionAfter securing the lamp holder, it is important to perform a final round of testing and inspection to ensure that everything is in proper working order. This final step is crucial to guarantee the safety and functionality of the lamp before putting it to regular use. Follow these steps for final testing and inspection:
- Turn off the Power: Before conducting any further tests or inspections, make sure the lamp is turned off and unplugged from the power source. This step is necessary to ensure your safety while examining the lamp.
- Check Electrical Connections: Carefully inspect the electrical connections between the lamp holder wires and the lamp cord wires. Ensure that they are still securely connected and properly insulated. Look for any signs of loose or exposed wires and address them immediately if found.
- Inspect the Lamp Cord: Examine the lamp cord for any frayed or damaged areas. Check the insulation to ensure it is intact and not worn down. If you notice any issues, it is crucial to replace the lamp cord to prevent potential electrical hazards.
- Verify Stability: Shake or lightly jostle the lamp to confirm the stability of the lamp holder. Ensure that it remains securely attached and does not wobble or move excessively. If instability is detected, review the attachment and make any necessary adjustments.
- Perform Functional Tests: Turn on the lamp and test its functionality. Check if it lights up properly without flickering or dimming. Verify that any adjustable settings, such as a rotary switch or dimmer, are fully operational. Pay attention to any unusual noises or smells during this testing phase.
- Examine for Safety: Inspect the lamp and its components for any signs of overheating, sparking, or other safety concerns. Look for indications of damaged or worn-out parts. If you identify any issues, promptly address them before regular use.
By completing these final testing and inspection steps, you can have peace of mind knowing that your lamp is safely wired and ready for use. It is essential to prioritize safety throughout the process and address any issues or concerns promptly to prevent accidents and ensure the optimal performance of your lamp.