
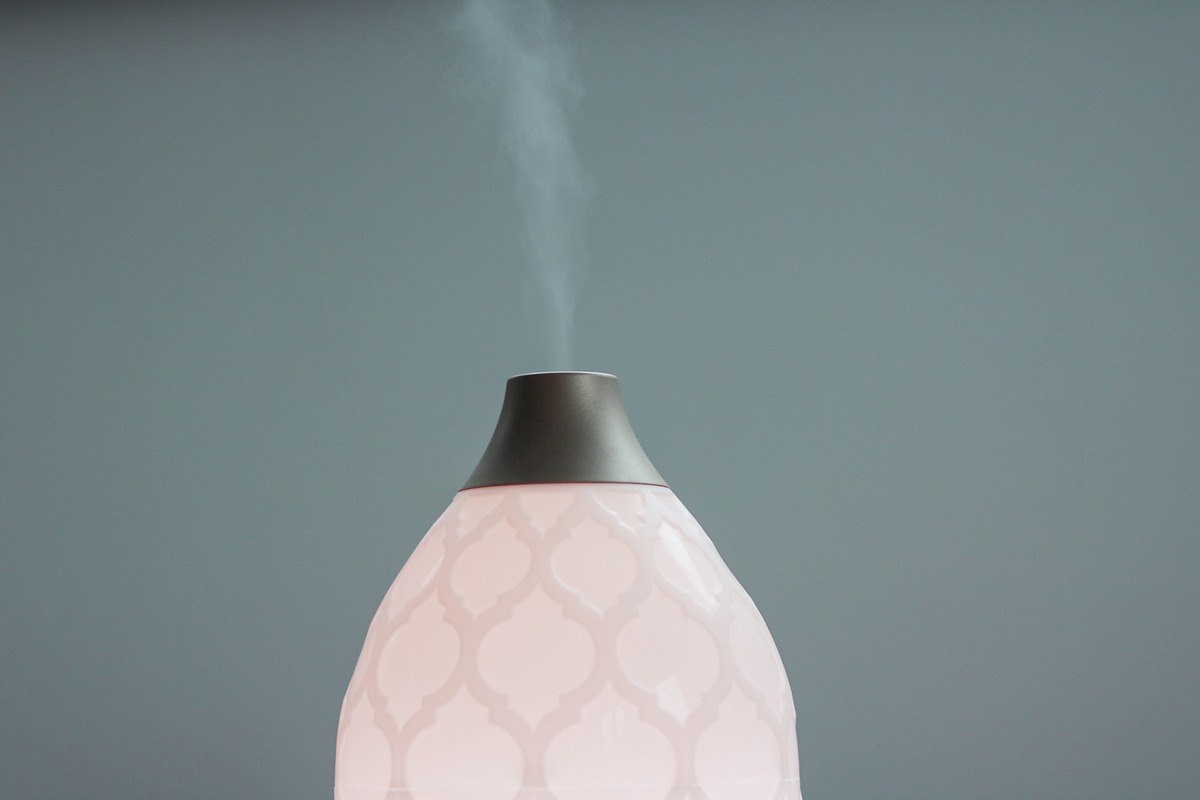
What is an Ultrasonic Aroma Diffuser?
An ultrasonic aroma diffuser is a device that uses ultrasonic vibrations to disperse essential oils into the air, creating a fragrant and therapeutic atmosphere in any space. It works by breaking down the essential oils and water into micro particles, which are then released as a mist into the air. This allows the aroma and benefits of the essential oils to be evenly distributed throughout the room.
Ultrasonic aroma diffusers are not only a convenient way to enjoy the benefits of aromatherapy, but they also provide a decorative element to any room with their elegant designs and soft LED lighting options. They come in various shapes and sizes, ranging from compact designs for personal use to larger models suitable for larger spaces.
One of the key advantages of using an ultrasonic aroma diffuser is that it preserves the therapeutic properties of the essential oils. Unlike other methods of diffusing essential oils, such as heating or burning, ultrasonic diffusers do not compromise the chemical composition of the oils. This means that you can experience the full benefits of the essential oils, including their calming, energizing, or healing properties, without any alteration or degradation.
Aside from their aromatic benefits, ultrasonic aroma diffusers also function as a humidifier, adding moisture to the air. This can be especially beneficial in dry environments or during the winter months when the air tends to be dry and can cause issues like dry skin, congestion, or sore throat.
Overall, an ultrasonic aroma diffuser is a versatile and effective way to create a relaxing and aromatic environment in your home or office. Whether you want to unwind after a long day, improve your mood, or enjoy the therapeutic effects of essential oils, an ultrasonic aroma diffuser is a must-have accessory for any aromatherapy enthusiast.
Choosing the Right Essential Oil
When using an ultrasonic aroma diffuser, selecting the right essential oil is essential for creating the desired ambiance and reaping the benefits of aromatherapy. With countless options available, here are some factors to consider when choosing the perfect essential oil:
Scent Preference: Start by considering the type of scent you prefer. Essential oils come in a wide variety of aromas, ranging from floral and citrusy to woody and earthy. Experiment with different scents to find the ones that resonate with you and create the desired atmosphere.
Focus or Relaxation: Determine the purpose of using the diffuser. If you want to promote focus and concentration, scents such as peppermint, rosemary, or lemon can be stimulating and revitalizing. On the other hand, for relaxation and stress relief, lavender, chamomile, or ylang-ylang can help create a calming environment.
Specific Benefits: Some essential oils have additional benefits beyond their scent. For example, eucalyptus is known for its respiratory benefits and can help clear congestion, while tea tree oil has anti-fungal and antibacterial properties. Research the specific benefits of different oils to select the ones that align with your needs.
Purity and Quality: Ensure that you are purchasing high-quality, pure essential oils. Look for reputable brands that provide detailed information about the sourcing and extraction methods of their oils. Pure essential oils offer better and longer-lasting scents, as well as optimal therapeutic benefits.
Personal Sensitivities: Consider any personal sensitivities or allergies when choosing essential oils. Some individuals may have sensitivities to certain scents or oils, so it’s important to be mindful of any potential reactions. Perform a patch test on a small area of skin before diffusing a new oil to see if any adverse reactions occur.
Blending Options: Don’t be afraid to get creative and experiment with blending different essential oils. Mixing scents can create unique and personalized aromas. Begin with a few drops of each oil and adjust the ratio based on your preferences. Keep track of your favorite blends so you can recreate them in the future.
By considering these factors, you can select the perfect essential oils to create a soothing and uplifting environment with your ultrasonic aroma diffuser. Whether you’re looking to enhance focus, promote relaxation, or enjoy the myriad of benefits that essential oils offer, choosing the right oil is the key to a delightful aromatherapy experience.
Filling the Water Tank
One of the essential steps in using an ultrasonic aroma diffuser is properly filling the water tank. Follow these guidelines to ensure a smooth and effective diffusion process:
1. Read the Instructions: Familiarize yourself with the specific instructions provided by the manufacturer of your ultrasonic aroma diffuser. While the general process is similar across different models, there might be slight variations in terms of capacity and recommended water levels.
2. Select Clean, Cold Water: Use clean, cold tap water to fill the water tank. Avoid using hot water or any other liquids, as this can interfere with the diffuser’s performance and may even cause damage to the device.
3. Determine the Water Capacity: Most ultrasonic diffusers have a maximum fill line. It is important not to exceed this line, as overfilling the water tank can lead to malfunctioning or reduced diffusion efficiency.
4. Fill the Tank: Carefully pour the water into the tank, ensuring that you do not exceed the maximum fill line. It’s important to handle the diffuser with care to avoid any spillage or damage.
5. Close the Water Tank: Once the water is filled to the appropriate level, securely close the water tank. Make sure that the lid or cap is properly aligned and sealed to prevent any leakage during operation.
6. Optional: Add Filtered Water: If you live in an area with hard water, you may want to consider using filtered water to reduce mineral buildup or residue on the inside of the water tank. This can help prolong the lifespan of your diffuser and ensure optimal performance.
7. Regularly Change the Water: To maintain the purity and effectiveness of the diffuser, it is recommended to change the water between each use. This prevents any accumulation of bacteria or mold and ensures a clean diffusion process.
By following these steps, you can easily fill the water tank of your ultrasonic aroma diffuser and prepare it for a delightful aromatherapy experience. Remember to refer to the specific instructions provided with your diffuser to ensure proper usage and maximize the diffuser’s effectiveness.
Adding Essential Oils
Adding essential oils to your ultrasonic aroma diffuser is a crucial step in creating a fragrant and therapeutic atmosphere. Follow these steps to ensure proper usage and achieve the desired aromatic experience:
1. Check the Manufacturer’s Recommendations: Before adding essential oils, refer to the manufacturer’s instructions or guidelines specifically provided for your ultrasonic aroma diffuser model. Some diffusers may have limitations on the amount of oil or specific oils that can be used.
2. Choose the Desired Essential Oil: Select the essential oil or blend of oils that you want to infuse into the air. Pick scents that align with your mood, desired benefits, or personal preferences.
3. Determine the Recommended Amount: Most ultrasonic diffusers have a suggested amount of essential oil to add per fill of the water tank. It is usually recommended to add 3-5 drops of essential oil per 100ml of water. However, you can adjust the amount based on your personal preference and the strength of the scent you desire.
4. Add Essential Oils to Water: Remove the lid or cap of the water tank and carefully add the desired amount of essential oil drops directly into the water. Some diffusers may have a separate compartment or designated area for adding oils, so follow the instructions provided with your diffuser.
5. Optional: Mix Oils: If you prefer to create a custom aroma, you can mix different essential oils in a separate container before adding them to the water tank. This allows you to experiment and create unique blends that suit your preferences.
6. Avoid Overuse: While essential oils offer a range of benefits, it’s important not to overuse them in your diffuser. Adding an excessive amount of oil can result in an overpowering scent or even cause issues with the diffuser’s performance. Always follow the manufacturer’s recommended guidelines for oil-to-water ratios.
7. Close the Lid or Cap: Once the essential oils are added, securely close the lid or cap of the water tank. This ensures that the oils are properly dispersed into the mist created by the diffuser.
8. Turn on the Diffuser: With the water tank filled and essential oils added, you’re ready to turn on the diffuser. Follow the manufacturer’s instructions to power on the diffuser and select your desired mist settings and timer options.
By following these steps, you can confidently add essential oils to your ultrasonic aroma diffuser and enjoy a customized and aromatic environment in your space. Remember to choose high-quality essential oils and experiment with different scents to find the perfect combination that suits your preference.
Adjusting the Mist Level
Adjusting the mist level on your ultrasonic aroma diffuser allows you to control the intensity of the fragrance and the amount of essential oil dispersed into the air. Follow these steps to customize the mist level according to your preferences:
1. Identify the Mist Settings: Familiarize yourself with the mist settings available on your ultrasonic aroma diffuser. Most diffusers offer options such as high or low mist output, continuous or intermittent mist modes, or even different mist intensity levels.
2. Start with Low Mist Level: If you’re unsure about the optimal mist level, it’s usually recommended to begin with the lowest setting. This allows you to gauge the strength of the scent and increase it gradually until it reaches your desired intensity.
3. Consider Room Size: The size of the room can influence the mist level that is suitable. For larger spaces, you may need to increase the mist output to effectively disperse the fragrance throughout the room. In smaller rooms, a lower mist level will suffice to avoid overwhelming the space.
4. Personal Preference: Everyone has different preferences when it comes to the strength of the scent. Some may prefer a subtle and gentle aroma, while others enjoy a more pronounced and noticeable fragrance. Adjust the mist level to align with your personal preference and the desired ambiance.
5. Intermittent or Continuous Mist: Some ultrasonic aroma diffusers offer the option to choose between intermittent and continuous mist modes. Intermittent mode releases mist in short intervals, while continuous mode provides a constant stream of mist. Decide which mode suits your preference and switch between them accordingly.
6. Experiment and Observe: The best way to find the ideal mist level is through experimentation. Observe the diffusion process and evaluate the strength of the scent. It may take a few adjustments to find the perfect balance that enhances the atmosphere without overpowering it.
7. Consider the Essential Oil: Different essential oils have varying degrees of intensity and volatility. Some oils have a stronger fragrance and may require a lower mist level to achieve the desired aroma, while others may need a higher mist level to adequately disperse the scent.
8. Regularly Assess and Adjust: As the diffusion process progresses, periodically assess the scent intensity in the room. Adjust the mist level as needed to maintain the desired fragrance without overwhelming the space.
By following these steps, you can easily adjust the mist level on your ultrasonic aroma diffuser to create the perfect aromatic environment. Remember to consider factors such as room size, personal preference, and the characteristics of the essential oils being used to achieve the ideal balance of scent and mist intensity.
Turning on the Diffuser
Once you have filled the water tank and added the desired essential oils, it’s time to turn on your ultrasonic aroma diffuser and enjoy the aromatic experience. Follow these steps to power on the diffuser and set it up for optimal performance:
1. Ensure Proper Connection: Check that your diffuser is properly connected to a power source or that the batteries are inserted correctly if your diffuser operates on battery power.
2. Position the Diffuser: Place the diffuser on a flat, stable surface in the desired location. Make sure there is adequate space around the diffuser, allowing the mist to disperse freely into the room.
3. Turn on the Power: Locate the power button or switch on your diffuser. Press the button or slide the switch to power on the diffuser. Some diffusers may have additional buttons for mist settings, timers, or light options.
4. Select Mist Options: Depending on your diffuser model, you may have the option to adjust the mist settings. Common options include high or low mist output and continuous or intermittent mist modes. Choose the setting that suits your preference.
5. Set the Timer: If your diffuser has a timer feature, set the desired duration for the diffuser to operate. Timers can range from 1 hour to several hours, or even have options for continuous operation. This allows you to customize the diffusion time according to your needs.
6. Optional: Adjust Light Options: Some ultrasonic aroma diffusers offer built-in LED lights that can enhance the ambiance. If you wish to use the light feature, choose the color or mode that creates the desired atmosphere in your space.
7. Enjoy the Aromatic Experience: Once you have set the desired mist, timer, and light options, sit back and relax as the diffuser begins to release a fine mist of fragrant essential oils into the air. Breathe in deeply and let the therapeutic aroma envelop your space.
8. Monitor Water Level: Keep an eye on the water level in the tank, especially during longer diffusion sessions. Some diffusers have an automatic shut-off feature when the water level is low, while others may continue to operate but with reduced mist output. Refill the water tank as needed to maintain an uninterrupted aromatic experience.
By following these steps, you can easily turn on your ultrasonic aroma diffuser and create a soothing and aromatic environment in your home or office. Sit back, relax, and enjoy the benefits of aromatherapy as the diffuser fills your space with delightful scents.
Setting the Timer
Setting the timer on your ultrasonic aroma diffuser allows you to control the duration of the diffusion process. A timer ensures that the diffuser operates for a specified period of time and automatically shuts off, offering convenience and energy efficiency. Follow these steps to set the timer on your diffuser:
1. Determine Timer Options: Check the timer options available on your ultrasonic aroma diffuser. Common timer settings include 1 hour, 3 hours, 6 hours, and continuous operation. Some diffusers may offer additional intervals or customizable timer settings.
2. Understand Your Needs: Define your purpose for using the diffuser and consider the desired duration of the aromatic experience. If you would like a quick burst of fragrance, a shorter timer setting may be appropriate. For longer-lasting diffusion, opt for a longer timer duration.
3. Locate the Timer Button: Identify the timer button or feature on your diffuser. Depending on the model, the timer button may be a separate button or incorporated into the diffuser’s control panel.
4. Select the Timer Duration: Press or toggle the timer button to cycle through the available options. Choose the desired timer duration that aligns with your needs and preferences.
5. Confirm the Timer Setting: Once you have selected the appropriate timer duration, confirm the setting by pressing the timer button again or following the instructions provided by the diffuser’s manufacturer. Some diffusers may require an additional press of a start or confirmation button to activate the timer.
6. Observe the Operation: Watch as your ultrasonic aroma diffuser begins the diffusion process. The diffuser will emit a fine mist of fragrant essential oils into the air according to the selected timer setting.
7. Enjoy the Aromatic Experience: Sit back, relax, and enjoy the aromatic experience as the diffuser fills your space with delightful scents. The diffuser will continue to operate until the timer duration elapses, after which it will automatically shut off.
8. Adjust Timer Settings as Needed: If you find that the timer duration does not suit your desired outcome, feel free to adjust the timer setting accordingly. Experiment with different durations to find the optimal balance of fragrance and operation time.
By setting the timer on your ultrasonic aroma diffuser, you can enjoy the benefits of aromatherapy without the need to manually turn off the diffuser. This convenient feature ensures efficient use of essential oils, promotes safety, and allows you to customize the duration of your aromatic experience.
Cleaning and Maintenance
Proper cleaning and maintenance of your ultrasonic aroma diffuser are essential for optimal performance and longevity. Regular maintenance ensures that your diffuser continues to operate efficiently and delivers a delightful aromatic experience. Follow these steps to clean and maintain your diffuser:
1. Power Off and Unplug: Before cleaning, make sure to power off the diffuser and unplug it from the electrical outlet. This ensures your safety and prevents any potential damage to the diffuser.
2. Empty any Remaining Water: Carefully remove any remaining water from the water tank. To avoid spilling water on the diffuser, you may want to hold a paper towel or cloth underneath the tank as you empty it.
3. Clean the Water Tank: Fill the water tank halfway with clean water and add a few drops of mild dish soap. Use a soft brush or cloth to gently scrub the walls of the water tank and the interior surface. Pay close attention to any areas with residue or build-up.
4. Rinse Thoroughly: After cleaning, rinse the water tank with clean water to remove any soap residue. Ensure that all soap is thoroughly rinsed out to prevent it from affecting the fragrance of future aromatherapy sessions.
5. Clean the Ultrasonic Plate: Use a cotton swab or soft brush to clean the ultrasonic plate, which is typically located at the bottom of the water tank. Gently wipe away any mineral deposits or oil residue that may have accumulated on the plate. Take care not to damage or dislodge any components during the cleaning process.
6. Dry the Water Tank: After rinsing, allow the water tank to air dry completely before reassembling it. Ensure that no moisture remains inside the tank to prevent the growth of mold or mildew.
7. Clean the Exterior: Use a soft, damp cloth to wipe down the exterior of the diffuser. This helps remove any dust or dirt that may have accumulated on the surface. Avoid using harsh chemicals or abrasive materials, as they can damage the diffuser’s finish.
8. Regular Maintenance: To maintain the performance of your ultrasonic aroma diffuser, it is recommended to clean it once a week or after every 3-4 uses. Regular maintenance helps prevent clogging and ensures consistent diffusion.
9. Check the User Manual: Consult the user manual provided by the manufacturer for specific cleaning instructions tailored to your diffuser model. Different diffusers may have unique requirements or components that need special attention during cleaning.
By regularly cleaning and maintaining your ultrasonic aroma diffuser, you can prolong its lifespan and continue to enjoy the benefits of aromatherapy. A clean diffuser not only ensures optimal performance but also ensures the purity and effectiveness of the essential oils used.
Troubleshooting Tips
While ultrasonic aroma diffusers are generally reliable, occasional issues may arise. Here are some troubleshooting tips to help you address common problems and ensure optimal performance:
1. Diffuser Not Powering On: Check if the diffuser is properly connected to a power source or if the batteries need to be replaced. Ensure that the electrical outlet is functioning correctly by plugging in another device.
2. No Mist Being Released: If the diffuser is powered on but no mist is being released, check if the water level is too low. Refill the water tank to the recommended level and ensure that the lid or cap is tightly closed. Also, verify that the ultrasonic plate is clean and free from any deposits.
3. Weak Mist Output: If the mist output is weak, make sure the water level is sufficient and the essential oil-to-water ratio is appropriate. Cleaning the ultrasonic plate and ensuring there are no obstructions in the airflow can also improve the mist output.
4. Strange Smell or Taste in the Mist: If you experience an unusual odor or taste in the mist, it may indicate that the water tank or ultrasonic plate needs a thorough cleaning. Follow the cleaning steps outlined in the user manual to remove any residue or build-up.
5. Device Overheating: If the diffuser feels excessively hot, immediately power it off and unplug it. Allow the diffuser to cool down completely before attempting to use it again. If the problem persists, contact the manufacturer for assistance.
6. Excessive Noise: Some diffusers may produce a slight humming sound during operation, which is normal. However, if the noise is excessively loud or grinding, it may indicate an issue. Ensure that the diffuser is on a flat surface and that no foreign objects are obstructing the mist output or vibrating parts of the diffuser.
7. Inconsistent Timer Functioning: If the diffuser’s timer function is not working correctly, ensure that you have followed the proper steps to program it. If the issue persists, consult the user manual to see if there are any specific instructions or troubleshooting steps for the timer function.
8. Contact Customer Support: If you have tried troubleshooting the issue and it persists, or if you encounter any other problems not covered by the user manual, reach out to the manufacturer’s customer support for further assistance or to inquire about warranty coverage.
Remember to always consult the user manual provided by the manufacturer for specific troubleshooting steps and contact customer support if the issue cannot be resolved on your own. By following these troubleshooting tips, you can overcome common challenges and continue enjoying the benefits of your ultrasonic aroma diffuser.
Safety Precautions
While ultrasonic aroma diffusers are generally safe to use, it is important to follow certain safety precautions to ensure a risk-free and enjoyable aromatherapy experience. Here are some safety guidelines to keep in mind:
1. Read the User Manual: Carefully read and understand the user manual provided by the manufacturer. Familiarize yourself with the specific instructions, maintenance guidelines, and any warnings or precautions specific to your diffuser model.
2. Place on a Stable Surface: Always place your diffuser on a flat and stable surface. Avoid placing it on uneven or unstable surfaces to prevent accidental spills or toppling.
3. Keep Out of Reach of Children and Pets: Keep the diffuser out of the reach of children and pets. Essential oils can be harmful if ingested, and the diffuser may contain hot water or produce heat during operation, posing potential hazards.
4. Use Recommended Essential Oils: Use only high-quality essential oils that are recommended for use with aromatherapy diffusers. Avoid using synthetic oils or fragrance oils, as these may not be suitable for diffusers and can cause damage to the unit.
5. Follow Recommended Oil-to-Water Ratios: Adhere to the recommended oil-to-water ratios provided by the manufacturer or outlined in the user manual. Overuse of essential oils can lead to overpowering scents and may affect the performance of the diffuser.
6. Avoid Direct Skin Contact: Essential oils are highly concentrated and should not come into direct contact with the skin without proper dilution. Always follow the recommended guidelines for topical use of essential oils.
7. Monitor Water Levels: Pay attention to the water levels in the diffuser’s tank. Do not let the tank run dry during operation, as this can cause damage to the diffuser. Refill the tank as needed according to the manufacturer’s instructions.
8. Use in Well-Ventilated Areas: Ensure that the area where the diffuser is placed is well-ventilated. This allows for proper dispersal of the essential oils and prevents the accumulation of excessive fragrance in enclosed spaces.
9. Follow Electrical Safety Guidelines: If your diffuser is powered by electricity, plug it into a properly grounded electrical outlet. Avoid using extension cords or power strips that may overload the electrical circuit.
10. Regularly Clean and Maintain: Regularly clean and maintain your diffuser according to the manufacturer’s instructions. This helps ensure optimal performance and reduces the risk of mold or bacterial growth.
11. Unplug When Not in Use: When you’re finished using the diffuser, unplug it from the electrical outlet. This prevents any potential electrical hazards and conserves energy.
By following these safety precautions, you can enjoy the benefits of your ultrasonic aroma diffuser with peace of mind. Always prioritize your safety and the safety of those around you when using any electrical device and handling essential oils.