
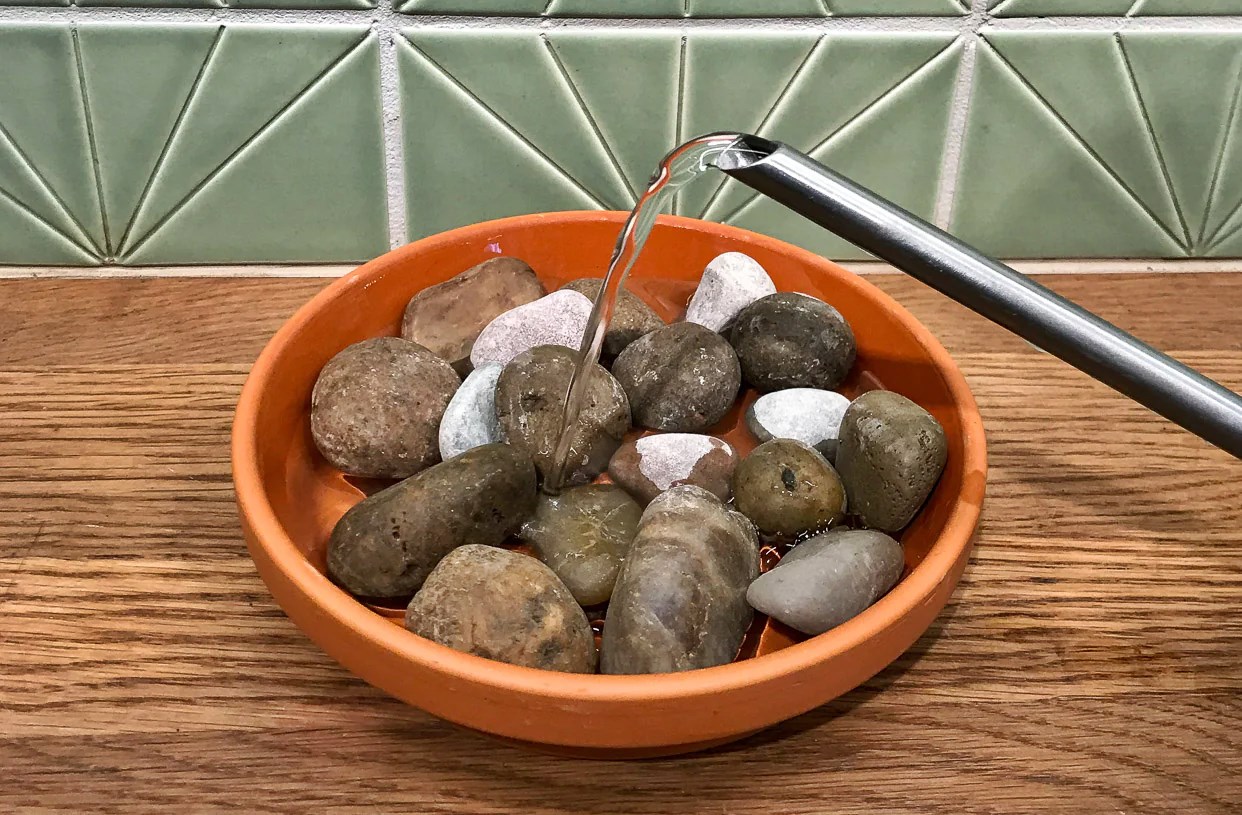
What is a Pebble Tray?
A pebble tray is a simple and effective tool that can be used to increase humidity levels around plants. It consists of a shallow tray filled with water and topped with a layer of pebbles. The plants are placed on top of the pebbles, allowing them to benefit from the evaporating water below.
Plants naturally transpire water through their leaves, a process that helps to regulate temperature and moisture levels. In indoor environments, where humidity can be low, this transpiration process can be disrupted, leading to dry and stressed plants. A pebble tray helps to combat this issue by increasing humidity around the plants.
The principle behind a pebble tray is simple. As the water in the tray evaporates, it releases moisture into the surrounding air. The layer of pebbles serves to elevate the plants above the water, preventing them from sitting in standing water and potentially causing root rot. Instead, the plants benefit from the increased humidity levels, which can help to keep their foliage healthy and vibrant.
Pebble trays are particularly useful for plants that thrive in high humidity environments, such as tropical plants like ferns, orchids, and tropicals. They can also be beneficial for plants that are sensitive to changes in humidity or those that have been recently repotted and require a bit of extra care.
Not only do pebble trays increase humidity, but they can also add a decorative element to your indoor garden. The pebbles come in various colors and sizes, allowing you to choose a combination that complements your plants and overall decor.
Now that you understand what a pebble tray is and how it can benefit your plants, let’s delve into why using a pebble tray is a smart choice for any indoor gardener.
Why Use a Pebble Tray?
Using a pebble tray offers numerous benefits for both your plants and your indoor environment. Here are some compelling reasons why you should consider incorporating a pebble tray into your plant care routine:
1. Increased Humidity: One of the primary reasons to use a pebble tray is to raise the humidity levels around your plants. Many indoor plants, especially those native to tropical regions, thrive in high humidity environments. By using a pebble tray, you can help recreate their natural habitat and ensure they receive the moisture they need to remain healthy and vibrant.
2. Prevents Dryness: Dry indoor air can lead to various issues, such as dry and brittle foliage, brown leaf tips, and stunted growth. A pebble tray helps combat these problems by releasing moisture into the air through evaporation. This additional humidity can prevent dryness and create a more favorable environment for your plants to thrive.
3. Easy to Set Up: Setting up a pebble tray is incredibly simple and requires minimal effort. All you need is a shallow tray, pebbles, and water. Choose a tray that is large enough to accommodate your plants without overcrowding them. Fill the tray with a layer of pebbles, then add water until it reaches just below the surface of the pebbles. Place your plants on top, ensuring that the pots do not directly touch the water. Voila! You now have a functional pebble tray.
4. Cost-Effective Solution: Pebble trays are a cost-effective way to increase humidity in your indoor environment. Instead of investing in expensive humidifiers, a pebble tray can provide a similar effect at a fraction of the cost. It is an affordable option that can benefit a wide range of plants.
5. Aesthetically Pleasing: In addition to their practical benefits, pebble trays can also enhance the visual appeal of your indoor garden. The pebbles come in various sizes, colors, and textures, allowing you to choose a combination that complements your plant’s aesthetic and adds a decorative touch to your space.
6. Low Maintenance: Once set up, pebble trays require minimal maintenance. You simply need to keep an eye on the water level and ensure it doesn’t completely evaporate. Refill the tray as needed to maintain the desired humidity levels. Additionally, the pebbles can help absorb excess water, preventing the roots from sitting in waterlogged soil.
Overall, using a pebble tray offers a convenient and effective way to increase humidity and create a more favorable environment for your indoor plants. Now that you understand the benefits of using a pebble tray, let’s explore how to set one up properly.
How to Set Up a Pebble Tray
Setting up a pebble tray is a straightforward process that requires just a few simple steps. Follow these guidelines to ensure you create an effective and functional pebble tray for your indoor plants:
1. Choose the Right Pebbles: Select pebbles that are clean, smooth, and not too large. Avoid using rough or jagged stones that may cause damage to the plant roots or hinder water flow. It’s best to opt for natural river stones or decorative pebbles specifically designed for indoor use.
2. Select the Perfect Tray: Look for a shallow tray that is large enough to accommodate your plants. It should be slightly larger than the base of your pots to ensure proper coverage. The tray can be made of plastic, ceramic, or any other waterproof material that can hold water without leaking.
3. Prepare the Tray: Thoroughly clean the tray before use to remove any dirt or debris. This will help maintain a clean and healthy environment for your plants. You can wash the tray with mild soap and water and rinse it thoroughly to ensure there are no residues left behind.
4. Add Pebbles to the Tray: Pour a layer of pebbles into the tray, ensuring they cover the bottom surface evenly. The depth of the pebble layer should be around 1 to 2 inches, enough to provide a stable base for your plants while allowing water to evaporate effectively.
5. Add Water to the Tray: Carefully pour water into the tray, stopping just below the surface of the pebbles. Avoid filling the tray to the brim to prevent overflow when the water starts evaporating. Regular tap water is usually sufficient for the tray, but if your tap water has high mineral content, you may consider using distilled or filtered water to prevent mineral buildup on the pebbles.
6. Place Your Plants on the Tray: Position your potted plants on top of the pebbles in the tray. Ensure that the pots are elevated and don’t come into direct contact with the water. This will prevent waterlogging and potential root rot. If you have multiple plants, space them out evenly to allow air circulation and avoid overcrowding.
7. Care for Your Pebble Tray: Monitor the water level in the tray regularly and refill as needed to maintain the desired humidity. Depending on the conditions of your indoor environment, you may need to add water every few days or once a week. Additionally, keep an eye on the cleanliness of the tray and pebbles, removing any debris or algae that may accumulate over time.
By following these steps, you can establish a functional and visually appealing pebble tray to create a humid microclimate for your indoor plants. Now you’re ready to enjoy the benefits of using a pebble tray and provide your plants with the optimal growing conditions they need.
Choosing the Right Pebbles
When setting up a pebble tray, selecting the right type of pebbles is essential for both functionality and aesthetics. Here are some factors to consider when choosing the perfect pebbles for your pebble tray:
1. Size: Opt for pebbles that are small to medium in size, typically ranging from 1/4 inch to 1 inch in diameter. Avoid using oversized stones, as they can make it difficult for water to evaporate effectively and may hinder air circulation around the plants.
2. Material: Natural river stones, such as smooth beach pebbles or polished river rocks, are excellent choices for pebble trays. They offer a decorative element while allowing water to flow freely. You can also find decorative pebbles specifically designed for indoor use, such as colorful glass pebbles or smooth ceramic stones.
3. Texture: Look for pebbles with a smooth texture rather than rough or jagged stones. Smooth pebbles not only provide a pleasant visual appeal but also protect your plant roots from potential damage. Avoid using pebbles with sharp edges that could cause harm to your plants when placing them on the tray.
4. Color: Consider the color of the pebbles to create a pleasing aesthetic for your pebble tray. Choose colors that complement your plants or match the overall decor of your space. Earth tones like brown, tan, or gray are popular choices that blend well with most indoor environments.
5. Porosity: It is essential to use pebbles that are porous to facilitate proper water evaporation. Porous stones absorb water and allow it to slowly evaporate into the surrounding air, increasing humidity levels. Avoid non-porous materials like glass or glazed ceramic, as they may trap water and hinder evaporation.
6. Cleanliness: Ensure that the pebbles you choose are clean and free from dirt, debris, or any substances that could potentially harm your plants. If you collect pebbles from outdoors, thoroughly wash and rinse them to remove any contaminants before using them in your pebble tray.
7. Personal Preference: Ultimately, your choice of pebbles should align with your personal aesthetic and style. Experiment with different combinations of colors, sizes, and textures to create a pebble tray that complements your indoor plants and adds a touch of visual interest to your space.
By considering these factors and selecting pebbles that meet your criteria, you can create a visually appealing and functional pebble tray that enhances the humidity around your plants. Now that you know how to choose the right pebbles, let’s move on to selecting the perfect tray for your pebble tray setup.
Selecting the Perfect Tray
When setting up a pebble tray, choosing the right tray is crucial to ensure optimal functionality and aesthetic appeal. Here are some considerations to keep in mind when selecting the perfect tray for your pebble tray setup:
1. Size: The size of the tray should be appropriate for the number and size of your plants. It should be slightly larger than the base of your pots to accommodate them comfortably without overcrowding. Additionally, make sure the tray fits well within the space where you intend to place it.
2. Shallow Depth: Opt for a tray with a shallow depth to prevent excessive water accumulation and ensure proper evaporation. A depth of around 1 to 2 inches is usually sufficient to provide a stable base for the pebbles while allowing for adequate airflow.
3. Material: Choose a waterproof material for your tray to prevent leakage. Plastic trays, ceramic dishes, or even shallow saucers can work well as long as they can hold water without seeping through. Consider the durability and longevity of the material to ensure it will withstand regular use and the weight of your plants.
4. Aesthetics: Consider the visual appeal of the tray to complement your indoor space and enhance the overall aesthetic. Look for a tray that matches your personal style and blends with the decor of the room. You can choose a tray with a color, texture, or pattern that adds a decorative touch to your pebble tray setup.
5. Functionality: Ensure that the tray provides stability and support for the pebbles and plants. It should have a flat and even surface to prevent tilting or slippage. Additionally, consider whether the tray is easy to clean and maintain, as it will require regular monitoring and occasional water refills.
6. Fit for Purpose: Identify the specific requirements of your plants when selecting a tray. Some plants may have larger root systems and require trays with more depth or width. Additionally, certain plants may benefit from a tray with built-in drainage holes for better water regulation.
7. Accessibility: Consider the practicality of accessing the tray for maintenance purposes. If you plan to place the tray on a high shelf or in a tight space, ensure that you can easily reach it to refill the water and clean the tray without any inconvenience.
By considering these factors, you can select a tray that meets both your functional needs and aesthetic preferences. A well-chosen tray will provide a stable and visually appealing foundation for your pebble tray setup, ensuring an optimal environment for your plants to thrive. Now, let’s move on to preparing the tray for use.
Preparing the Tray
Before setting up your pebble tray, it’s important to prepare the tray properly to create an optimal environment for your plants. Here are the steps to follow for preparing the tray:
1. Clean the Tray: Thoroughly clean the tray to ensure it is free from any dirt, dust, or residues that could potentially harm your plants. Use mild soap and water to wash the tray, scrubbing gently if needed. Rinse it thoroughly to remove any cleaning agents, and then dry it completely before proceeding.
2. Check for Leaks: Inspect the tray carefully for any signs of leakage. Fill the tray with water and let it sit for a few hours to see if any water seeps through. If you notice any leaks, either repair the tray or consider using a different one to prevent water damage to your surfaces.
3. Place a Barrier: To prevent the pebbles from directly touching the tray’s surface, which may trap standing water and affect proper evaporation, you can place a barrier between the pebbles and the tray. A piece of landscaping fabric or a plastic mesh can be used as a barrier to keep the pebbles elevated.
4. Install the Barrier: If using a barrier, cut it to fit the size of the tray and lay it flat at the bottom. Ensure that it covers the entire tray surface, extending slightly up the sides. This will create a separation between the pebbles and the tray, allowing water to flow freely and evaporate effectively.
5. Arrange the Pebbles: Pour a layer of pebbles onto the tray, making sure they cover the barrier evenly. Create a smooth and level surface by spreading them out with your hand or a small tool. The pebbles should be distributed evenly to provide a stable base for your plants.
6. Clean the Pebbles: Before placing your plants on the tray, rinse the pebbles thoroughly to remove any dust or debris. This will help maintain a clean and healthy environment for your plants and prevent any unwanted particles from affecting the water or the plant roots.
7. Ensure Proper Drainage: Double-check that the pebbles are not blocking any drainage holes in your plant pots. Adequate drainage is crucial to prevent waterlogging and root rot. Adjust the pebbles as needed to ensure that the water can flow freely through the drainage holes.
By following these steps, you can properly prepare the tray for use and ensure that it provides a stable foundation for your pebble tray setup. With the tray prepared, it’s time to add water and create the humid environment that your plants will love.
Adding Water to the Tray
Once your pebble tray is prepared, the next step is to add water to create the humid environment that will benefit your plants. Here’s how to properly add water to the tray:
1. Determine the Water Level: The water level in the tray should be below the surface of the pebbles. Aim for a level that allows the pebbles to remain partially submerged without touching the bottom of the pots or covering the drainage holes. This allows for proper evaporation while avoiding over saturation of the soil.
2. Fill the Tray: Carefully pour water into the tray, being mindful not to disturb the pebbles or overflow the tray. Start with a gradual amount of water and assess the level as you go. Add more water if necessary, but make sure to stop before it reaches the surface of the pebbles.
3. Avoid Overfilling: It’s important not to overfill the tray as it can lead to waterlogging and increased risk of root rot. The purpose of the tray is to create humidity through evaporation, and excess water can dampen the soil and adversely affect your plants’ health. Always ensure there is a gap between the water level and the top of the pebbles.
4. Choose the Right Water: The quality of the water you use can impact the health of your plants. While tap water is generally suitable, consider using filtered or distilled water if your tap water contains high levels of minerals or chemicals that may accumulate on the pebbles over time. This will help prevent any unwanted buildup and maintain a clean environment.
5. Monitor the Water Level: Regularly check the water level in the tray to ensure it does not completely evaporate. As the water evaporates, you may need to add more to maintain the desired humidity levels. The frequency of refilling will depend on factors such as the humidity of your environment and the size of your tray.
6. Avoid Standing Water: Standing water in the tray can lead to the growth of algae and create an environment conducive to pests. If you notice any standing water, drain or scoop it out to maintain a clean and healthy habitat for your plants. The pebbles should always be moist but not submerged.
7. Adjust the Water Level: Pay attention to the water level in the tray and adjust it as needed. If you find that your plants require more humidity, you can increase the water level slightly. Conversely, if you notice excessive moisture or if the plants are not benefiting from the pebble tray, reduce the amount of water and allow some of it to evaporate.
By adding water to the tray in the proper manner, you create a humid microclimate for your plants that promotes their growth and overall health. Now that the water is added, it’s time to place your plants on the tray and start caring for them in their new environment.
Placing Your Plants on the Tray
Now that your pebble tray is filled with water, it’s time to carefully place your plants on top of the pebbles. Here are the steps to properly position your plants on the tray:
1. Elevate the Pots: Ensure that the pots of your plants are elevated above the water level in the tray. Direct contact with the water can lead to waterlogging and root rot. Place the pots on top of the pebbles, allowing air to circulate freely around the base of the pots.
2. Space Out the Plants: Arrange your plants on the tray, ensuring that they have adequate space between them. Proper spacing allows for better air circulation and prevents overcrowding, which can lead to stagnant moisture and increased risk of fungal diseases.
3. Position for Ideal Growth: Consider the growth habits and light requirements of each plant when positioning them on the tray. Taller plants with a tendency to lean should be placed towards the back, while shorter plants can be placed towards the front. This will ensure that all plants receive adequate light and have room to thrive.
4. Group Compatible Plants: If you have multiple plants in the pebble tray, consider grouping together those that have similar humidity and care requirements. This will help create a more uniform environment for these plants and make maintenance and watering more convenient.
5. Rotate for Balanced Growth: To promote even growth and prevent the plants from leaning towards the light source, periodically rotate the plants on the tray. By rotating them every few weeks, you encourage uniform exposure to light and ensure balanced growth on all sides of the plants.
6. Observation and Adjustment: Observe your plants closely after placing them on the tray. Check for any signs of stress, such as yellowing leaves or wilting. If you notice any issues, adjust the placement of the plants to provide them with more or less light or adjust the water level in the tray if necessary.
7. Monitor and Maintain: Regularly monitor the condition of your plants while they are on the pebble tray. Keep an eye on moisture levels, growth patterns, and signs of any pests or diseases. Attend to the needs of each plant individually, adjusting watering, light exposure, and care as required.
By carefully placing your plants on the pebble tray, you ensure that they can benefit from the increased humidity while maintaining a healthy growing environment. Now, let’s explore how to care for your pebble tray and its accompanying plants to maximize their growth potential.
Caring for Your Pebble Tray
Regular care and maintenance are essential to ensure the longevity and effectiveness of your pebble tray and the health of your plants. Here are some tips for properly caring for your pebble tray:
1. Monitor Water Level: Check the water level in the tray regularly to ensure it doesn’t completely evaporate. Refill the tray as needed to maintain the desired humidity levels. Depending on the temperature and humidity of your environment, you may need to add water every few days or once a week.
2. Clean the Tray: Regularly clean the tray to remove any debris, algae, or mineral buildup. Empty the tray, wipe it clean with a soft cloth or sponge, and rinse it thoroughly. This helps maintain a clean environment and prevent any potential issues related to stagnant water or algae growth.
3. Clean the Pebbles: Occasionally rinse the pebbles to remove any dust or dirt that may accumulate on their surface. This will keep them looking clean and prevent any unwanted particles from affecting the water or the plants. Rinse the pebbles under running water and allow them to air dry before placing them back in the tray.
4. Check for Pest or Disease: Regularly inspect your plants for any signs of pests or diseases. Monitor for issues such as yellowing leaves, browning tips, or unusual spots. If you notice any problems, promptly address them by taking appropriate measures, such as using organic pest control methods or adjusting watering and care practices.
5. Prune and Trim: Trim any dead or yellowing leaves from your plants as necessary. This helps maintain their overall health and appearance. Additionally, prune back any overgrown branches to promote bushier growth and prevent crowding on the pebble tray.
6. Rotate the Plants: To ensure even exposure to light and promote balanced growth, periodically rotate the plants on the tray. This prevents the plants from leaning towards the light source and encourages uniform growth on all sides. Rotate the plants every few weeks or as needed depending on their growth patterns.
7. Fertilize as Needed: Depending on the nutrient requirements of your plants, consider fertilizing them periodically. Use a balanced, water-soluble fertilizer specifically designed for indoor plants. Follow the instructions on the fertilizer packaging for the appropriate dilution and application frequency.
8. Maintain Good Air Circulation: Adequate air circulation around your plants is important to prevent the growth of mold or fungus. Avoid overcrowding the tray with too many plants or placing it in a stagnant area. Position it in a well-ventilated space with enough room for air movement around the plants.
By following these care tips, you can ensure that your pebble tray remains clean, your plants thrive in a suitable environment, and you can enjoy the benefits of increased humidity. With proper care, your pebble tray will continue to provide a healthy and humid microclimate for your indoor plants to thrive.
Benefits of Using a Pebble Tray
Using a pebble tray offers a range of benefits for both your plants and your indoor environment. Here are some key advantages of incorporating a pebble tray into your plant care routine:
1. Increased Humidity: A pebble tray helps to raise humidity levels around your plants, creating a more favorable environment, especially for plants that thrive in high humidity. Increased humidity can prevent dryness, minimize leaf browning, and keep your plants healthy and vibrant.
2. Natural Moisture Regulation: By implementing a pebble tray, you allow your plants to benefit from natural moisture regulation. As the water in the tray evaporates, it releases moisture into the air around the plants, mimicking their natural habitat and supporting proper transpiration.
3. Improved Plant Health: The increased humidity provided by a pebble tray can help improve overall plant health. It reduces the risk of dryness, prevents wilting, and promotes lush foliage. Healthy plants are more resistant to pests and diseases, leading to fewer plant care challenges.
4. Cost-Effective Solution: Using a pebble tray is a cost-effective way to increase humidity in your indoor environment. Compared to investing in expensive humidifiers, a pebble tray offers similar benefits at a fraction of the cost. It’s a budget-friendly solution to enhance the well-being of your plants.
5. Easy Setup and Maintenance: Setting up a pebble tray is simple and requires minimal effort. You only need a tray, pebbles, and water. It’s a low maintenance option that doesn’t require complex equipment or frequent adjustments. With regular checks and refills, maintaining a pebble tray is hassle-free.
6. Aesthetically Pleasing: Pebble trays not only serve a functional purpose but also add a decorative element to your indoor space. The pebbles come in various colors and sizes, allowing you to create a visually appealing display. You can choose a combination that complements your plants and enhances the overall aesthetic of your home or office.
7. Versatility: Pebble trays can be used for a wide range of plants, whether they are tropical plants, succulents, or other moisture-loving varieties. Thanks to their simplicity and adaptability, pebble trays can cater to different plant species and provide the right amount of humidity for their specific needs.
8. Educational and Therapeutic: Using a pebble tray provides an opportunity to observe and connect with your plants more closely. It allows you to learn about their specific humidity requirements and observe how they respond to the controlled environment. Engaging with your plants in this way can also have a calming and therapeutic effect.
Incorporating a pebble tray into your plant care routine can have a positive impact on the health and growth of your indoor plants. From improved humidity to enhanced aesthetics, pebble trays offer practical advantages that contribute to a thriving indoor garden.