
Choosing the Right Type of Wood for Your Serving Tray
When it comes to treating a wood serving tray, selecting the right type of wood is crucial. Not all woods are suitable for food contact, and some may not withstand the test of time. Here are a few popular types of wood that are commonly used for serving trays:
- Maple: Maple wood is known for its durability and resistance to warping. It has a smooth texture and a light color, making it easy to stain or finish according to your preference.
- Cherry: Cherry wood is a favorite among woodworkers due to its natural beauty and rich color. It is also highly resistant to moisture, making it an excellent choice for a wood serving tray.
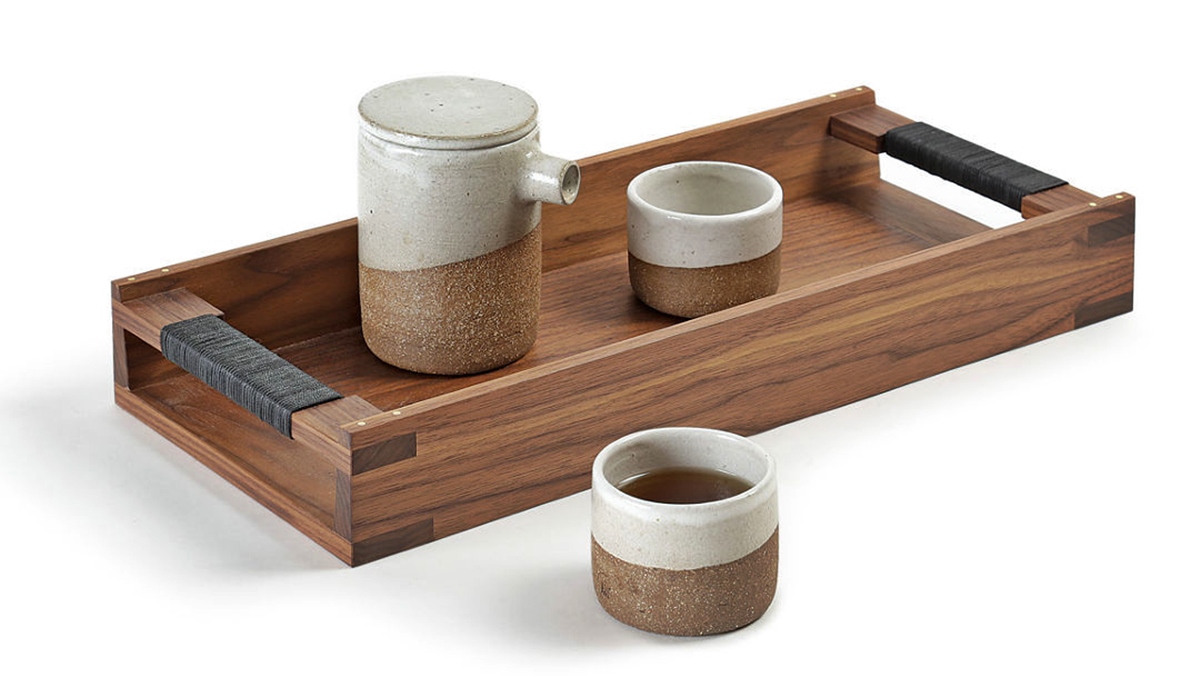
- Walnut: Walnut wood offers a deep, rich tone and a stunning grain pattern. It is a dense hardwood that is resistant to scratches, making it a durable choice for a serving tray.
- Bamboo: If you prefer an eco-friendly option, bamboo is a great choice. It is a sustainable and renewable material that is not only aesthetically pleasing but also highly durable.
- Teak: Teak wood is well-known for its natural oils that make it water-resistant and highly resistant to rotting. It is an excellent choice if you anticipate using your serving tray outdoors or in humid environments.
Ultimately, the choice of wood for your serving tray will depend on your personal preferences and specific needs. Consider factors such as the desired aesthetic, durability, and resistance to moisture before making your final decision. Remember, selecting the right type of wood will lay the foundation for the treatment process and ensure the longevity of your serving tray.
Preparing the Wood for Treatment
Before you can start treating your wood serving tray, it is essential to properly prepare the wood. This step is crucial as it helps to ensure that the treatment products penetrate the wood effectively and provide optimal protection. Here’s how you can prepare the wood for treatment:
- Remove any existing finishes: If your wood serving tray has any existing finishes, such as varnish or paint, you will need to remove them before applying the treatment. Use a suitable stripping agent or sandpaper to gently remove the finish. Ensure that the wood is smooth and free from any residue before proceeding.
- Fill any imperfections: Inspect the wood for any cracks, holes, or dents and fill them with a suitable wood filler. Smooth out the filler and allow it to dry completely. Once dry, sand the area to create a seamless surface.
- Clean the wood thoroughly: Use a damp cloth to wipe down the wood and remove any dust, dirt, or debris. If necessary, use a mild detergent to clean stubborn stains, but make sure to rinse the wood thoroughly and allow it to dry completely before moving on.
- Inspect for pests: Check the wood for any signs of pests, such as termites or woodworms. If you notice any infestation, it is crucial to address the issue before proceeding with the treatment process. Consult a professional if necessary to ensure that the wood is pest-free.
By properly preparing the wood for treatment, you are setting the stage for a successful and long-lasting result. Taking the time to remove existing finishes, fill imperfections, clean the wood, and inspect for pests will ensure that the treatment products adhere well to the surface and provide effective protection for your wood serving tray.
Sanding the Wood to a Smooth Finish
Once you have prepared the wood by removing any existing finishes and cleaning it, the next step in treating your wood serving tray is to sand it to achieve a smooth finish. Sanding not only creates a uniform surface but also helps to open up the wood’s pores, allowing the treatment products to penetrate effectively. Here’s how you can sand your wood serving tray:
- Select the right sandpaper: Choose sandpaper with an appropriate grit for your specific needs. For initial sanding, start with a coarser grit (around 80 to 120) to remove any rough spots or imperfections. Then gradually move to finer grits (220 to 400) for a smooth finish.
- Sand with the grain: Always sand in the direction of the wood grain to avoid causing scratches or damage. Use long, sweeping motions and apply gentle pressure to ensure an even sanding process. Take your time and be patient in this step.
- Check your progress: Periodically check the surface to ensure that you are achieving the desired smoothness. As you sand, the wood should become smoother and more uniform. Pay close attention to any remaining rough patches or uneven areas that may require additional sanding.
- Remove dust and debris: After sanding, use a brush or a tack cloth to remove any dust or debris from the surface of the wood. This step is crucial to ensure that the treatment products adhere properly and provide a flawless finish.
Sanding the wood to a smooth finish not only enhances the appearance of your wood serving tray but also prepares it for the next steps of treatment. By following these steps and being mindful of sanding with the grain, you will achieve a beautifully smooth surface that is ready for the application of wood sealers and finishes.
Applying a Wood Sealer
After sanding the wood to a smooth finish, the next step in treating your wood serving tray is to apply a wood sealer. A wood sealer acts as a protective layer, sealing the wood pores and preventing moisture and stains from penetrating the surface. Here’s how you can apply a wood sealer to your serving tray:
- Choose the right type of wood sealer: Select a wood sealer that is suitable for your specific type of wood and intended use. There are various types of sealers available, such as oil-based, water-based, or lacquer-based sealers. Consider factors like durability, ease of application, and food-safety when choosing the sealer.
- Prepare the wood: Ensure that the wood surface is clean and free from any dust or debris. You can use a cloth or brush to remove any lingering particles.
- Apply the sealer: Using a brush or cloth, apply an even coat of the wood sealer onto the surface of your serving tray. Work in the direction of the wood grain and make sure to cover all areas, including the edges. Allow the sealer to penetrate the wood for the recommended drying time specified on the product label.
- Remove excess sealer: After the recommended drying time, use a clean cloth or brush to remove any excess sealer from the surface. This step helps to ensure an even finish and prevents any potential buildup of the sealer.
- Allow proper curing time: Give the sealer sufficient time to cure and harden. Follow the manufacturer’s instructions for the recommended drying and curing time. Avoid using your serving tray until the sealer has completely cured.
Applying a wood sealer is an important step in protecting your serving tray from moisture, stains, and other potential damage. By choosing the right sealer, properly preparing the wood, and applying it evenly, you are enhancing the longevity and durability of your wood serving tray.
Staining the Wood (Optional)
If you want to add a touch of color or enhance the natural beauty of your wood serving tray, staining is an optional step that you can consider. Staining not only adds depth and richness to the wood but also provides additional protection. Here’s how you can stain your wood serving tray:
- Select the right stain: Choose a stain that complements the type of wood and the overall aesthetic you want to achieve. There are various types of wood stains available, such as oil-based, water-based, gel stains, or penetrating stains. Consider factors like ease of application, drying time, and desired color when selecting the stain.
- Prepare the wood: Ensure that the wood surface is clean, smooth, and free from any previous finishes. Sand the wood lightly to create a smooth surface and remove any imperfections. Make sure to remove any dust or debris from the surface.
- Test the stain: Before applying the stain to the entire serving tray, it’s a good idea to test it on a small, inconspicuous area of the wood. This will allow you to evaluate the color and determine if any adjustments need to be made.
- Apply the stain: Using a brush, cloth, or sponge applicator, apply an even coat of stain to the wood surface. Follow the manufacturer’s instructions for the recommended drying time between coats if multiple coats are desired. Ensure that you cover all areas, including the edges, and work with the grain of the wood.
- Wipe off excess stain: After applying the stain, use a clean cloth to wipe off any excess stain. This step helps to achieve an even and smooth finish, preventing any blotching or pooling of the stain.
- Allow proper drying and curing time: Allow the stain to dry completely according to the manufacturer’s instructions. Once dry, ensure that the stain is fully cured before using or applying any additional finishes to your wood serving tray.
Staining the wood is an optional step that can add beauty and character to your wood serving tray. It allows you to customize the color and achieve the desired look. Remember to follow the instructions provided by the stain manufacturer and take your time to apply the stain evenly to achieve the best possible results.
Applying a Food-Safe Finish
To ensure that your wood serving tray is not only visually appealing but also safe for food contact, it is important to apply a food-safe finish. A food-safe finish creates a protective barrier on the wood surface, preventing any harmful substances from leaching into food. Here’s how you can apply a food-safe finish to your serving tray:
- Choose a food-safe finish: Look for finishes that are specifically labeled as food-safe or suitable for food contact. Some popular options include mineral oil, beeswax, walnut oil, or food-grade varnish. Ensure that the finish does not contain any toxic chemicals or additives.
- Prepare the wood surface: Make sure that the wood surface is clean, smooth, and free from any stains or contaminants. If necessary, lightly sand the surface to create a smooth finish and remove any imperfections. Be sure to remove any dust or debris before applying the finish.
- Apply the food-safe finish: Using a clean cloth or brush, apply a liberal coat of the food-safe finish to the wood surface. Ensure that you cover all areas, including the edges. Allow the finish to penetrate the wood for the recommended drying time specified by the manufacturer.
- Remove any excess finish: After the recommended drying time, use a clean cloth to remove any excess finish from the surface. This step helps to achieve an even finish and prevents any potential buildup or stickiness.
- Allow proper curing time: Give the finish sufficient time to cure and harden. Follow the manufacturer’s instructions for the recommended drying and curing time. Avoid using your serving tray for food until the finish has completely cured.
Applying a food-safe finish is vital to ensure that your wood serving tray is safe for serving food. By selecting a suitable food-safe finish, properly preparing the wood surface, and applying the finish evenly, you can enjoy the beauty of your serving tray while maintaining the highest standards of food safety.
Buffing and Polishing the Wood
After applying the necessary treatments and finishes to your wood serving tray, the final step is to buff and polish the wood surface. This step enhances the appearance of the wood, giving it a smooth and lustrous finish. Here’s how you can buff and polish your wood serving tray:
- Ensure the finish is dry: Before starting the buffing and polishing process, make sure that the applied finishes have completely dried and cured. Refer to the manufacturer’s instructions for the recommended drying time.
- Choose the right polishing material: Depending on the type of finish and the level of shine desired, you can use various materials for buffing and polishing. Some common options include microfiber cloths, soft cotton cloths, or polishing pads.
- Apply a polishing compound: If you want to further enhance the shine of the wood, you can apply a small amount of a suitable polishing compound onto the polishing material. Ensure that the compound is specifically designed for use on wood surfaces.
- Buff the wood surface: Using the chosen polishing material, gently buff the wood surface in circular motions. Apply consistent, light pressure while ensuring that you cover all areas of the serving tray. Continue buffing until you achieve the desired level of shine.
- Remove any excess compound: After buffing, use a clean cloth to remove any excess polishing compound from the wood surface. This step is important to ensure a smooth and residue-free finish.
- Inspect and touch up (if necessary): Take a careful look at the entire surface of your wood serving tray after buffing and polishing. If you notice any areas that require touch-up, such as uneven shine or missed spots, you can carefully reapply the polishing process to those specific areas.
Buffing and polishing the wood surface of your serving tray adds the final touch of elegance and sophistication. By selecting the appropriate polishing material, using a suitable polishing compound, and applying gentle pressure, you can achieve a smooth and glossy finish that will showcase the natural beauty of the wood.
Maintaining and Caring for Your Wood Serving Tray
To ensure the longevity and continued beauty of your wood serving tray, proper maintenance and care are essential. By following some basic guidelines, you can keep your serving tray looking its best for years to come. Here are some tips for maintaining and caring for your wood serving tray:
- Keep it clean: Clean your serving tray regularly with a damp cloth to remove any spills, stains, or debris. Avoid using harsh chemicals or abrasive cleaners that can damage the wood. Dry the tray thoroughly after cleaning.
- Prevent moisture damage: Avoid placing hot or wet items directly on the wood surface. Always use coasters, trivets, or placemats to protect against heat and moisture. This will help to prevent warping, discoloration, or unwanted reactions with the wood.
- Apply maintenance coats: Over time, the finish on your serving tray may wear off or become dull. To maintain its protective properties and enhance its appearance, you can apply maintenance coats of a suitable wood sealer or food-safe finish as needed.
- Store properly: When not in use, store your wood serving tray in a cool, dry, and well-ventilated area. Avoid exposing it to direct sunlight or extreme temperatures, which can cause the wood to warp or fade.
- Inspect for damage: Regularly inspect your serving tray for any signs of damage, such as cracks, chips, or loose parts. Address any issues promptly to prevent further damage and ensure the longevity of your tray.
- Recondition the wood: Over time, the wood may become dry or lose its luster. Recondition the wood surface by applying a small amount of food-safe oil, such as mineral oil or walnut oil, and gently rubbing it into the wood. This will help restore moisture and enhance the natural beauty of the wood.
By following these maintenance and care tips, you can prolong the life and beauty of your wood serving tray. With regular cleaning, proper protection, and timely maintenance, your serving tray will continue to be a stunning centerpiece for your dining experiences.