
Assess the Damage
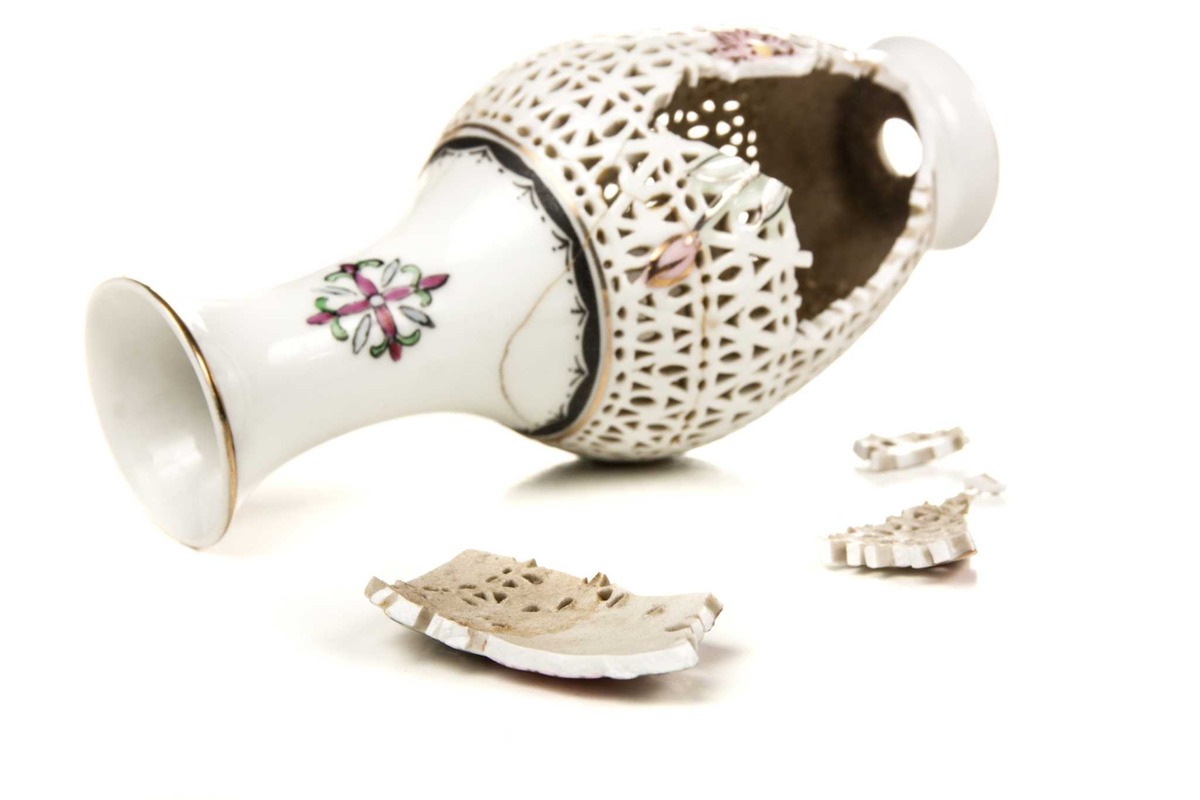
When confronted with a broken vase, the first step in repairing it is to assess the extent of the damage. Carefully examine the broken pieces to determine if any fragments are missing or chipped. Take note of the location and severity of the breaks, as well as any cracks or fractures that may not be immediately visible.
It is essential to evaluate the material of the vase to determine the best course of action for repair. Is the vase made of glass, porcelain, ceramic, or another fragile material? This information will help you choose the appropriate adhesive and technique for repairing the vase.
Look for any reinforcement in the vase, such as metal wires or internal support structures. These elements might affect the repair process and should be taken into account when assessing the damage.
Consider the sentimental or monetary value of the vase. If it holds sentimental value or is an antique or valuable piece, professional restoration might be the best option. In such cases, it is advisable to consult a professional art restorer or ceramics expert to ensure the vase is repaired correctly and preserved for future generations.
On the other hand, if the vase holds minor sentimental value or is replaceable, you may opt for a DIY repair method. This will save you time and money while still allowing you to enjoy the vase once it is restored.
By thoroughly assessing the damage, you will be better equipped to determine the appropriate repair method and materials needed to restore your broken vase. Taking the time to evaluate the extent of the damage will ultimately result in a more successful and satisfying repair process.
Gather the Necessary Supplies
Before embarking on repairing your broken vase, it is crucial to gather all the necessary supplies. Having the right tools and materials readily available will ensure a smooth and efficient repair process. Here are the essential supplies you will need:
- Protective gloves and eyewear: Safety should always be a priority when working with broken glass or delicate ceramics. Invest in a pair of sturdy gloves and safety goggles to protect your hands and eyes.
- Clean cloth or towel: You will need a clean cloth or towel to carefully handle and clean the broken pieces of the vase. This will prevent any further damage or contamination.
- Adhesive: Depending on the material of your vase, you will need the appropriate adhesive. Common options include super glue, epoxy resin, or ceramic repair putty. Choose a high-quality adhesive that is specifically designed for bonding the material of your vase.
- Applicator: For precise and controlled application of the adhesive, have an applicator on hand. This can be a small brush, toothpick, or syringe, depending on the viscosity of your chosen adhesive.
- Clamps or rubber bands: Depending on the size and shape of the broken pieces, you may need clamps or rubber bands to hold the vase together while the adhesive cures. These will provide stability and ensure a tight bond.
- Sanding materials: After the adhesive has dried, you may need to sand down any rough edges or excess glue. Prepare sandpaper or sanding pads of various grits to achieve a smooth and seamless repair.
- Finishing materials: If your vase has a specific finish or color, you will want to have the necessary touch-up materials. This can include paint, varnish, or glaze that matches the original appearance of the vase.
- Protective sealant: Once the repair is complete, consider applying a protective sealant to safeguard the vase from future damage or moisture. This can help preserve the integrity of the repair.
Having all these supplies ready beforehand will ensure that you can proceed with the repair smoothly and without interruptions. By being well-prepared, you can focus on restoring your broken vase with confidence and ease.
Clean the Broken Pieces
One crucial step in repairing a broken vase is to clean the broken pieces thoroughly. Cleaning the fragments ensures that the adhesive bonds properly and removes any dirt, debris, or residue that may hinder the repair process. Follow these steps to clean the broken pieces:
- Wear gloves and protective eyewear: Before handling the broken pieces, put on gloves and protective eyewear to avoid any injuries.
- Set up a clean workspace: Prepare a clean, well-lit workspace where you can safely handle the broken pieces without risk of further damage.
- Place a clean cloth or towel: Lay down a clean cloth or towel to provide a soft surface to work on and prevent any scratches or additional breakage.
- Gently remove loose debris: If there are any loose fragments or debris on the broken edges, carefully remove them using a soft brush or cloth. Be gentle to avoid causing further damage.
- Rinse the pieces: After removing any loose debris, rinse the broken pieces under lukewarm water. This will help remove surface dirt and residue. Avoid using hot water, as it can cause thermal shock to delicate materials like glass or ceramics.
- Dry the pieces: Once rinsed, pat the broken pieces dry with a clean, lint-free cloth. It is essential to ensure that there is no moisture remaining on the surfaces before applying the adhesive.
- Inspect for hidden dirt or grease: Carefully examine the broken edges and cracks of the vase pieces for any hidden dirt, grease, or oils. If present, use a gentle cleaning agent or rubbing alcohol to clean these areas. Ensure that the cleaning agent is compatible with the material of your vase.
- Let the pieces air dry: After cleaning, allow the broken pieces to air dry for a sufficient amount of time to ensure that they are completely free of moisture.
By taking the time and care to clean the broken pieces, you can ensure a strong and durable bond when applying the adhesive. Properly cleaned surfaces will provide an optimal condition for the adhesive to adhere, giving you a successful and long-lasting repair.
Decide on a Repair Method
When it comes to repairing a broken vase, there are several different methods you can choose from. The choice of repair method will depend on factors such as the material of the vase, the severity of the damage, and your level of skill and comfort in handling the repair. Here are three common repair methods to consider:
- Using Super Glue: Super glue is a popular choice for repairing small to medium-sized vases made of materials such as glass, porcelain, or ceramic. It provides a quick and strong bond. However, keep in mind that super glue may not be suitable for all materials or for vases with complex or intricate breaks.
- Using Epoxy Resin: Epoxy resin is a versatile option that works well for a wide range of materials, including glass, ceramic, and even certain plastics. It offers a strong bond and allows for more time to align the broken pieces before the adhesive cures. Epoxy resin is also known for its durability and ability to withstand heat and moisture.
- Using Ceramic Repair Putty: Ceramic repair putty is specifically designed for repairing ceramic or porcelain vases. This type of adhesive often comes in two parts that need to be mixed together. It provides a strong bond and can be used to fill in gaps and rebuild missing sections of the vase. Ceramic repair putty requires careful application and may require additional shaping or sanding for a seamless repair.
Consider the material of your vase, the complexity of the break, and the desired level of invisibility in the repair when deciding on a method. It is essential to carefully read and follow the instructions provided with the chosen adhesive to achieve the best results.
Additionally, if you are unsure about which method to choose or if the damage is extensive, it is recommended to consult a professional art restorer or ceramics expert. They can provide guidance and expertise to ensure the proper repair of your valuable or sentimental vase.
By making an informed decision on the repair method, you can set yourself up for a successful restoration of your broken vase. Each method has its own advantages and considerations, so take the time to assess your specific needs before moving forward with the repair.
Using Super Glue
Super glue is a popular adhesive choice for repairing vases due to its quick-drying and strong bonding properties. When using super glue to repair a broken vase, follow these steps:
- Clean the broken surfaces: Ensure that the broken edges of the vase are thoroughly cleaned and free from dust or debris. This will help the super glue bond effectively.
- Apply the super glue: Carefully apply a small amount of super glue to one of the broken edges. It is recommended to use a thin and even layer to avoid excessive glue buildup.
- Align the broken pieces: Begin aligning the broken pieces of the vase, using your fingers or tweezers for precision. Take your time to ensure the pieces fit together accurately.
- Hold the pieces in place: Once the broken pieces are aligned, hold them firmly together for a few minutes to allow the super glue to set. Apply gentle pressure to ensure a secure bond.
- Allow the repair to dry: Let the vase sit undisturbed for the recommended drying time specified by the super glue manufacturer. This will ensure that the bond is fully cured and strong.
- Check for additional repairs: If there are any remaining broken areas or gaps, repeat the process of applying the super glue and aligning the pieces until the vase is fully repaired.
- Remove excess glue: After the repair has dried, gently remove any excess glue using a craft knife or sandpaper. Be careful not to scratch or damage the vase in the process.
- Test the integrity of the repair: Once the excess glue is removed, gently handle the vase to ensure that the repair is secure and the broken pieces are firmly bonded.
It is important to note that super glue is not suitable for all materials or for vases with complex breaks. Some delicate materials, such as antique or valuable ceramics, may require a different adhesive or professional restoration. Take into consideration the material of your vase and the severity of the damage when deciding whether to use super glue for the repair.
By following these steps and using super glue carefully and correctly, you can successfully repair your broken vase and restore its functionality and appearance.
Using Epoxy Resin
Epoxy resin is a versatile and durable adhesive that provides a strong bond, making it an excellent choice for repairing broken vases. Here’s a step-by-step guide on how to use epoxy resin for repairing a vase:
- Prepare the epoxy resin: Mix the epoxy resin according to the manufacturer’s instructions. This typically involves combining equal parts of resin and hardener. Use a clean container and stir the components thoroughly until they are well blended.
- Clean the broken surfaces: Ensure that the broken edges of the vase are clean, dry, and free from any debris or grease. This will help the epoxy resin adhere properly.
- Apply the epoxy resin: Using an applicator, carefully apply the mixed epoxy resin to one of the broken surfaces. Apply a thin and even layer to ensure a strong bond.
- Align the broken pieces: Begin aligning the broken pieces of the vase, making sure they fit together accurately. Take your time to align the pieces correctly before the epoxy resin starts to set.
- Hold the pieces in place: Once the broken pieces are aligned, hold them firmly together, applying gentle pressure for a few minutes. This will help ensure a secure bond and prevent the pieces from shifting.
- Allow the repair to cure: Leave the vase undisturbed for the recommended curing time specified by the epoxy resin manufacturer. This typically ranges from a few hours to overnight, depending on the specific product.
- Check for additional repairs: If there are any remaining broken areas or gaps, repeat the process of applying the epoxy resin and aligning the pieces until the vase is fully repaired.
- Sand and polish the repair: Once the epoxy resin has cured, carefully sand down any excess resin or rough edges using sandpaper or sanding pads. Start with a coarse grit and gradually move to finer grits for a smooth finish. Finally, polish the repaired area for a seamless look.
- Test the integrity of the repair: After sanding and polishing, handle the vase gently to ensure that the repair is secure and the broken pieces are firmly bonded.
Epoxy resin is known for its strength and durability, making it suitable for a variety of vase materials. However, it is important to consider the specific requirements of your vase and consult any manufacturer guidelines or recommendations before using epoxy resin for repair. If you are unsure about using epoxy resin or if the damage is extensive, consulting a professional art restorer is advisable.
By following these steps and using epoxy resin correctly, you can effectively repair your broken vase, ensuring a sturdy and long-lasting restoration.
Using Ceramic Repair Putty
When it comes to repairing ceramic vases, ceramic repair putty is a specialized adhesive that offers a strong and versatile solution. Here’s a step-by-step guide on how to use ceramic repair putty for repairing your vase:
- Mix the repair putty: Follow the manufacturer’s instructions to mix the two components of the ceramic repair putty thoroughly. Ensure that the ratio and mixing process are accurate to achieve optimal bonding strength.
- Clean the broken surfaces: Clean the broken edges of the vase carefully, removing any dirt, debris, or old adhesive residue. This will help the putty adhere effectively to the ceramic surfaces.
- Apply the repair putty: Take a small amount of the mixed repair putty and apply it to one of the broken surfaces. Use your fingers or a tool to shape and press the putty into the crack or gap.
- Align the broken pieces: Begin aligning the broken pieces of the vase, ensuring they fit together accurately. As you press the pieces together, the repair putty will help fill in any gaps or missing sections of the ceramic.
- Hold the pieces in place: Apply firm pressure to hold the broken pieces together, allowing the repair putty to bond properly. Consider using clamps or rubber bands to hold the pieces in position while the putty cures.
- Allow the repair putty to cure: Leave the vase undisturbed for the recommended curing time specified by the manufacturer. This can range from a few hours to several days, depending on the specific ceramic repair putty.
- Shape and sand the repair: Once the repair putty has fully cured, use sandpaper or a file to shape and smooth down any excess putty. Gradually transition to finer grits to achieve a seamless and flush repair with the surrounding ceramic surface.
- Test the integrity of the repair: Gently handle the repaired vase to ensure that the ceramic repair putty has created a strong and secure bond between the broken pieces. Pay attention to any signs of weakness or movement, which may indicate the need for additional repair.
Ceramic repair putty is an excellent option for filling in gaps, reconstructing missing sections, and achieving a seamless repair on ceramic vases. However, it is important to select a high-quality and compatible repair putty that matches the material of your vase. If you have any doubts or concerns about using ceramic repair putty or if you are dealing with a valuable or irreplaceable vase, seeking professional assistance is recommended.
By following these steps and using ceramic repair putty correctly, you can effectively restore your broken ceramic vase and enjoy its beauty for years to come.
Applying the Adhesive
Once you have chosen the appropriate adhesive for repairing your broken vase, the next step is to apply it correctly. The application process is crucial for ensuring a strong and long-lasting bond. Here’s how to apply the adhesive for your vase repair:
- Read and follow the instructions: Before starting, carefully read and follow the manufacturer’s instructions for the specific adhesive you are using. Different adhesives may have varying application methods and drying times.
- Prepare the adhesive: If the adhesive requires mixing two components, ensure that you mix them according to the instructions provided. Use a clean container and stir or shake the adhesive thoroughly to achieve a homogeneous mixture.
- Apply a thin and even layer: Using an applicator, such as a small brush, toothpick, or syringe depending on the viscosity of the adhesive, apply a thin and even layer to one of the broken surfaces. Avoid applying too much adhesive, as it can overflow or create excessive buildup.
- Distribute the adhesive: Use the applicator to distribute the adhesive evenly across the surface, ensuring that it covers the entire area that needs to be bonded. This will enhance the overall strength and stability of the repair.
- Align the broken pieces: Carefully position the broken pieces of the vase, fitting them together accurately. Take your time to align them properly before the adhesive begins to set.
- Apply pressure: Once the broken pieces are aligned, hold them firmly together and apply gentle pressure to ensure a secure bond. This will help the adhesive penetrate into the micro-gaps and create a strong connection.
- Remove excess adhesive: Use a clean cloth or a cotton swab slightly moistened with a suitable solvent (if recommended by the adhesive manufacturer) to remove any excess adhesive that may have squeezed out from the bond. Be cautious not to disturb the alignment of the broken pieces.
- Follow the drying/curing time: Allow the adhesive to dry or cure according to the instructions provided. It is essential to be patient during this stage to ensure that the bond achieves its full strength and stability.
- Double-check the bond: Once the adhesive has fully dried or cured, gently inspect the repaired area. Ensure that the bond is secure and that there are no gaps or weaknesses in the connection.
Following these steps and adhering to the instructions of the adhesive manufacturer will help you apply the adhesive correctly and optimize the bonding process. Remember, each adhesive may have specific requirements, so be sure to use the appropriate adhesive for your vase material and follow the recommended guidelines for the best outcome.
Aligning the Broken Pieces
Aligning the broken pieces of your vase is a critical step in the repair process. Proper alignment ensures a seamless and secure bond between the fragments. Here are the steps to effectively align the broken pieces of your vase:
- Prepare your workspace: Set up a clean and well-lit workspace where you can comfortably inspect and align the broken pieces of your vase.
- Organize the broken pieces: Arrange the broken pieces systematically, grouping them according to their location and shape. This will help you identify which pieces fit together and avoid confusion during the alignment process.
- Start with larger fragments: Begin by identifying and aligning the larger fragments of your vase. These pieces often form the foundation of the repair and serve as reference points for aligning smaller sections.
- Test the fit: Before applying adhesive, carefully test the fit of the broken pieces together. Gently place them in their approximate positions to ensure they align correctly. Make any necessary adjustments to ensure a snug fit.
- Consider symmetry and aesthetics: Pay attention to the overall symmetry and aesthetics of the vase. Align the pieces in a way that ensures the vase maintains its original shape and visual appeal.
- Use clamps or rubber bands: If needed, apply clamps or use rubber bands to temporarily hold the aligned pieces together while the adhesive sets. This will help maintain the alignment and prevent any shifting or movement during the bonding process.
- Check from different angles: Assess the alignment of the broken pieces from different viewpoints. This will help you identify any discrepancies or misalignments that may need further adjustment.
- Make minor adjustments: If the alignment is slightly off, gently nudge or adjust the broken pieces to achieve a precise fit. Use caution to avoid putting too much pressure on the fragile fragments.
- Ensure a flush connection: Aim to create a flush connection between the broken pieces, minimizing any visible gaps or unevenness. This will contribute to a more seamless repair.
- Give it a final check: Once you are satisfied with the alignment, carefully inspect the vase from different angles. Ensure that the broken pieces are in their correct positions and that the alignment is uniform throughout.
Proper alignment is crucial for a successful vase repair. Taking the time and care to align the broken pieces accurately will result in a stronger bond and a more aesthetically pleasing restoration. Remember to handle the pieces delicately and make any necessary adjustments before moving on to the adhesive application stage.
Allowing the Repair to Dry
After aligning the broken pieces of your vase and applying the adhesive, it is crucial to allow the repair to fully dry. Proper drying ensures that the adhesive sets and creates a strong bond between the fragments. Here are the key steps to follow when allowing the repair to dry:
- Read the instructions: Refer to the instructions provided by the adhesive manufacturer for the recommended drying time. Different adhesives may have varying drying periods, so it is important to follow the specific guidelines.
- Create a stable environment: Place the repaired vase in a stable and secure location where it won’t be disturbed during the drying process. Ensure that the vase is positioned upright to prevent any shifting of the broken pieces or adhesive.
- Avoid moving or touching the vase: It is critical to resist the temptation to touch or move the vase while it is drying. Any movement can disrupt the alignment and weaken the bond between the fragments.
- Maintain proper temperature and humidity: Check the recommended temperature and humidity levels for optimal drying. Extreme temperatures or high humidity can affect the drying process, so it is essential to provide a suitable environment.
- Allow sufficient drying time: Be patient and allow the recommended drying time to ensure that the adhesive fully sets. Rushing this stage can compromise the strength of the repair and lead to a less durable bond.
- Take precautions with delicate materials: If you are working with delicate or sensitive materials, consider using additional support, such as props or padding, to prevent any stress or strain on the repaired areas while drying.
- Monitor the drying process: Periodically check the vase during the drying period to ensure that the repaired sections remain stable and secure. If any signs of movement or instability are observed, seek professional assistance or consider reinforcing the repair.
- Allow extra time if necessary: In certain cases, such as with larger or more complex repairs, it may be beneficial to extend the drying time beyond the manufacturer’s recommendations. This will provide an extra margin of safety and ensure a stronger bond.
- Test for complete dryness: After the recommended drying time has passed, carefully test the repaired vase to ensure that it has fully dried. Press gently on the repaired sections to confirm that there is no residual tackiness or softness.
- Proceed to the next steps: Once you are confident that the repair has dried completely, you can proceed with further steps such as sanding, buffing, or touching up the finish as needed.
Allowing the repair to dry thoroughly is crucial for a successful vase restoration. By following these steps and being patient during the drying process, you ensure a stronger and more durable bond between the broken pieces of your vase.
Sanding and Buffing the Repair
After the adhesive has fully dried and the repaired vase is stable, the next step is to sand and buff the repair. Sanding and buffing help smooth out any rough edges or excess adhesive, creating a seamless and polished finish. Follow these steps to properly sand and buff the repair:
- Gather the necessary materials: Prepare sandpaper or sanding pads of different grits, ranging from coarse to fine. You may also need a sanding block or a soft cloth for sanding and buffing.
- Sand the repaired area: Start with a coarse-grit sandpaper and gently sand down any rough edges or excess adhesive around the repaired area. Be careful not to apply excessive pressure that could damage the vase or disrupt the alignment of the broken pieces.
- Continue with finer grits: Gradually transition to finer grits of sandpaper to achieve a smoother surface. This will help remove any visible scratches or imperfections left by the coarse-grit sandpaper.
- Use a light touch: When sanding, use a light touch and let the sandpaper do the work. Apply even pressure and sand in a circular or back-and-forth motion to ensure an evenly sanded surface.
- Check the progress frequently: Frequently check the progress of the sanding to avoid over-sanding or removing too much material. Stop sanding when the repaired area becomes flush with the surrounding surface.
- Wipe and clean: After sanding, wipe the vase with a clean, damp cloth to remove any dust or debris. This will help you assess the repair and determine if further sanding or buffing is needed.
- Buff the repaired area: Using a soft cloth or buffing pad, gently buff the repaired area in a circular motion. This helps smoothen the surface further and improves the overall shine of the vase.
- Inspect the repair: Once the sanding and buffing are complete, closely inspect the repaired area to ensure that it is flush, smooth, and visually seamless with the rest of the vase.
- Make further adjustments if needed: If any rough edges or imperfections are still present, repeat the sanding and buffing process with a finer grit of sandpaper until the desired result is achieved.
- Protect the finish: Consider applying a protective sealant or wax to the repaired area to preserve the finish and provide additional protection.
Sanding and buffing the repair is an essential step in achieving a professional-looking restoration of your vase. By following these steps carefully and exercising patience, you can create a smoothly blended repair that seamlessly integrates with the original surface of the vase.
Touching up the Finish
Once the repaired vase has been sanded and buffed to achieve a smooth surface, the next step is to touch up the finish. This involves restoring the color, texture, and overall appearance of the repaired area to seamlessly blend with the rest of the vase. Follow these steps to effectively touch up the finish:
- Assess the original finish: Examine the unaffected areas of the vase to determine the original finish, such as paint, varnish, glaze, or any other type of coating. This will serve as a reference for matching the finish in the repaired section.
- Identify the correct coloring agent: Depending on the material and finish of the vase, select the appropriate coloring agent. This can be acrylic paint, ceramic or porcelain glaze, or a specialized touch-up product designed for your specific vase material.
- Prepare the coloring agent: Mix or dilute the coloring agent according to the manufacturer’s instructions. Test it on a small inconspicuous area before applying it to the repaired section to ensure a good color match.
- Apply the coloring agent: Using a small brush or applicator, carefully apply the coloring agent to the repaired area. Take care to blend it with the surrounding surface, feathering the edges to create a seamless transition.
- Allow the coloring agent to dry: Let the coloring agent dry completely according to the instructions provided. This ensures that the touch-up adheres properly and doesn’t smudge or rub off.
- Check for color accuracy: Once the touch-up is dry, evaluate the color match between the repaired area and the rest of the vase. If needed, apply additional layers of coloring agent to achieve a more accurate and seamless blend.
- Protect the touch-up: Consider applying a clear protective coating or sealer to the touch-up area. This will help protect the coloring agent and maintain the integrity of the repaired finish.
- Inspect the finished touch-up: Step back and evaluate the repaired section from different angles and lighting conditions. Ensure that the touch-up is visually indistinguishable from the rest of the vase, and make any necessary adjustments if needed.
Touching up the finish of the repaired area is vital in achieving a visually seamless and professional restoration. By carefully selecting and applying the appropriate coloring agent, and with attention to detail, you can restore the original appearance of the vase and enhance its overall aesthetic appeal.
Displaying and Caring for the Repaired Vase
Once you have successfully repaired your vase, it’s time to display and care for it properly to ensure its longevity and beauty. Here are some essential tips to consider for displaying and caring for your repaired vase:
- Choose a suitable display location: Select a display location that showcases the vase’s beauty while keeping it safe from potential accidents or damage. Avoid placing it in areas where it might be knocked over or exposed to direct sunlight or extreme temperatures.
- Use a stable display surface: Ensure that the surface on which the vase is displayed is stable, flat, and able to support its weight. This will prevent any accidental tipping or wobbling.
- Protect the vase from direct sunlight: Prolonged exposure to sunlight can cause fading or discoloration, especially for delicate materials like glass or ceramic. Keep your repaired vase away from direct sunlight or use UV-protective glass if it needs to be displayed in a sunny area.
- Handle the vase with care: When moving or handling the vase, always use caution and handle it with clean hands. Avoid placing unnecessary pressure on the repaired areas and never carry the vase by its vulnerable or weakened parts.
- Keep the vase clean: Regularly dust the vase with a soft, lint-free cloth to keep it clean and free from debris. Avoid using harsh cleaning chemicals or abrasive materials that could damage the surface or the repair.
- Maintain stable humidity: Extreme fluctuations in humidity can affect the stability of certain vase materials. Aim to maintain a stable humidity level in the display area to prevent cracking or warping.
- Inspect and address any issues: Periodically inspect the repaired vase for any signs of damage or deterioration. If you notice any cracks, chips, or loosened sections, address them promptly to prevent further damage.
- Consider additional protective measures: Depending on the material and fragility of the vase, you might want to consider using protective measures such as a display case, stand, or padding to enhance its overall safety and preservation.
- Consult professionals for valuable or antique vases: If you have a valuable or antique vase that has been repaired, consult with professionals or specialists in art restoration or ceramics conservation for specific care instructions and recommendations.
- Enjoy and appreciate your repaired vase: Lastly, display your repaired vase with joy and pride. Appreciate the beauty and history it holds, and relish in the satisfaction of restoring a cherished piece back to its former glory.
By following these guidelines for displaying and caring for your repaired vase, you can ensure its continued beauty and preserve it for years to come. With proper care, your vase will not only serve as a decorative piece but also as a testament to your restoration skills and appreciation for artistry.