
Common Causes and Effects of Mildew on Shower Curtains
Mildew on shower curtains is a common problem that can be both unsightly and unhygienic. Understanding the causes and effects of mildew growth on shower curtains is essential for effectively tackling this issue. Here, we’ll explore the common causes of mildew on shower curtains and the potential effects it can have.
One of the primary causes of mildew growth on shower curtains is high levels of humidity in the bathroom. When the bathroom lacks proper ventilation or when wet shower curtains are not allowed to dry completely, it creates an ideal environment for mold and mildew to thrive. Additionally, if your shower curtain is not made from mold-resistant materials, it is more prone to mildew growth.
The effects of mildew on shower curtains can be both visible and health-related. Visually, mildew can lead to discoloration, dark spots, and an overall unpleasant appearance of the curtain. This can make your entire bathroom appear dingy and unclean, even if you regularly clean other areas.
Health-wise, exposure to mildew can cause various respiratory issues, especially for individuals with allergies or asthma. Breathing in the spores released by the mildew can trigger symptoms such as coughing, sneezing, and congestion. Prolonged exposure to mildew can also worsen existing respiratory conditions and potentially lead to more severe health problems.
Moreover, the presence of mildew on shower curtains can create an unpleasant odor that permeates the bathroom. This can make your bathing experience less enjoyable and can be particularly off-putting for guests or family members.
Safety Precautions Before Cleaning
Prior to cleaning mildew off your shower curtain, it’s important to take certain safety precautions to protect yourself and ensure effective cleaning. These precautions will help minimize any potential risks associated with handling mildew and cleaning agents.
First and foremost, always wear protective gloves while cleaning mildew. These gloves will safeguard your hands against any harsh cleaning chemicals and prevent direct contact with the mildew itself. Additionally, wearing old clothes or an apron can help protect your clothing from stains or damage from cleaning agents.
Next, make sure the bathroom is well-ventilated before starting the cleaning process. Open windows and turn on exhaust fans to allow fresh air to circulate in the space. Adequate ventilation will help minimize the inhalation of cleaning fumes and reduce the risk of respiratory irritation.
When selecting your cleaning agents, opt for mildew-specific cleaners or natural alternatives such as vinegar or hydrogen peroxide. These options are effective in killing mold and mildew without posing significant health risks or causing damage to your shower curtain. Avoid using bleach unless specifically recommended for the material of your shower curtain, as it can cause discoloration or deterioration.
Before applying any cleaning solution, it’s essential to conduct a patch test on a small, inconspicuous area of the curtain. This will allow you to ensure that the cleaning agent does not cause any adverse reactions or damage to the fabric. If the cleaning solution causes any discoloration or deterioration, discontinue use immediately.
Lastly, follow the instructions provided by the cleaning agent manufacturer. Pay attention to recommended dilution ratios, exposure times, and any specific precautions or warnings mentioned. This will ensure that you use the product safely and effectively for the best results.
By following these safety precautions, you can effectively clean your shower curtain while minimizing any potential health hazards or damage to the fabric. Remember, taking adequate precautions before cleaning will contribute to a safe and successful cleaning process.
Homemade Solutions for Removing Mildew from Shower Curtains
If you’re looking for effective and budget-friendly ways to remove mildew from your shower curtains, there are several homemade solutions you can try. These solutions are often made from common household ingredients and can be just as effective as commercial cleaners. Here are some tried and tested methods:
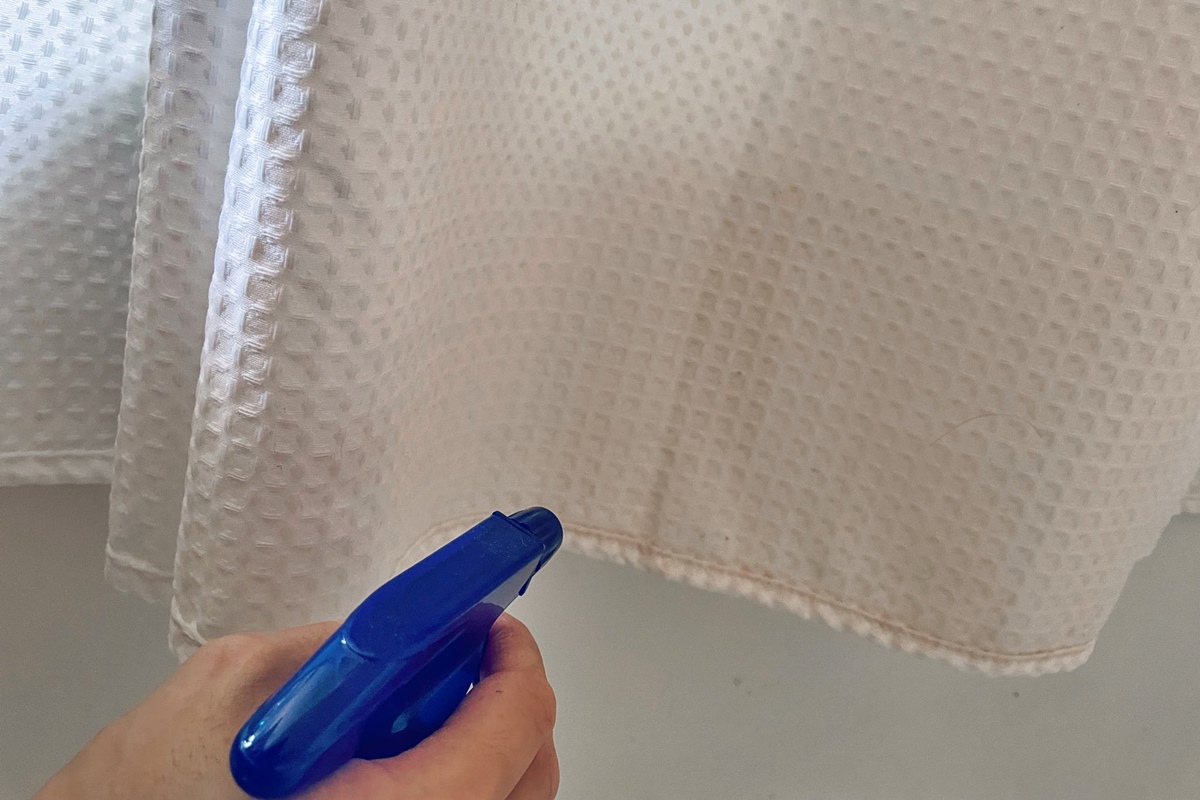
- Vinegar Solution: Mix equal parts white vinegar and water in a spray bottle. Spray the affected areas of your shower curtain with the vinegar solution and let it sit for about 15 minutes. Scrub the mildew stains gently with a soft brush or sponge, then rinse with water. Vinegar is naturally acidic and can help kill mildew spores.
- Baking Soda Paste: Create a paste by mixing baking soda with a small amount of water. Apply the paste directly to the mildew stains on your shower curtain, allowing it to sit for 10-15 minutes. Gently scrub the stains with a brush or sponge, then rinse thoroughly with water. Baking soda is a natural abrasive and can help lift and remove mildew stains.
- Hydrogen Peroxide Solution: Mix equal parts hydrogen peroxide and water in a spray bottle. Spray the mildewed areas of your shower curtain and allow it to sit for about 15 minutes. Scrub the stains gently with a brush or sponge, then rinse well. Hydrogen peroxide is a powerful oxidizer that can effectively kill mildew and remove stains.
- Tea Tree Oil Spray: Combine one teaspoon of tea tree oil with one cup of water in a spray bottle. Shake well to blend the mixture. Spray the solution onto the mildewed areas of your shower curtain and let it sit for 15-20 minutes. Scrub the stains gently with a brush or sponge, then rinse thoroughly. Tea tree oil has natural antifungal properties that can help eliminate mildew.
When using any of these homemade solutions, always test them on a small, inconspicuous area of your shower curtain first to ensure they do not cause any damage or discoloration. Additionally, ensure proper ventilation in your bathroom while cleaning and handle these solutions with care to avoid any accidents or skin irritation.
By utilizing these homemade solutions, you can effectively remove mildew from your shower curtains without the need for harsh chemicals or expensive cleaners. These natural remedies are not only environmentally friendly but also safe for use in your bathroom.
Step-by-Step Guide to Cleaning Mildew Off Shower Curtains
Now that you’re familiar with the causes of mildew and have taken necessary safety precautions, it’s time to delve into the step-by-step process of cleaning mildew off shower curtains. Follow these simple steps to effectively remove mildew and restore the cleanliness of your shower curtain:
- Remove the Shower Curtain: Take the shower curtain off the rod and lay it flat on a surface that allows easy access to both sides. This will make the cleaning process more manageable.
- Pre-Treatment: If the mildew stains are stubborn, apply a pre-treatment solution such as vinegar or a mildew-specific cleaner. Spray the affected areas and let it sit for a few minutes to break down the mildew.
- Cleaning Solution Application: Prepare your chosen cleaning solution – whether it’s a vinegar-water mixture, baking soda paste, hydrogen peroxide solution, or tea tree oil spray. Apply the solution directly to the mildewed areas of the shower curtain.
- Gentle Scrubbing: Using a soft brush or sponge, gently scrub the mildew stains in a circular motion. Be careful not to apply too much pressure, as this could damage the fabric of the curtain.
- Rinse Thoroughly: Once you’ve scrubbed the stains, rinse the shower curtain thoroughly with warm water. Ensure that all traces of the cleaning solution and mildew are completely rinsed off.
- Drying: After rinsing, hang the shower curtain back on the rod to allow it to air dry. Ensure that the curtain is well-stretched to minimize any wrinkling or folding that could promote mildew growth.
- Cleaning the Curtain Liner: If your shower curtain has a liner, it’s important to clean that as well. Follow the same steps mentioned above, treating and scrubbing any mildew stains, rinsing thoroughly, and allowing the liner to dry completely before reattaching it to the curtain.
- Maintenance: To prevent future mildew growth, ensure proper ventilation in your bathroom, allow the curtain to fully dry after each use, and regularly clean the curtain to remove any soap scum or residue that can attract mildew.
Following this step-by-step guide will help eliminate mildew and keep your shower curtain clean and fresh. Regular maintenance and proper care are key to preventing the recurrence of mildew, ensuring a hygienic and visually appealing bathroom environment.
Additional Tips for Preventing Mildew Growth on Shower Curtains
Preventing mildew growth on your shower curtains is essential to maintain a clean and hygienic bathroom. With a few simple steps and regular maintenance, you can effectively minimize the chances of mildew coming back. Here are some additional tips to prevent mildew growth on your shower curtains:
- Proper Ventilation: Ensure adequate ventilation in your bathroom by allowing fresh air to circulate. Open windows, use an exhaust fan, or install a dehumidifier to reduce humidity levels. Keeping the bathroom well-ventilated helps prevent the ideal conditions for mildew growth.
- Dry Your Curtain: After showering, make sure to fully extend and spread out your shower curtain to allow it to dry completely. This helps prevent moisture from being trapped, which can contribute to mildew growth. If possible, avoid folding the curtain or stacking it in a way that inhibits drying.
- Avoid Contact with Walls: When the shower curtain is in use, try to ensure it does not come into direct contact with the walls of the shower. Keeping a small gap between the curtain and the walls allows for better air circulation and drying, reducing the likelihood of mildew formation.
- Regular Cleaning: Establish a routine of regular cleaning for your shower curtain. Even if mildew is not yet visible, periodic cleaning can help remove any buildup of soap scum or other substances that can attract mildew. Follow the cleaning methods mentioned earlier to keep your curtain free of mildew.
- Use Mold-Resistant Materials: When purchasing a new shower curtain, opt for one made from mold-resistant materials. These specially designed curtains have antimicrobial properties that inhibit the growth of mold and mildew, keeping your shower area cleaner for longer.
- Replace Old Curtains: If you have an old shower curtain that is prone to mildew growth or has visible signs of mold, it may be time to replace it. Over time, shower curtains can become less resistant to mildew or develop small tears or holes that trap moisture. Investing in a new curtain can be a proactive measure to prevent future mildew problems.
- Regularly Wash Curtain Liners: If your shower curtain has a liner, make sure to wash it regularly. Follow the manufacturer’s instructions for cleaning and drying. Keeping the liner clean will prevent any mildew or mold spores from transferring onto the curtain itself.
By implementing these additional tips and incorporating them into your bathroom maintenance routine, you can effectively prevent mildew growth on your shower curtains. A clean and mildew-free shower curtain will not only enhance the overall appearance of your bathroom but also contribute to a healthy and inviting bathing experience.
When to Replace Your Shower Curtain
While regular cleaning and proper maintenance can prolong the lifespan of your shower curtain, there comes a time when it’s necessary to replace it. Here are some indicators that it’s time to replace your shower curtain:
- Mold or Mildew Growth: If your shower curtain consistently develops mold or mildew despite your best efforts to clean and prevent it, it may be a sign that it’s time for a replacement. Mold and mildew can be difficult to completely remove, and they can pose health risks if left unchecked.
- Visible Damage: Look for visible signs of wear and tear on your shower curtain, such as rips, tears, or frayed edges. A damaged curtain not only compromises its functionality but can also harbor moisture and make it more susceptible to mold and mildew growth.
- Foul Odor: If your shower curtain has a persistent musty or unpleasant odor, even after cleaning, it could be an indication of deep-seated mildew or mold infestation. Despite your best efforts, the smell may persist, warranting a replacement.
- Stains and Discoloration: Over time, shower curtains can accumulate stubborn stains and discoloration that are difficult to remove. If your curtain appears permanently discolored or stained, it may be time to invest in a new curtain to refresh the look of your bathroom.
- Lack of Effectiveness: If your shower curtain is no longer effectively repelling water and keeping it within the shower area, it’s time for a replacement. A worn-out curtain may leak or allow water to escape onto the bathroom floor, causing potential slip hazards or water damage.
- Outdated Style: While not a functional concern, if your shower curtain is outdated or no longer complements your bathroom decor, it may be time to replace it with a new one. Updating the style of your curtain can instantly enhance the aesthetic appeal of your bathroom.
Remember, the lifespan of a shower curtain can vary depending on factors such as material quality, maintenance, and frequency of use. It’s generally recommended to replace your shower curtain every 6-12 months to ensure optimal hygiene and functionality.
By observing these signs and replacing your shower curtain when necessary, you can maintain a clean and visually appealing bathroom while ensuring a safe and hygienic bathing experience.