
Choosing the Wood
Choosing the right type of wood is essential when making a wooden tray. It not only affects the aesthetics of the finished product but also its durability and longevity. Here are some key factors to consider when selecting the wood for your tray:
- Type of Wood: There are various types of wood available, each with its own unique characteristics. Hardwoods like oak, mahogany, and maple are popular choices for their durability and beautiful grain patterns. Softwoods such as pine or fir can be a more budget-friendly option and are easier to work with.
- Wood Grain: Pay attention to the grain pattern of the wood. Some woods have straight grains, while others may have more pronounced patterns like swirls or knots. Consider the desired aesthetic and choose a wood with a grain pattern that complements your style and preferences.
- Wood Thickness: The thickness of the wood will determine the overall sturdiness and weight of the tray. Thicker wood is generally more durable but can add weight. Consider the intended use of the tray and choose a thickness that is appropriate for your needs.
- Finishing Options: Different woods respond differently to finishes and stains. Some woods, like oak, take on a deep, rich color when stained, while others, like maple, may require a pre-conditioner to achieve an even finish. Consider how you plan to finish your tray and choose a wood that will complement your desired aesthetic.
- Budget: Wood prices can vary significantly depending on the type and quality. Consider your budget when choosing the wood for your tray. If you’re on a tight budget, softwoods or reclaimed wood can be cost-effective choices.
Overall, selecting the right wood is crucial for creating a beautiful and functional wooden tray. Take your time to research and consider your options before making a decision. Remember, the type of wood you choose will have a significant impact on the final outcome, so choose wisely.
Gathering the Materials and Tools
Before you begin making a wooden tray, it’s important to gather all the necessary materials and tools. Having everything prepared will ensure a smooth and efficient workflow. Here’s a list of the essential items you’ll need:
- Wood: Based on your chosen wood type, make sure you have enough wood for the tray’s bottom and sides. Consider a little extra for any mistakes or adjustments.
- Measuring Tools: A tape measure, a combination square, and a ruler are essential for accurate measurements. Use them to measure the dimensions of the tray and mark the wood accordingly.
- Cutting Tools: Depending on your preference and accessibility, you can use a table saw, a circular saw, or a handsaw to cut the wood to the desired lengths. Make sure the blade is suitable for cutting wood.
- Sanding Tools: To achieve a smooth surface, have sandpaper or a sanding block with different grits (e.g., 80, 120, and 220) ready. You can also use a power sander for faster results.
- Clamps: Clamps are handy for holding the wood securely while you assemble the tray. They ensure accurate and tight joints. Having a few different sizes can be helpful.
- Wood Glue: An essential adhesive for joining the pieces of wood together. Choose a high-quality wood glue that has a strong bond and dries clear.
- Finishing Supplies: Depending on your desired finish, gather the necessary supplies such as wood stain, paint, varnish, or a sealant to protect the wood and enhance its appearance.
- Safety Equipment: When working with wood and power tools, it’s essential to prioritize safety. Have safety glasses, ear protection, and a dust mask to protect yourself from flying debris and excessive noise.
- Cleaning Supplies: Keep a dustpan, a brush, and a damp cloth nearby to clean up wood shavings and dust as you work.
Having all the materials and tools ready before starting the project will save you time and ensure a more enjoyable woodworking experience. Double-check your list to ensure you have everything you need. Remember to work in a well-ventilated area and follow safety guidelines while using tools and materials.
Measuring and Cutting the Wood
Accurate measurements and precise cuts are crucial for the success of your wooden tray project. Before you start cutting, make sure you have a clear plan and a well-lit workspace. Here are the steps to effectively measure and cut the wood:
- Measurements: Use a tape measure, combination square, or ruler to measure the dimensions of the tray you want to make. Decide on the length, width, and height of the tray and note down the measurements.
- Marking the Wood: Lay out the pieces of wood according to your design and measurements. Use a pencil or a marking knife to mark the cutting lines on the wood. Make sure to mark the correct dimensions for each piece.
- Preparing the Cutting Tools: Set up your chosen cutting tool, such as a table saw or circular saw, and ensure that the blade is sharp and suitable for cutting wood. Adjust the cutting depth if necessary.
- Cutting the Wood: Align the marked lines with the blade of the cutting tool and carefully cut along the lines. Take your time and maintain a steady cutting pace to achieve clean and precise cuts. Always keep your hands away from the cutting path and follow proper safety precautions.
- Double-Check Measurements: After cutting each piece, double-check the measurements to ensure accuracy. If needed, make any necessary adjustments or recut any pieces that are not the correct size.
Remember to take accurate measurements and make precise cuts to ensure that the pieces fit together properly during assembly. It’s always better to measure twice and cut once to avoid any mistakes or inaccuracies.
By following these steps and taking your time with the measuring and cutting process, you’ll be on your way to creating a well-fitted and aesthetically pleasing wooden tray.
Assembling the Bottom of the Tray
Once you have measured and cut the wood pieces for your wooden tray, it’s time to start the assembly process. The first step is to assemble the bottom of the tray. Here’s how you can do it:
- Dry Fit: Before applying any glue, perform a dry fit by placing the cut pieces together to ensure they fit properly. Make any necessary adjustments if needed.
- Apply Wood Glue: Once you are satisfied with the dry fit, apply a thin and even layer of wood glue to the edges of the bottom piece. Use a brush or a small spatula to spread the glue evenly.
- Secure with Clamps: Press the side pieces against the glued edges of the bottom piece. Use clamps to hold the pieces together tightly. Make sure the corners are square and aligned properly. Wipe off any excess glue that may squeeze out.
- Check Alignment: Use a combination square or a ruler to check if the sides are perpendicular to the bottom and if the corners are square. Make any necessary adjustments before the glue dries.
- Allow Glue to Dry: Follow the recommended drying time specified by the wood glue manufacturer. Keep the assembled bottom piece in a well-ventilated area and avoid disturbing it while the glue cures.
- Remove Clamps: Once the glue is completely dry, remove the clamps and check the strength of the bond. If needed, you can lightly sand any rough edges or excess glue residue.
By following these steps, you will have successfully assembled the bottom of your wooden tray. Remember, using the right amount of glue and ensuring proper alignment and clamping are key to achieving a sturdy and stable tray structure.
Now that the bottom piece is complete, you can move on to building the sides of the tray in the next section.
Building the Sides of the Tray
Once you have assembled the bottom of your wooden tray, it’s time to focus on building the sides. The sides will not only add height to the tray but also provide stability and structure. Here’s how you can build the sides of the tray:
- Measure and Cut: Measure the height you want for the sides of your tray. Mark the measurements on the remaining wood pieces, ensuring they are consistent in length.
- Apply Wood Glue: Apply a thin and even layer of wood glue along one edge of each side piece.
- Attach the Side Pieces: Carefully press the glued edges of the side pieces against the corresponding edges of the bottom piece. Ensure they are aligned properly and form 90-degree angles at the corners.
- Secure with Clamps: Use clamps to hold the side pieces in place, applying enough pressure to create a strong bond. Make sure the corners are square and the sides are perpendicular to the bottom. Wipe off any excess glue that may squeeze out.
- Check Alignment: Once again, use a combination square or a ruler to check for proper alignment and square corners. Make any necessary adjustments before allowing the glue to dry.
- Allow Glue to Dry: Follow the recommended drying time specified by the wood glue manufacturer. Ensure that the tray remains undisturbed during the drying process.
- Remove Clamps: Once the glue is completely dry, carefully remove the clamps. Check the stability of the sides and ensure that the bonding is strong.
By following these steps, you’ll have successfully built the sides of your wooden tray. Remember, proper measurements, accurate alignment, and sturdy connections are essential for a well-constructed tray. With the bottom and sides assembled, you’re one step closer to completing your beautiful wooden tray.
Sanding and Smoothing the Wood
After assembling the bottom and sides of your wooden tray, it’s time to focus on sanding and smoothing the surface. Sanding not only enhances the appearance of the wood but also ensures a smooth and professional finish. Follow these steps for sanding and smoothing the wood:
- Gather the Right Sanding Tools: Depending on the size and shape of your tray, you may need various sanding tools. Sandpaper with different grits (e.g., 80, 120, and 220) or a sanding block can be used for hand sanding. If available, a power sander can speed up the process.
- Start with Coarse Grit Sandpaper: Begin sanding the surface of the tray with coarse-grit sandpaper, such as 80 or 100. Sand in the direction of the wood grain, applying even pressure. This will help remove any rough spots, imperfections, or excess glue.
- Progress to Finer Grits: Gradually switch to finer grit sandpaper, such as 120 and 220, for a smoother finish. Sanding with finer grits will help remove scratches left by the coarse grit sandpaper and provide a polished surface.
- Smooth the Edges: Don’t forget to sand the edges of the tray as well. Use the sandpaper or sanding block to smooth out any rough edges or sharp corners. Be careful not to round the edges too much, as it may impact the overall look of the tray.
- Wipe and Clean: After sanding, use a damp cloth or tack cloth to wipe away the dust and residues left on the wood surface. This will prepare the wood for the next steps, such as applying a finish or sealant.
- Inspect the Surface: Take a close look at the sanded surface to ensure that it is smooth and free of any blemishes. Sand any remaining rough spots if necessary.
Proper sanding helps achieve a professional and polished look for your wooden tray. Take your time, be patient, and pay attention to detail during the sanding process. Remember to sand in the direction of the wood grain to avoid creating unwanted scratches. Once you’re satisfied with the smoothness of the wood, you’re ready to move on to the next steps of finishing and enhancing the tray.
Applying a Finish or Sealant
Once the wood of your tray is sanded and smooth, the next step is to apply a finish or sealant. Applying a finish not only enhances the natural beauty of the wood but also provides protection against stains, moisture, and everyday wear and tear. Here’s how you can apply a finish or sealant to your wooden tray:
- Choose the Right Finish: There are various types of finishes available, such as polyurethane, varnish, lacquer, or oil-based finishes. Consider the level of protection, sheen, and desired appearance when choosing a finish for your tray.
- Prepare the Workspace: Find a well-ventilated area with adequate lighting. Lay down a drop cloth or newspaper to protect the surface underneath from any spills or drips.
- Follow the Manufacturer’s Instructions: Read and follow the instructions provided by the manufacturer of the chosen finish or sealant. Different finishes may have specific application techniques and drying times.
- Apply the Finish: Dip a clean brush or use a clean cloth to apply the finish or sealant evenly over the surface of the tray. Work in the direction of the wood grain to achieve a smooth and even coverage. Pay extra attention to the edges and corners.
- Allow Proper Drying Time: Set the tray aside in a well-ventilated area and let the finish dry as per the manufacturer’s instructions. Avoid touching or disturbing the tray while the finish is drying to prevent any imperfections or smudges.
- Apply Additional Coats (Optional): If desired, you can apply additional coats of the finish to achieve a deeper color or added protection. Make sure to lightly sand between coats to create a smooth surface for the subsequent layers.
- Let the Finish Cure: After applying the final coat, allow the finish to cure for the recommended time. This will ensure that it becomes fully hardened and provides optimal protection.
- Buff (Optional): If desired, you can lightly buff the tray with a fine-grit sandpaper or a buffing pad to enhance the smoothness and sheen of the finish.
By following these steps, you’ll be able to apply a beautiful and protective finish or sealant to your wooden tray. The finish will not only enhance the appearance but also ensure its longevity and resilience to daily use.
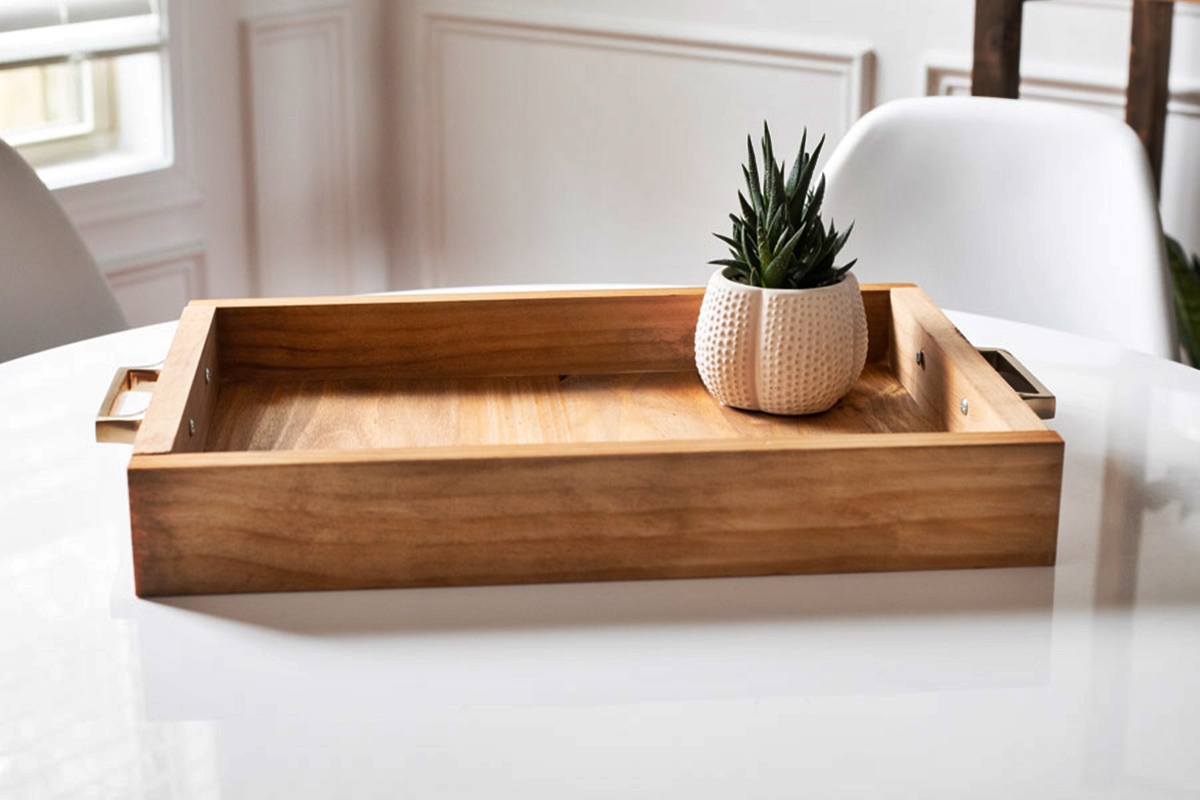
Attaching Handles or Hardware
Adding handles or hardware to your wooden tray can not only make it easier to carry but also enhance its functionality and aesthetics. Here’s a guide on how to attach handles or hardware to your wooden tray:
- Choose the Right Handles or Hardware: Consider the style, size, and material of the handles or hardware that will best complement your wooden tray. There are various options available, such as drawer pulls, cabinet handles, leather straps, or custom-made handles.
- Decide on the Placement: Determine where you want to place the handles on the tray. This is usually near the ends or sides of the tray, depending on the design and function of the handles.
- Mark the Mounting Holes: Hold the handles or hardware in the desired position and mark the locations of the mounting holes on the wood using a pencil or a small awl. Ensure that the markings are evenly spaced and aligned.
- Pre-drill Holes: Use an appropriately sized drill bit to pre-drill holes at the marked locations. The diameter of the drill bit should match the size of the screws or bolts that will be used to secure the handles or hardware.
- Attach the Handles: Line up the mounting holes on the handles with the pre-drilled holes on the wood. Insert the screws or bolts through the holes and tighten them securely. Make sure the handles are centered and attach them firmly to the tray.
- Test the Stability: Once the handles are attached, test their stability by gently pulling on them to ensure they are securely fastened. Make any necessary adjustments or tighten the screws further if needed.
- Optional: Finish the Hardware: If desired, you can paint or finish the handles or hardware to match the overall look of the tray. This step adds a cohesive element to the design and enhances the visual appeal.
By following these steps, you can easily attach handles or hardware to your wooden tray. Ensure that the handles or hardware are securely fastened to handle the weight and usage of the tray. With properly attached handles, your wooden tray will be functional, easy to carry, and visually appealing.
Optional: Adding Decorative Touches
If you want to make your wooden tray even more visually appealing, you can add decorative touches to personalize and customize its look. These decorative touches can elevate the aesthetics and create a unique and eye-catching piece. Here are some ideas for adding decorative touches to your wooden tray:
- Wood Burning: Use a wood burning tool to create intricate designs or patterns on the surface of the tray. You can create personalized initials, artistic motifs, or even nature-inspired designs. This adds a rustic and handcrafted touch to the tray.
- Painting or Staining: Apply paint or wood stain to the surface or edges of the tray to add color and visual interest. Consider using stencils or painter’s tape to create patterns or geometric designs for a modern or contemporary look.
- Decoupage: Use decoupage techniques to adhere decorative paper or fabric onto the tray’s surface. This allows for endless possibilities, as you can choose patterns, colors, or themes that reflect your personal style or the desired aesthetic.
- Inlays or Veneers: Consider adding decorative inlays or veneer strips to the surface of the tray. These can be made from contrasting wood species or even other materials like metal or acrylic. It adds a touch of sophistication and elegance to the design.
- Add Metal Accents: Attach decorative metal corner brackets or hardware to the corners of the tray for a vintage or industrial look. This adds both style and additional durability to the tray.
- Embellishments: Apply decorative embellishments like beads, crystals, or small tiles to the surface or edges of the tray. This allows for endless creativity and adds a unique and personalized touch.
- Custom Engravings: If you have access to laser engraving or CNC machines, consider adding custom engravings or etchings to the wooden tray. This could include names, dates, or meaningful quotes that hold sentimental value.
Remember, adding decorative touches to your wooden tray is optional but can greatly enhance its overall appeal and reflect your personal style. Explore different techniques and materials to find the perfect decorative elements that will make your tray truly stand out.
Optional: Personalizing the Tray
If you want to make your wooden tray even more special and meaningful, personalizing it can add a sentimental touch. Personalization allows you to create a one-of-a-kind tray that is uniquely yours. Here are some ideas for personalizing your wooden tray:
- Engraving Initials or Names: Consider engraving your initials, name, or a special date onto the surface of the tray. This adds a personal touch and makes the tray truly yours.
- Family Crest or Monogram: If you have a family crest or a monogram, incorporating it into the design of the tray can add a touch of heritage and tradition.
- Memorable Quotes or Sayings: Choose a meaningful quote, saying, or mantra that resonates with you. Engrave or paint it onto the tray to be reminded of its significance every time you use it.
- Custom Artwork: If you have artistic skills or know someone who does, consider painting or drawing a custom artwork on the tray. This allows you to create a truly unique and personalized design.
- Handprints or Footprints: Capture the handprints or footprints of your loved ones and transfer them onto the tray using non-toxic paint. This adds a sentimental touch and creates a lasting memory.
- Photographs: If you have small photographs or prints that hold special meaning, you can decoupage them onto the tray’s surface. This allows you to showcase those cherished memories in a functional and decorative way.
- Special Events or Occasions: Consider personalizing the tray to commemorate a special event or occasion. This could include anniversary dates, birthdays, or milestones in your life.
- Favorite Quotes or Lyrics: Engrave or paint your favorite quotes, song lyrics, or inspirational words onto the tray. This adds a touch of your personality and can uplift your mood every time you use it.
Personalizing your wooden tray allows you to create a piece that holds sentimental value and reflects your unique personality. Explore different ideas and techniques to find the perfect way to make your tray truly yours.
Caring for and Maintaining the Wooden Tray
Proper care and maintenance are essential to ensure the longevity and beauty of your wooden tray. With the right practices, you can keep your tray in excellent condition for years to come. Here are some tips for caring for and maintaining your wooden tray:
- Keep it Clean: Regularly remove any dust or debris from the surface of the tray using a soft, dry cloth or a gentle brush. Avoid using harsh chemicals or abrasive cleaners that can damage the wood.
- Avoid Excessive Moisture: Wood is susceptible to moisture damage, so avoid placing the tray directly on wet surfaces or exposing it to excessive humidity. Wipe up any spills immediately to prevent the wood from warping or staining.
- Apply a Protective Finish: If your tray doesn’t already have a protective finish, consider applying one to enhance its durability. This can include varnish, polyurethane, or food-safe oils like mineral oil or beeswax for trays used in the kitchen or dining areas.
- Avoid Extreme Temperatures: Keep the tray away from extreme temperature changes, such as placing it near direct sunlight or next to heat sources. These can cause the wood to expand, contract, or warp over time.
- Use Coasters or Mats: When using the tray for serving food or drinks, consider using coasters, placemats, or cloth napkins to protect the wood from heat, moisture, and scratches.
- Rotate and Refresh: To prevent uneven wear or fading, periodically rotate the tray or move it to different locations to ensure consistent exposure to light and use.
- Avoid Heavy Loads: While wooden trays can be sturdy, avoid overloading them with heavy items. This can put unnecessary stress on the joints and potentially lead to structural damage.
- Refinish when needed: Over time, the protective finish on your tray may wear off. If you notice signs of wear or if the wood starts to look dull, consider refinishing the tray by sanding down the surface and applying a fresh coat of finish.
By following these care and maintenance tips, you can keep your wooden tray looking beautiful and functioning well for many years. Remember, proper care and attention will preserve its natural beauty and make it a cherished piece in your home.