
Choosing the Right Material for Your Vase
When making a vase, one of the most important decisions you need to make is choosing the right material. The material you choose will determine the durability, aesthetics, and functionality of your vase. Here are a few popular options to consider:
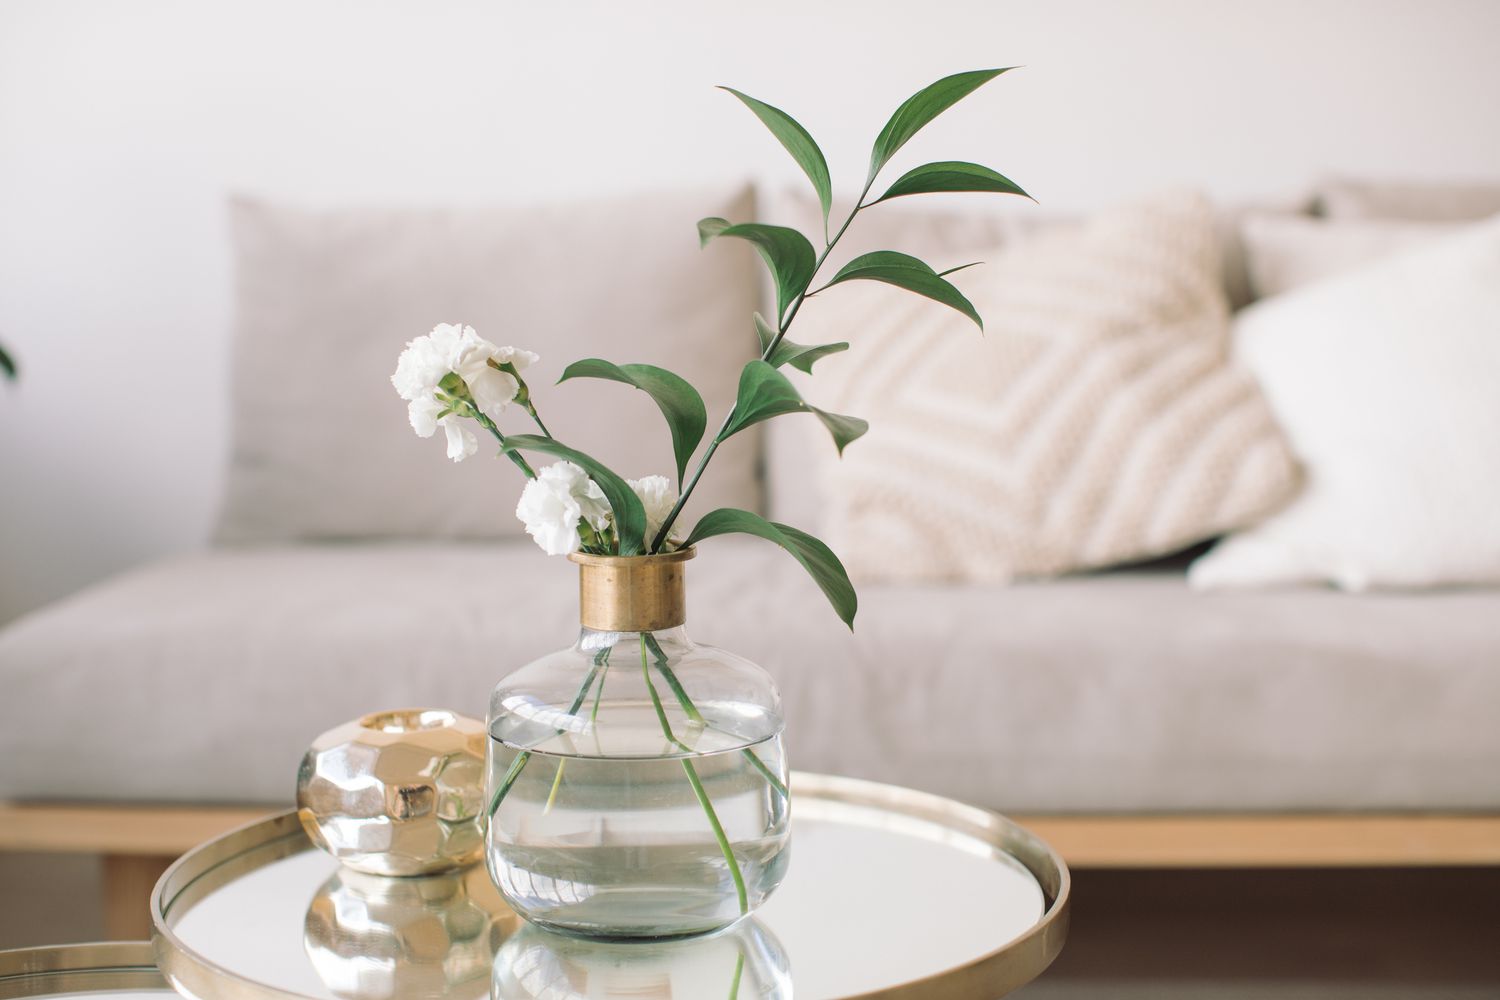
- Glass: Glass is a classic choice for vases, known for its transparency and ability to showcase the beauty of flowers. It comes in various shapes and sizes, and can easily complement any interior style.
- Ceramic: Ceramic vases are timeless and versatile. They are available in a range of finishes, from smooth to textured, and can be painted or glazed to add visual interest. Ceramic vases are durable and suitable for both fresh and dried flowers.
- Metal: Metal vases exude a contemporary and sophisticated vibe. Options such as brass, copper, or stainless steel offer a sleek and shiny look, while patinated metals can add an antique or rustic touch to your decor.
- Wood: If you prefer a more organic and natural feel, wooden vases are an excellent choice. They can be carved, turned, or sculpted into unique shapes and provide a warm and earthy aesthetic.
- Clay: Clay vases offer a beautiful handmade charm. They can be molded into various shapes and sizes and can be glazed or left unglazed for a rustic appeal. Clay vases are great for creating a bohemian or artisanal look.
Consider the style of your home or the purpose of the vase when choosing the material. If you want to highlight the flowers, glass or clear acrylic vases may be ideal. For a statement piece, choose a unique material like concrete or recycled materials. Remember to also consider the maintenance and cleaning requirements of each material.
By selecting the right material for your vase, you can ensure that your creation perfectly complements your decor and meets your functional needs.
Gathering the Required Tools and Materials
Before you begin making your own vase, it’s important to gather all the necessary tools and materials. Having everything prepared beforehand will make the process smoother and more enjoyable. Here’s a list of essential items you’ll need:
- Vase Material: Depending on the type of vase you want to create, you’ll need to gather the appropriate materials. This could include glass, ceramic, metal, wood, or clay.
- Protective Gear: Safety should always come first in any DIY project. Make sure to have proper protection such as goggles, gloves, and a dust mask, especially when handling materials like glass, ceramics, or chemicals.
- Measuring Tools: Accurate measurements are crucial for creating a well-balanced and visually pleasing vase. Have a ruler, tape measure, or calipers ready to ensure precise dimensions.
- Cutting Tools: Depending on the material you’re working with, you may need specific cutting tools. Glass cutters for glass vases, clay sculpting tools for clay vases, or saws for wooden vases are common examples.
- Adhesives and Sealants: If you plan to join different components together or make your vase water-tight, you’ll need appropriate adhesives, epoxy, or sealants. Consider the material of your vase when selecting the right adhesives.
- Decorative Elements: If you want to add embellishments to your vase, gather any decorative elements such as paint, brushes, stencils, beads, or ribbons.
- Cleaning Supplies: After you finish making your vase, you’ll want to clean any residue or excess material. Have a set of cleaning supplies, including sponges, brushes, and appropriate cleaners, ready for the final touch-up.
Remember to read the instructions on any tools or materials you’re using and familiarize yourself with proper handling techniques. Additionally, check if there are any specific tools or materials required for the type of vase you’re creating. Being well-prepared will help you avoid unnecessary delays or complications during the crafting process.
Preparing the Work Area
Before you embark on creating your own vase, it’s essential to set up a suitable work area. This will ensure that you have a safe and organized space to bring your creative vision to life. Here are some key steps to prepare your work area:
- Clean and Clear: Start by cleaning the area where you plan to work. Remove any clutter, debris, or unnecessary items that may hinder your movements or cause accidents.
- Surface Protection: Depending on the materials you’ll be using, consider covering your work area with a protective layer. For example, if you’re working with clay or paint, a plastic sheet or drop cloth can prevent any spills or stains on your surfaces.
- Proper Ventilation: If you’ll be using any materials that produce fumes or strong odors, make sure your work area is well-ventilated. Open windows or use fans to ensure a constant circulation of fresh air.
- Lighting: Adequate lighting is crucial for precision and accuracy in your work. Set up sufficient lighting sources to provide clear visibility of your materials, tools, and workspace.
- Organization: Arrange your tools, materials, and supplies in an organized manner. Use containers, drawers, or shelves to keep everything within reach and easily accessible. This will save you time and prevent unnecessary distractions during the crafting process.
- Workspace Comfort: Ensure that you have a comfortable work surface, such as a sturdy table or workbench, at the right height for your comfort. Consider using a cushioned mat or adding ergonomic supports to prevent fatigue or strain on your body.
- Safety Awareness: Keep a first aid kit within reach in case of any minor accidents or injuries. Familiarize yourself with the safety instructions of the materials and tools you’ll be using, and always follow recommended safety practices.
By taking the time to prepare your work area, you’ll create an environment that promotes focus, efficiency, and safety. Having a clean and well-organized space will not only enhance your crafting experience but also allow you to fully enjoy the process of bringing your vase to life.
Designing the Shape of Your Vase
Designing the shape of your vase is an exciting and creative part of the crafting process. The shape you choose will determine the overall aesthetic and functionality of your vase. Here are some steps to guide you in designing the perfect shape:
1. Consider the Purpose: Think about the purpose of your vase. Will it primarily hold fresh flowers or dried arrangements? Will you use it as a standalone decorative piece? The purpose will influence the size, depth, and overall design of your vase.
2. Explore Different Forms: Research and explore different vase forms to gather inspiration. Look at various shapes, such as cylindrical, spherical, square, or asymmetrical designs. Consider how each shape can complement your chosen material and the overall style of your home.
3. Sketch and Experiment: Use paper and pencil to sketch out your design ideas. Experiment with different shapes and proportions to visualize the final outcome. This will help you refine your vision and make adjustments as needed before moving into the crafting stage.
4. Consider Ergonomics: Think about the ease of use and functionality of your vase. Will it be easy to insert and arrange flowers? Will the shape provide stability? Consider the balance between aesthetics and practicality to create a vase that is both visually pleasing and functional.
5. Embrace Uniqueness: Don’t be afraid to think outside the box and create a unique and unconventional shape. Let your creativity flow, and incorporate your personal style and preferences into the design. A distinctive shape can make your vase a true statement piece.
6. Seek Feedback: Show your design sketches to friends, family, or fellow crafters for feedback. They may offer valuable insights or suggestions that you haven’t considered. Embrace constructive criticism and use it to refine your design further.
7. Iterate and Refine: Don’t be discouraged if your initial design doesn’t meet your expectations. Crafting is a process of trial and error. Use each iteration to refine and improve your design until you achieve the desired shape.
Designing the perfect shape for your vase is an opportunity to showcase your creativity and style. Take your time, experiment, and trust your instincts. Remember, the shape you create will be the foundation for the rest of the vase-making process.
Creating the Base of Your Vase
The base of your vase serves as the foundation, providing stability and support for the rest of the structure. Building a strong and sturdy base is essential to ensure the longevity of your vase. Here are the steps to follow when creating the base:
1. Choose the Shape and Size: Determine the desired shape and size of the base. It should be proportionate to the overall design of your vase and provide a stable platform. Common base shapes include circular, square, or hexagonal.
2. Prepare the Material: Depending on the material you’re working with, you may need to prepare it before building the base. For example, if you’re using clay, knead the clay to remove air bubbles, or if you’re using wood, ensure that the surface is smooth and free of any imperfections.
3. Build the Foundation: Start by forming the base of your vase. If you’re using clay, you can roll it into a flat disc or shape it using a mold. For other materials, you may need to cut and join pieces together to create the desired base shape.
4. Ensure Stability: It’s crucial to ensure that the base is stable and level. Use a level tool to check for any unevenness. If needed, adjust the base by sanding or adding additional layers to create a perfectly level surface.
5. Joining Techniques: Determine the joining technique suitable for your chosen material. For clay, you can score and slip the pieces together or use clay adhesives. If you’re working with wood, consider using wood glue, screws, or nails to secure the pieces.
6. Reinforce if Necessary: Depending on the size and weight of your vase, you may need to reinforce the base for extra stability. Consider adding support structures such as dowels, metal brackets, or additional layers of material to strengthen the base.
7. Allow for Drying or Curing Time: If your material requires drying or curing, follow the recommended time before moving on to the next step. This will ensure that the base sets properly and provides a solid foundation.
8. Evaluate and Adjust: Once the base has been created, evaluate its stability and overall look. Make any necessary adjustments or refinements before proceeding to build up the sides of your vase.
By following these steps and paying attention to detail, you’ll create a solid and reliable base for your vase. A well-crafted base not only provides stability but also enhances the overall aesthetic and functionality of your homemade masterpiece.
Building up the Sides of Your Vase
Building up the sides of your vase is where the shape and structure start to take form. This step allows you to create the height and curvature that will define the overall look of your vase. Here’s a guide to help you navigate through the process:
1. Plan the Height: Determine how tall you want your vase to be. Measure and mark the desired height on your base to serve as a reference point as you build up the sides.
2. Joining Techniques: Depending on your chosen material, use the appropriate joining techniques. For example, if you’re working with glass, apply glass adhesive or use a glass fusing technique. When using clay, score and slip the edges or use clay adhesives. Each material will have specific instructions for creating strong and secure bonds.
3. Layer-by-Layer: Start building up the sides of your vase one layer at a time. Use the appropriate technique for your material, whether it’s rolling out clay slabs, stacking wooden panels, or layering glass pieces. Ensure each layer is securely attached to the previous one.
4. Smooth and Shape: As you add layers, periodically smooth and shape the sides of your vase. Use your hands, tools, or molds to create the desired curves, angles, or contours. Pay attention to symmetry and balance, ensuring the sides are even and proportional.
5. Allow for Drying or Curing: If your material requires drying or curing time between layers, follow the recommended instructions. This will ensure that each layer sets properly and maintains its shape and integrity.
6. Evaluate and Adjust: Step back and evaluate the progress of your vase’s sides. Check for any inconsistencies, imperfections, or wobbliness. Make any necessary adjustments, such as smoothing rough edges or reattaching any loose sections, to ensure a seamless and solid structure.
7. Repeat and Refine: Depending on the thickness and desired look of your vase, you may need to repeat the layering process several times. Each layer adds strength and depth to the sides, allowing you to refine the shape and achieve the desired aesthetic appeal.
8. Consider Decorative Elements: If desired, consider adding decorative elements to the sides of your vase. This could include etching designs, carving patterns, or applying paint or glaze. Be sure to plan and implement any decorative elements before proceeding to the next step.
Building up the sides of your vase requires patience and attention to detail. Take your time, regularly assess your progress, and make the necessary adjustments. The result will be a beautifully crafted vase with sides that perfectly showcase your creativity and craftsmanship.
Adding Decorative Elements to Your Vase
Adding decorative elements to your vase is the perfect way to personalize and enhance its visual appeal. This step allows you to unleash your creativity and make your vase truly unique. Here are some ideas and techniques for adding decorative elements:
1. Painting or Staining: One of the simplest ways to add decorative elements is through painting or staining. Use acrylic or ceramic paints, or wood stains to create colorful designs, patterns, or gradients on the surface of your vase. Consider using stencils or freehand techniques for more intricate designs.
2. Decoupage: Decoupage involves applying cut-out images or decorative papers onto the surface of your vase using adhesive and a sealing coat. Experiment with different patterns, textures, or printed materials to create a custom and visually appealing design.
3. Etching or Carving: For glass or metal vases, consider etching or carving intricate designs onto the surface. Use etching cream, sandblasting, or engraving tools to create unique patterns, monograms, or motifs. This adds a touch of elegance and sophistication to your vase.
4. Appliques and Embellishments: Add dimension to your vase by attaching appliques or decorative embellishments. These can be made of materials such as metal, wood, or ceramic and can include designs like flowers, leaves, or abstract shapes. Adhere them using glue, adhesive, or by embedding them into the vase when working with clay or ceramic.
5. Mosaics: Create an eye-catching and vibrant design by incorporating mosaic tiles or broken glass onto the surface of your vase. Arrange the pieces into patterns or create a mosaic picture. Apply adhesive and grout between the tiles to securely attach them to the vase.
6. Natural Elements: Bring nature into your decoration by incorporating natural elements such as dried flowers, leaves, or seashells. Embed these items into the material of your vase as you build up the sides, or glue them onto the surface for a more decorative touch.
7. Ribbons and Trimmings: Add a touch of elegance and whimsy by attaching ribbons, lace, or decorative trimmings around the neck or base of your vase. This is a simple yet effective way to enhance the overall look and complement your vase’s style.
8. Personal Touches: Don’t be afraid to incorporate your own personal touch to the decorative elements. This could include hand-painted designs, personalized messages, or symbols that hold special meaning to you or the recipient of the vase.
When adding decorative elements, remember to consider the overall design and style you envisioned for your vase. Avoid overcrowding or overwhelming the surface with too many elements. Strive for a harmonious balance that highlights the beauty of both the decorative elements and the base material.
Making the Vase Water-Tight
Ensuring that your vase is water-tight is crucial, especially if you plan to use it for fresh flowers or as a functional piece. Here are some essential steps to make your vase water-tight:
1. Choose the Right Sealant: Look for a sealant that is specifically designed for your material. For glass vases, silicone adhesive is commonly used, while clay or ceramic vases may require waterproof glazes or sealants. Read the product labels and instructions carefully to select the appropriate sealant.
2. Apply Sealant to Joints: Examine the joints and seams of your vase and apply the sealant generously to these areas. Use a small brush or applicator to ensure even coverage. Pay close attention to any areas where the base meets the sides or where attached pieces join together.
3. Smooth and Seal the Exterior: In addition to sealing the joints, it’s important to protect the exterior of your vase from water damage. Apply a waterproof sealant or varnish to the entire surface, even if it’s already glazed or painted. This extra layer of protection will help to prevent water absorption.
4. Test for Leaks: After applying the sealant, fill your vase with water and let it sit for some time. Carefully inspect the vase for any signs of leaks or seepage. If you notice any, mark the areas and apply additional sealant as needed. Repeat the testing process until the vase is completely water-tight.
5. Allow for Proper Curing and Drying Time: Follow the manufacturer’s instructions regarding the curing and drying time for your chosen sealant. It’s crucial to allow the sealant to cure fully before using the vase to ensure its effectiveness in making it water-tight.
6. Test with Real Flowers: Once you’re confident that your vase is water-tight, test it with real flowers. Fill the vase with water and arrange the flowers accordingly. Monitor the vase over time to ensure there are no leaks or water seepage. If you encounter any issues, address them promptly with additional sealant or repairs.
7. Regular Maintenance: To maintain the water-tight integrity of your vase, avoid submerging it in water for prolonged periods. Instead, fill the vase with water only up to the level needed to support the stems of your flowers. After using the vase, empty the water promptly and dry the interior thoroughly to prevent moisture buildup.
By following these steps and taking the necessary precautions, you can create a vase that is water-tight and ready to showcase beautiful floral arrangements without any water leaks or damage.
Finishing and Sealing Your Vase
After completing the construction and ensuring that your vase is water-tight, the next step is to finish and seal the surface. This final touch will add durability, protection, and an enhanced aesthetic appeal to your homemade vase. Here’s how to finish and seal your vase effectively:
1. Surface Preparation: Prepare the surface of your vase for finishing by smoothing out any rough areas or imperfections. Sand the surface gently using fine-grit sandpaper to achieve a smooth and even texture. Wipe away any dust or debris before proceeding.
2. Choose the Right Finish: Select a finish that aligns with your material and desired look. For wood vases, you can use lacquer, varnish, or wood stain. Glass or ceramic vases can be left as is or sealed with a clear protective coating. Consider the level of gloss or matte finish that suits your style.
3. Apply the Finish: Follow the manufacturer’s instructions for applying the chosen finish. Use a brush, sponge, or a spray applicator depending on the consistency of the finish. Apply thin, even layers and allow each coat to dry completely before applying the next one. This will ensure an even and professional finish.
4. Sanding Between Coats (optional): If you desire an extra smooth and polished finish, lightly sand the surface between each coat of finish. This helps to remove any imperfections, bumps, or brush marks, resulting in a more refined look. Wipe away any dust before proceeding to the next coat.
5. Pay Attention to Edges and Details: Ensure that you cover all edges and intricate details of your vase with the finish. This will provide uniform protection and enhance the overall appearance. Take your time to apply the finish carefully, paying attention to every nook and cranny.
6. Allow for Sufficient Drying Time: Proper drying time is crucial for a robust and durable finish. Follow the manufacturer’s instructions to determine the necessary drying time between coats and the overall curing time. Avoid handling or placing objects on the vase until it is fully cured.
7. Buff and Polish (optional): If desired, you can further enhance the shine and smoothness of your finish by buffing and polishing the surface. Use a soft cloth or a polishing pad to gently buff the vase in circular motions, focusing on any areas that require extra attention.
8. Display and Enjoy: Once the finish is dry and cured, your vase is ready to be displayed and enjoyed. Arrange beautiful flowers in it, or let it stand alone as a decorative piece that adds charm and personality to your home.
By following these steps and taking your time to finish and seal your vase properly, you can create a stunning and long-lasting piece that reflects your craftsmanship and adds a touch of elegance to any space.
Caring for Your Homemade Vase
Once you’ve created your beautiful homemade vase, it’s important to properly care for it to ensure its longevity and continued enjoyment. Follow these essential care tips to keep your vase looking its best:
1. Gentle Handling: Handle your vase with care, especially when moving or displaying it. Avoid placing it in high traffic areas where it could be bumped or knocked over. When cleaning or arranging flowers, handle the vase with a gentle touch to prevent any accidental damage.
2. Avoid Exposure to Direct Sunlight: Protect your vase from prolonged exposure to direct sunlight. Sunlight can cause colors to fade and materials to degrade over time. Display your vase in an area where it will receive indirect or diffused light to preserve its beauty and integrity.
3. Avoid Extreme Temperatures: Avoid subjecting your vase to extreme temperatures, as this can cause materials to expand or contract, potentially leading to cracks or damage. Keep your vase away from direct heat sources such as stoves or radiators, and avoid placing it in freezing temperatures.
4. Regular Dusting: Regularly dust your vase to keep it free from dirt and debris. Use a soft cloth or a feather duster to gently remove any dust buildup. Avoid using harsh chemicals or abrasive materials that could scratch or damage the surface of your vase.
5. Proper Water Management: If using your vase for fresh flowers, properly manage the water to avoid any water damage or mold growth. Change the water regularly to keep it fresh and prevent the growth of bacteria. Trim the flower stems and remove any wilting blossoms to maintain the vase’s cleanliness and aesthetics.
6. Cleaning Techniques: Clean your vase using appropriate techniques for the chosen material. For glass or ceramic vases, mild soap and warm water are usually sufficient. Use a soft cloth or sponge to gently clean the surface. For wooden vases, use a slightly damp cloth to remove dirt, and periodically apply wood polish to maintain its luster and prevent drying.
7. Display with Proper Support: While showcasing your vase, ensure that it has proper support to prevent tipping or falling. Use stable and level surfaces, such as mantlepieces or sturdy shelves. If necessary, use vase stands or supportive bases to provide additional stability for taller or top-heavy vases.
8. Store with Care: If you need to store your vase, ensure it is clean and dry before placing it in a safe spot. Wrap it in soft, acid-free tissue paper or bubble wrap to protect it from scratches and breakage. Store it in a stable, temperature-controlled environment, away from any potential hazards or heavy objects that could damage it.
By following these care tips, you can enjoy the beauty of your homemade vase for years to come. Proper care will help preserve its craftsmanship and extend its lifespan, allowing you to continue appreciating your creation and the joy it brings to your home.