
Materials Needed
When it comes to making a vanity mirror, you will need a few essential materials to get started. Here is a list of items you’ll need:
- A mirror: Choose a mirror size that fits your needs and the available space in your vanity area. You can opt for a framed mirror or a frameless one, depending on your preference.
- A frame: Select a frame that complements the style of your vanity area. You can find frames in a variety of materials such as wood, metal, or plastic.
- Measuring tape: This tool will come in handy when determining the size of the frame, as well as when ensuring the mirror is centered correctly.
- Pencil: Use a pencil to mark the measurements and outline on the frame for accurate cuts and placements.
- Saw or miter box: If you choose to create a custom frame, you will need a saw or miter box to cut the frame materials to the desired sizes and angles.
- Screws or nails: These fasteners are essential for attaching the mirror to the frame and securing the frame together, depending on the type of frame you use.
- Paint or stain (optional): If you want to add a personal touch to your vanity mirror, consider using paint or stain to match the frame’s color to your vanity area’s aesthetic.
- Lights (optional): For a stylish and functional vanity mirror, you may want to add lights. LED strip lights or vanity light fixtures can be used to enhance visibility while applying makeup or grooming.
- Power drill or screwdriver: You will need one of these tools to attach the frame to the mirror and secure any additional elements like lights.
These are the basic materials you will need to create your own vanity mirror. Ensure that you have all the necessary items before starting the project to make the process smoother and more efficient. Once you have gathered all the materials, it’s time to dive into the steps of making your very own vanity mirror.
Step 1: Choose the Mirror
The first step in creating your vanity mirror is to choose the perfect mirror that suits your needs. Consider the following factors when selecting a mirror:
- Size: Measure the available space in your vanity area to determine the appropriate size for your mirror. Make sure the mirror is proportionate to the vanity and provides ample reflection area.
- Shape: Decide whether you prefer a traditional rectangular or oval-shaped mirror, or if you want to explore more unique shapes like round or arched mirrors. The shape should complement the overall style of your vanity area.
- Frame or frameless: Determine whether you want a mirror with a frame or a frameless one. Frames can add a decorative touch and tie in with the style of your vanity area, while frameless mirrors provide a sleek and minimalist look.
- Quality: Ensure that the mirror you choose provides a clear and distortion-free reflection. Look for mirrors made with high-quality glass to ensure durability and longevity.
Take your time to explore different options and consider your personal preferences and the aesthetic of your vanity area. Remember that the mirror will be the centerpiece of your vanity, so choose one that not only reflects your style but also serves its purpose effectively.
Once you have chosen the perfect mirror, you can move on to the next step of selecting a frame that will complement and enhance its beauty.
Step 2: Select the Frame
After choosing the ideal mirror for your vanity, the next step is to select a frame that will enhance its appearance. The frame will add a touch of style and personality to your vanity mirror. Here are some considerations when selecting a frame:
- Material: Decide on the material that suits your desired aesthetic. Common frame materials include wood, metal, and plastic. Each material has its unique characteristics, so choose one that complements the overall style of your vanity area.
- Color and finish: Consider the color scheme and finishes of your vanity area. You can opt for a frame that matches the existing furniture or fixtures, or choose a contrasting color to make a bold statement. Finishes like matte, glossy, or distressed can also add a particular charm to your vanity mirror.
- Style: Determine the style you want to achieve. Whether it’s rustic, modern, vintage, or minimalist, there are frames available in various designs to suit your preference.
- Size and shape: Ensure that the frame you choose fits the dimensions of your mirror. You can either purchase a pre-made frame or create a custom one using molding or trim to achieve the desired size and shape.
Remember that the frame should complement the mirror without overpowering it. It should harmonize with the overall aesthetic of your vanity area and create a cohesive look.
Once you have chosen the perfect frame, you can proceed to the next step of preparing the frame for assembly.
Step 3: Prepare the Frame
Now that you have selected the frame for your vanity mirror, it’s time to prepare it for assembly. Follow these steps to get your frame ready:
- Measure and cut the frame: Using a measuring tape and pencil, mark the measurements on the frame material according to the size and shape you desire. Use a saw or miter box to cut the frame pieces with precision.
- Sand the edges: After cutting the frame pieces, use sandpaper to smooth out any rough edges or uneven surfaces. This will ensure a seamless and polished look for your frame.
- Test fit the frame: Before attaching the mirror to the frame, do a test fit to ensure that all the frame pieces fit together properly. Make any adjustments if needed.
- Pre-drill holes (if required): If your frame material is prone to splitting, it’s recommended to pre-drill pilot holes for screws or nails. This will prevent any damage to the frame when attaching the mirror.
- Apply adhesive (if required): Depending on the frame design, you may need to apply adhesive to join the frame pieces together securely. Follow the adhesive manufacturer’s instructions for proper application.
It’s crucial to take your time during the preparation phase to ensure that the frame is cut accurately and fits together seamlessly. This will ensure a sturdy and visually appealing vanity mirror.
Once the frame is prepared, you can proceed to the next step of attaching the mirror to the frame.
Step 4: Attach the Mirror to the Frame
With the frame prepared, it’s time to attach the mirror to complete your vanity mirror project. Follow these steps to securely attach the mirror to the frame:
- Place the mirror on a flat surface: Lay the mirror face down on a soft and clean surface to protect it from scratches or damage.
- Position the frame: Carefully position the frame on top of the mirror, ensuring that it aligns perfectly with the edges of the mirror.
- Secure the frame to the mirror: Depending on the frame design, use screws, adhesive, or brackets to secure the frame to the mirror. Follow the manufacturer’s instructions and ensure that the attachments are sturdy and secure.
- Double-check alignment: Once the frame is attached, double-check that it is aligned properly with the mirror and sits flat against it. Make any necessary adjustments to ensure a seamless fit.
Attaching the mirror to the frame requires precision and careful handling to avoid any damage to the mirror. Take your time and ensure that the frame is securely fastened to provide stability and support.
Now that the mirror is securely attached to the frame, it’s time to move on to the next step of painting or staining the frame to enhance its appearance.
Step 5: Paint or Stain the Frame
After attaching the mirror to the frame, you have the option to further enhance the look of your vanity mirror by painting or staining the frame. Follow these steps to paint or stain the frame:
- Prepare the frame: Ensure that the frame is clean and free from any dust or debris. Use a damp cloth to wipe down the frame if necessary.
- Choose your paint or stain: Select a paint color or stain that complements the overall aesthetic of your vanity area. Consider the color scheme and the style you want to achieve.
- Apply the paint or stain: If using paint, apply a thin and even coat using a brush or a roller, allowing it to dry completely between coats. If using stain, apply it with a brush or cloth, following the manufacturer’s instructions for application and drying time.
- Add multiple coats (optional): Depending on the desired finish and coverage, you may need to add multiple coats of paint or stain. Allow each coat to dry thoroughly before applying the next one.
- Seal the frame (optional): To protect the painted or stained frame and ensure its longevity, consider applying a clear sealant or varnish. This step is particularly important if the vanity mirror will be exposed to moisture or high humidity.
Painting or staining the frame allows you to customize your vanity mirror and make it uniquely yours. It’s an opportunity to add a pop of color or highlight the natural beauty of the frame material.
Once the paint or stain is dry, you can move on to the next optional step of adding lights to your vanity mirror for enhanced functionality and style.
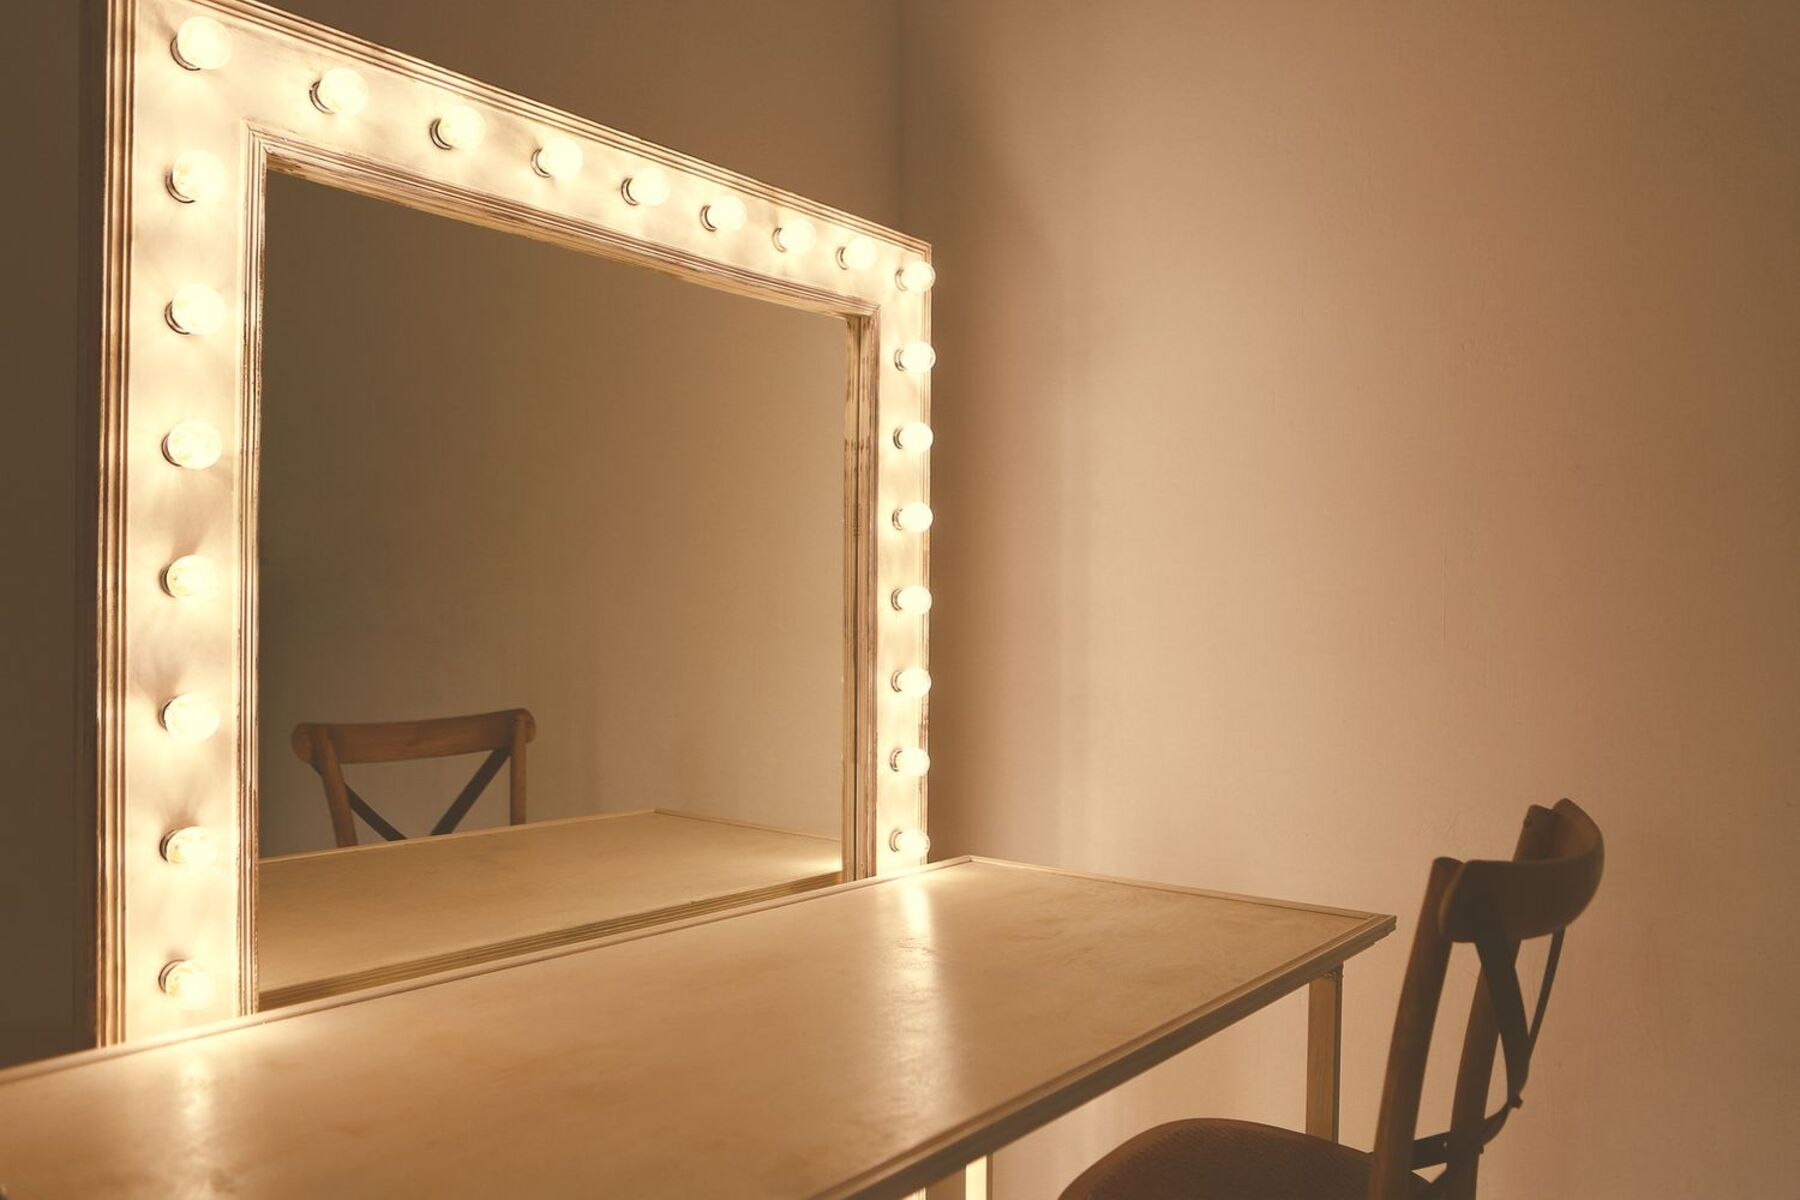
Step 6: Add Lights (optional)
For an extra touch of glamour and functionality, you may consider adding lights to your vanity mirror. Proper lighting can enhance visibility and make your vanity area more practical for tasks like applying makeup or grooming. Here’s how you can add lights to your vanity mirror:
- Plan the lighting placement: Determine the layout and placement of the lights. Common options include placing lights along the sides or top edges of the mirror.
- Select the lighting option: Choose the lighting option that works best for your needs and aesthetic. LED strip lights or vanity light fixtures are popular choices for vanity mirrors due to their brightness and energy efficiency.
- Measure and mark the placement: Use a measuring tape and a pencil to mark the desired placement of the lights on the frame or mirror. Ensure that the measurements are accurate and symmetric.
- Install the lights: Follow the manufacturer’s instructions to install the lights securely. This may involve attaching the light fixtures or adhesive LED strip lights to the frame or mirror.
- Connect the lights: If using wired light fixtures, you may need to connect them to a power source. Make sure to follow electrical safety guidelines or seek professional assistance if needed.
- Test the lights: Once the lights are installed and connected, test them to ensure they are functioning correctly and providing the desired amount of light for your vanity area.
Adding lights to your vanity mirror can create a beautiful ambiance and make your daily routine more efficient. It adds an element of elegance and allows you to see yourself clearly in a well-lit space.
Once the lights are installed and tested, it’s time to move on to the next step of installing your vanity mirror in its designated space.
Step 7: Install the Vanity Mirror
Now that your vanity mirror is ready, it’s time to install it in its designated space. Follow these steps to properly install your vanity mirror:
- Choose the installation location: Decide where you want to place your vanity mirror. It could be above your bathroom vanity, on a dresser, or mounted on the wall. Ensure that the location provides a comfortable and functional space for your grooming and styling needs.
- Measure and mark the placement: Use a measuring tape and a pencil to measure and mark the desired placement of the mirror. Take into consideration factors such as height, alignment, and any surrounding elements like lighting fixtures or cabinets.
- Attach mounting hardware (if necessary): Depending on the installation method, you may need to attach mounting hardware such as hooks, brackets, or screws to support the weight of the mirror. Follow the manufacturer’s instructions and use appropriate tools for secure installation.
- Hang or mount the mirror: Carefully lift the vanity mirror and hang or mount it according to the marked placement and the type of mounting hardware you are using. Enlist the help of a friend or family member for larger or heavier mirrors to ensure safe and accurate installation.
- Check for stability: Once the mirror is in place, ensure that it is level and securely installed. Gently shake or apply light pressure to test its stability. Make any necessary adjustments to ensure that the mirror is safely secured.
Proper installation is crucial to ensure the longevity and functionality of your vanity mirror. Take your time during this step to ensure that the mirror is securely and accurately installed in its designated space.
Now that your vanity mirror is installed, it’s time to move on to the next step of making any necessary adjustments for optimal use and aesthetics.
Step 8: Make Adjustments
After installing your vanity mirror, it’s essential to make any necessary adjustments to ensure optimal functionality and aesthetics. Follow these steps to fine-tune your vanity mirror:
- Check the alignment: Step back and assess the mirror’s alignment with the surrounding space. Ensure that it is centered and visually appealing within the overall design of your vanity area.
- Adjust the lighting (if applicable): If you added lights to your mirror, check their placement and adjust them if needed. Make sure the lights are evenly spaced and provide adequate illumination for your grooming tasks.
- Inspect for any defects or imperfections: Carefully examine the mirror and frame for any defects, scratches, or imperfections. If you spot any issues, consider whether they can be repaired or if you need to replace certain components.
- Clean the mirror: Use a non-abrasive glass cleaner and a soft cloth to clean the mirror’s surface. Remove any fingerprints, dust, or smudges for a crystal-clear reflection.
- Accessorize the vanity area: Consider adding decorative elements or organizing accessories to enhance the overall look and functionality of your vanity area. This could include storage containers, makeup organizers, or decorative items that reflect your personal style.
Making adjustments allows you to fine-tune your vanity mirror to your satisfaction. It ensures that everything is visually pleasing, functional, and well-maintained.
Once you have made the necessary adjustments, your vanity mirror is ready to be fully utilized and enjoyed for your daily grooming and styling needs.
Step 9: Organize Your Vanity
With your vanity mirror complete, it’s important to organize your vanity area to maximize functionality and create a visually pleasing space. Follow these steps to effectively organize your vanity:
- Clear clutter: Start by removing any unnecessary items from your vanity area. Decluttering will provide a clean canvas for organizing your essentials.
- Categorize your items: Sort your makeup, skincare products, hair accessories, and grooming tools into categories. This will help you identify what you have and decide how to best store and arrange them.
- Invest in organizers: Utilize storage containers, drawer dividers, and trays to keep your items neat and easily accessible. Choose organizers that fit your vanity’s dimensions and the size of your products.
- Create designated spaces: Assign specific areas within your vanity for different categories of items. For example, dedicate a section for makeup brushes, one for skincare products, and another for hair accessories.
- Label containers: Use labels to identify the contents of each organizer, making it easier to find what you need at a glance. This also helps maintain organization in the long run.
- Arrange items strategically: Place frequently used items within reach, while storing less frequently used items or backup products in a separate location. This will streamline your daily routine and prevent clutter from building up.
- Consider vanity top decor: Add a personal touch to your vanity by incorporating decorative elements such as candles, small potted plants, or a jewelry tray. Choose items that complement the overall aesthetic of your vanity area.
- Maintain regular cleaning: Establish a routine to clean and declutter your vanity area regularly. This will help prevent the accumulation of unnecessary items and keep your vanity mirror and surroundings looking pristine.
Organizing your vanity area not only enhances the functionality and efficiency of your daily routine but also creates a visually pleasing and stress-free environment.
By following these steps and customizing your organization approach to suit your needs, you’ll have a beautifully arranged vanity space to accompany your vanity mirror.