
Choosing the Material
When it comes to creating a head sculpture, choosing the right material is crucial. The material you select will not only determine the overall look of your sculpture but also its durability and ease of sculpting. Here are some popular options to consider:
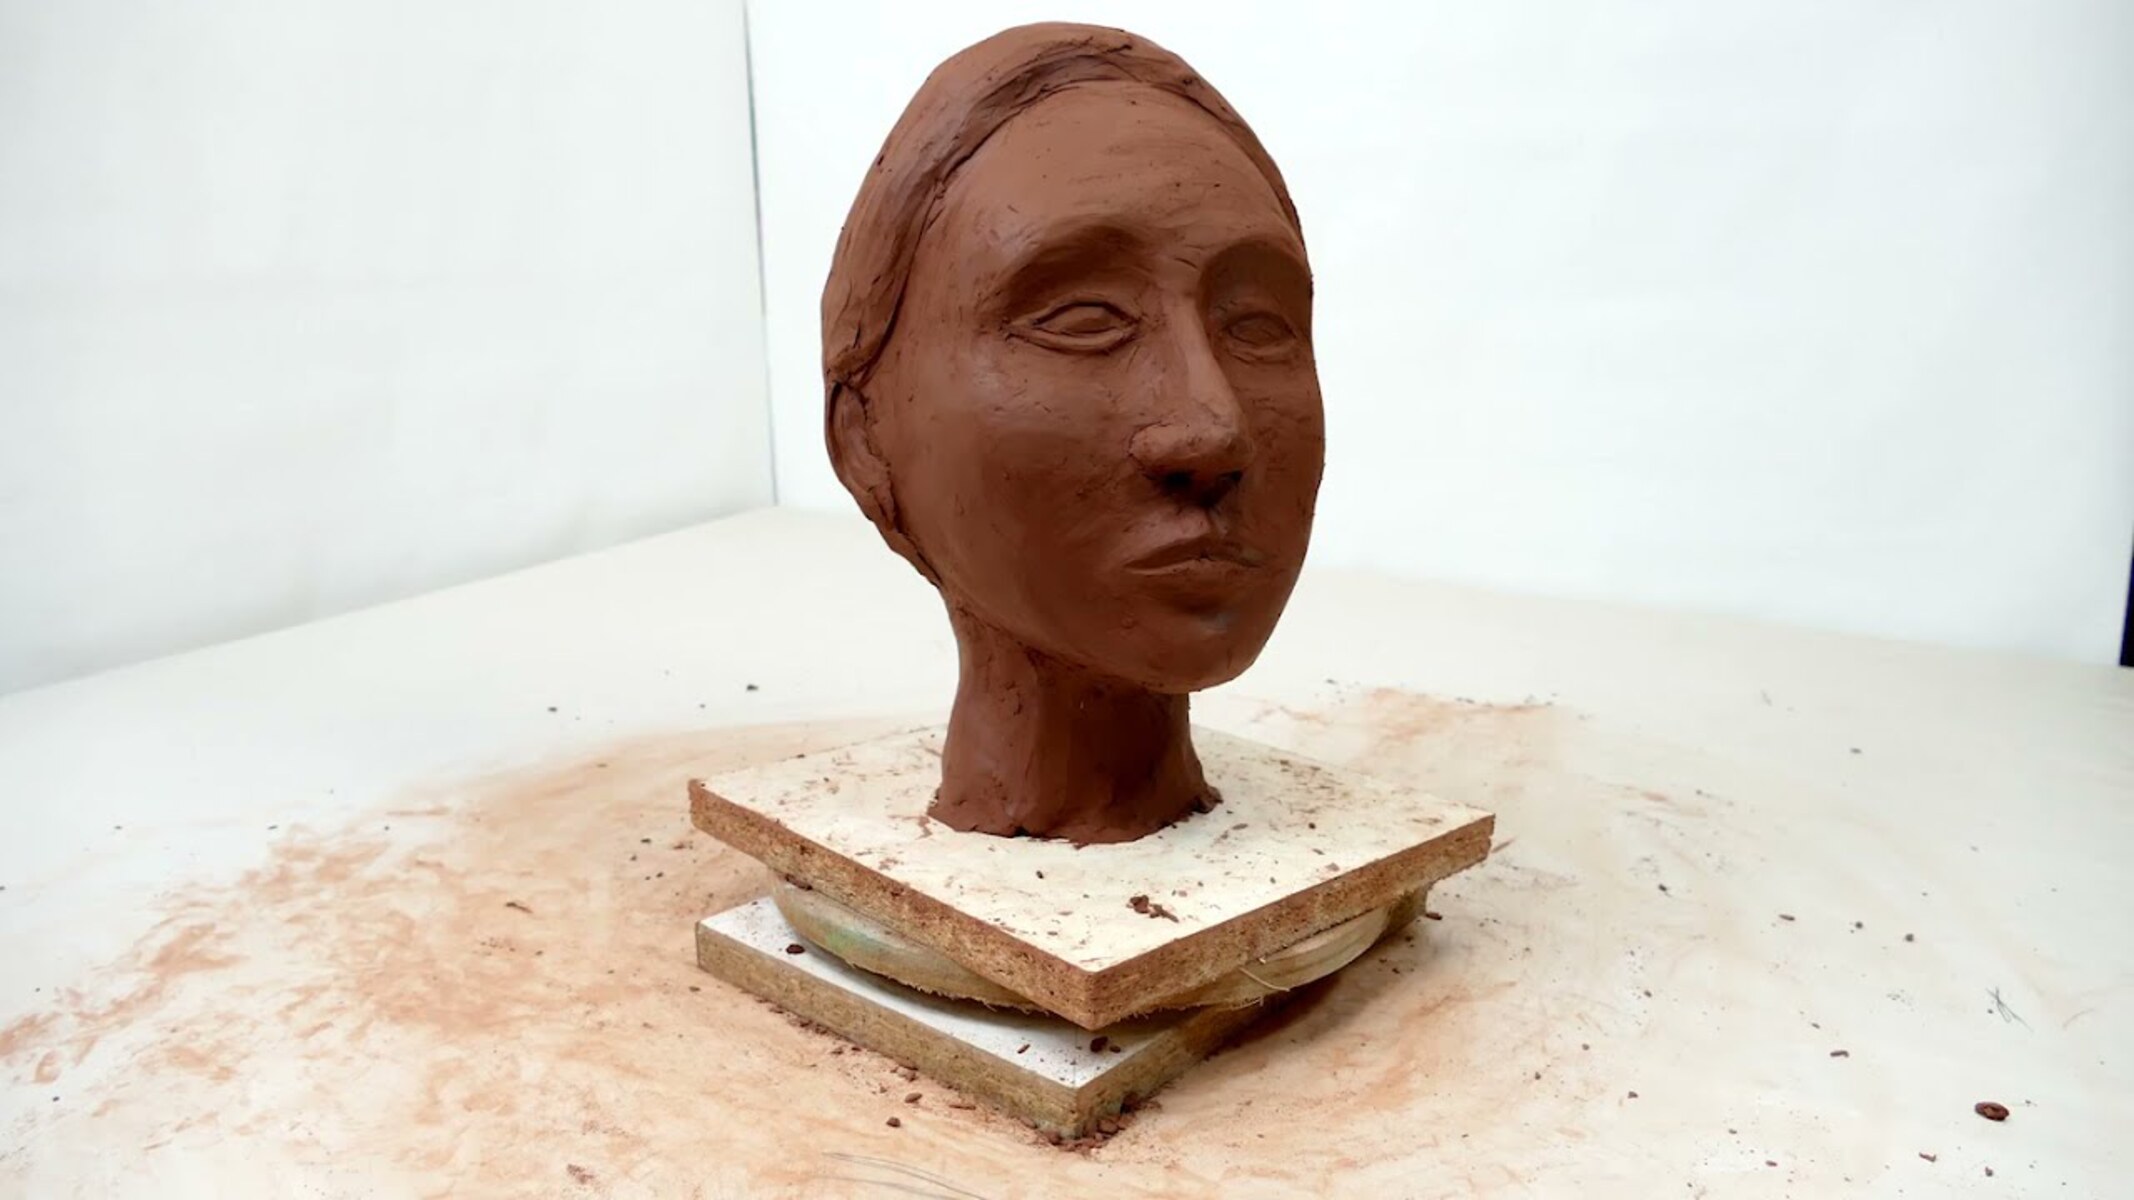
Clay: Clay is a timeless choice for sculpting, especially for beginners. It’s pliable, allowing you to easily mold and shape it into the desired form. Plus, clay is readily available in various types, such as oil-based clay or water-based clay. Oil-based clay is non-drying, allowing for long-term sculpting, while water-based clay dries out and hardens, making it a great choice for sculptures that need to be preserved.
Stone: Stone carving is a traditional sculpting technique that creates stunning and enduring results. Options like marble, granite, and alabaster offer durability and a timeless beauty to your sculpture. However, stone carving requires specialized tools and techniques, making it more suitable for experienced sculptors.
Plaster: Plaster is a versatile material that allows for intricate details and smooth finishes. It’s relatively easy to work with, making it a popular choice for beginners. Plaster sculptures can also be painted or coated with various finishes to enhance their appearance.
Resin: Resin is a synthetic material that can be cast into various shapes and sizes. It’s an excellent choice for creating replicas or mass-produced sculptures due to its ability to capture intricate details. Resin sculptures can also be painted and finished to achieve desired aesthetics.
Wire: Wire sculptures offer a unique and contemporary approach to head sculpting. Using a wire frame as the base, you can create a lightweight and visually appealing sculpture. Wire sculptures are often combined with other materials like clay or plaster to add more depth and texture.
When selecting the material for your head sculpture, consider factors such as your skill level, desired level of detail, and the specific look and feel you want to achieve. Experimenting with different materials can help you discover your preferred sculpting style and create truly unique pieces of art.
Gathering the Tools and Materials
Before starting your head sculpture project, it’s essential to gather all the necessary tools and materials. Having everything prepared and within reach will enable you to work smoothly and efficiently. Here are the basic tools and materials you’ll need:
Sculpting Tools: Invest in a range of sculpting tools that suit your chosen material. For clay sculpting, consider getting tools like wire loops, spatulas, clay shapers, and carving knives. If you’re working with stone or plaster, specialized tools like chisels, rasps, and files are essential. Look for high-quality tools that fit comfortably in your hand for precise sculpting.
Sculpting Medium: Depending on your chosen material, ensure you have an adequate supply of clay, stone, plaster, or resin. Consider the size of your sculpture and buy enough material to accommodate it. If using clay, ensure it’s at the right consistency for sculpting and ready to use.
Armature: An armature serves as the internal support structure for your sculpture. It can be made using wire, wood, or a combination of both. The armature provides stability and helps maintain the desired shape of the sculpture. Plan and construct the armature to match the proportions and size of the intended sculpture.
Safety Gear: Sculpting can involve sharp tools and materials that may irritate the skin or emit dust particles. Protect yourself by wearing safety goggles, a dust mask, and gloves. Ensure good ventilation in your workspace to minimize airborne particles.
Workspace Setup: Choose a dedicated workspace with ample lighting and enough room to accommodate your tools and materials. Consider covering the surface with plastic or a drop cloth to protect it from any spills or mess. Keep your workspace organized and free from clutter to work efficiently.
Reference Materials: Having visual references is important, especially when creating realistic portraits. Gather photographs or drawings of the subject or study human anatomy books to understand facial proportions and features better. These references will guide and inspire you throughout the sculpting process.
Non-toxic Sculpting Materials: If working with children or in an environment where safety is a concern, consider using non-toxic sculpting materials like air-dry clay or non-toxic modeling compounds. These materials are suitable for beginners and provide a safer sculpting experience.
By gathering all the necessary tools and materials, you’ll ensure that you have everything you need to bring your head sculpture to life. Remember to keep your workspace organized and practice safety measures while sculpting to enjoy a smooth and enjoyable sculpting process.
Creating a Basic Structure
Before diving into the details of your head sculpture, it’s important to establish a solid foundation by creating a basic structure. The basic structure provides stability and helps you maintain the correct proportions throughout the sculpting process. Here’s how you can create a basic structure:
1. Determine the Size and Proportions: Start by deciding the size of your sculpture. Consider the scale you want to work with and the level of detail you plan to incorporate. This will guide you in determining the overall height, width, and depth of your sculpture. Refer to reference materials or use measurements to ensure accurate proportions.
2. Build the Armature: The armature acts as the skeleton of your sculpture and provides stability. Construct the armature using materials such as wire or wood, depending on the size and weight of your sculpture. Shape the armature to match the basic outline of the head, including the skull, jawline, and neck. Ensure that the armature is securely attached to a sturdy base to prevent any wobbling during the sculpting process.
3. Establish the Facial Features: Use additional wire or clay to define the basic facial features on the armature. Mark the positions of the eyes, nose, mouth, and ears. This will serve as a guide as you sculpt the detailed facial features later on. Pay attention to the proportions and spacing between the different features to achieve a realistic likeness.
4. Refine the Shape: Begin building up the overall shape of the head using your chosen sculpting medium. Whether working with clay, stone, plaster, or resin, add material around the armature to create the basic contours of the head. Smooth and blend the material, gradually shaping it to match your desired vision. Use sculpting tools to add more definition to the basic forms, refining the overall shape and adding subtle curves and angles.
5. Evaluate and Adjust: Step back and evaluate the basic structure of your sculpture. Ensure that the proportions and general shape align with your reference materials or envisioned outcome. Make any necessary adjustments to achieve the desired look and feel. Remember, this stage is about establishing the foundation, so focus on getting the overall structure right before moving on to adding finer details.
6. Allow for Drying or Setting: Depending on the medium you’re using, allow time for the material to dry or set up before proceeding to the next steps. Follow the manufacturer’s instructions or refer to specific guidelines for the material you’re working with. This will ensure that your basic structure is solid and ready for the next stages of sculpting.
By creating a strong and accurate basic structure, you’ll set yourself up for success in sculpting the finer details of your head sculpture. Take your time during this stage to establish the correct proportions and shape, as it will serve as the foundation for the rest of your artistic process.
Adding Details and Features
With the basic structure in place, it’s time to bring your head sculpture to life by adding intricate details and features. This stage allows you to refine the facial characteristics and capture the unique essence of your subject. Here are some essential steps to follow when adding details and features to your sculpture:
1. Study Facial Anatomy: Understanding the anatomy of the human face is crucial for creating realistic sculptures. Study the different features such as eyes, nose, mouth, and ears to accurately depict their shapes, proportions, and positioning. Reference materials and observing real-life subjects can greatly assist in achieving realistic results.
2. Eyes: Focus on shaping and detailing the eyes, as they are often the focal point of a head sculpture. Pay attention to the shape of the eyelids, the depth of the eye sockets, and the positioning of the iris and pupil. Use sculpting tools to carve and shape the eyelids, creating realistic folds and contours.
3. Nose: Sculpting the nose requires careful attention to its shape, length, and placement. Use your reference materials to guide you in accurately depicting the unique characteristics of the nose. Pay attention to the bridge, nostrils, and overall profile to achieve a lifelike representation.
4. Mouth: The mouth plays an important role in capturing the expression and personality of your subject. Sculpt the lips, taking into account their shape, plumpness, and any defining features such as a cupid’s bow or dimples. Consider the position of the mouth in relation to the other features for a harmonious overall appearance.
5. Ears: Use reference materials to guide you in sculpting the ears. Pay attention to the size, shape, and positioning of the ears on the head. Capture the fine details such as the contours, ridges, and lobes to add realism to your sculpture.
6. Hair: Adding hair to your sculpture can enhance its character and overall aesthetic. Determine the hairstyle and texture you want to depict and use techniques appropriate to your chosen sculpting medium. Create realistic hair strands, curls, or waves using sculpting tools or by applying small pieces of material, such as clay or resin, to the head.
7. Skin Texture: To achieve a realistic appearance, consider adding texture to the skin. Use sculpting tools to create fine lines, wrinkles, and pores on the surface of the sculpture. Be mindful of the age and character of your subject, as this will influence the texture and overall feel of the skin.
8. Facial Expressions: If you want to convey a specific emotion or expression, sculpting subtle changes in the facial muscles and features can help achieve the desired effect. Pay attention to the positioning of eyebrows, depth of furrows, and overall shape of the face to accurately depict the intended expression.
Remember to continuously step back and evaluate your progress as you add details and features to your head sculpture. Fine-tune and refine the features until you achieve the desired result. This stage requires patience and attention to detail, but it’s also a highly rewarding part of the sculpting process.
Sculpting the Face
The face is the focal point of your head sculpture and requires meticulous attention to detail. This is where the unique characteristics and individuality of your subject come to life. Follow these steps to sculpt the face and capture the essence of your subject:
1. Study Facial Proportions: Take time to study and understand the proportions of the face. Pay attention to the relationships between the different features and their placement on the face. Use reference materials and observe real-life subjects to ensure accuracy in your sculpture.
2. Block in the Major Features: Begin by blocking in the major features of the face, such as the eyes, nose, mouth, and ears. Start with basic shapes and gradually refine them as you progress. Pay close attention to the placement and size of each feature, ensuring they align with the overall proportions of the face.
3. Add Volume and Definition: Use your chosen sculpting medium to add volume and definition to the face. Gradually build up the forms, paying attention to the contours of the cheeks, jawline, and forehead. Think about the underlying facial muscles and how they contribute to the overall shape and structure.
4. Sculpt the Eyes: The eyes are often considered the windows to the soul, and capturing their essence is essential in conveying expression and emotion. Sculpt the eyelids, taking care to create the correct shape and thickness. Add depth and detail to the eye sockets, and carefully sculpt the iris and pupil, paying attention to their size and placement.
5. Shape the Nose: Sculpting the nose requires precision and accuracy. Pay close attention to the shape, size, and placement of the nose on the face. Capture the unique character of the subject’s nose, including any defining features such as a bridge bump or flared nostrils.
6. Carve the Mouth: The mouth can convey a range of expressions and greatly impact the overall look of the sculpture. Sculpt the lips, paying attention to their shape, thickness, and positioning. Consider the character of the subject and their unique features, such as a prominent smile or distinctive lip shape.
7. Detail the Ears: Sculpt the ears with attention to detail. Capture the unique shape, size, and positioning of the ears on the head. Add realistic contours and folds to achieve a lifelike representation.
8. Refine and Fine-tune: Continuously evaluate and refine the facial features as you progress. Step back and take a fresh look at your sculpture to ensure accuracy and balance. Make adjustments where necessary to achieve the desired likeness and expression.
9. Pay Attention to Symmetry: Strive for symmetry in your sculpture, particularly in regard to the facial features. Regularly compare both sides of the face to ensure they align correctly. This will contribute to the overall realism and balance of the sculpture.
10. Continuously Evaluate: Throughout the sculpting process, continuously evaluate your progress. Make sure that the overall shape and proportions of the face align with your intended vision. If needed, make adjustments and refine the features until you achieve the desired result.
Sculpting the face requires time, precision, and attention to detail. By carefully studying the facial proportions, refining the major features, and continuously evaluating your progress, you can create a lifelike and expressive face in your head sculpture.
Sculpting the Hair
The hair of a head sculpture adds personality, style, and another dimension of realism to your artwork. Whether your subject has flowing locks, a short crop, or a specific hairstyle, sculpting the hair requires careful attention to detail. Follow these steps to sculpt realistic and dynamic hair for your head sculpture:
1. Research and Observe: Before you begin sculpting the hair, gather reference materials such as photographs, drawings, or real-life examples of the hairstyle you want to depict. Study the way the hair falls, the direction of the strands, and any unique characteristics that make up the desired style.
2. Establish the Hairline: Start by sculpting the hairline, which frames the face. Carefully shape and define the hairline according to the proportions and placement on the head. Consider the shape of the forehead and the hairline’s curvature for an accurate representation.
3. Create the Underlying Structure: Use your sculpting medium, whether it be clay, plaster, or another material, to establish the underlying structure of the hair. Build up the basic shape, following the direction and flow of the individual strands. Consider the overall volume and bulkiness of the hairstyle as you sculpt.
4. Sculpt Individual Strands: Focus on sculpting individual strands of hair. Pay attention to the thickness, texture, and movement of the hair. Use your sculpting tools to create fine, realistic strands, varying their length and direction to add depth and movement to the sculpture.
5. Add Detail and Texture: Enhance the realism of the sculpted hair by adding detail and texture. Use sculpting tools to create texture, such as waves, curls, or straight strands, that correspond to the chosen hairstyle. Add small details like loose strands of hair or wisps to create a more natural and organic appearance.
6. Consider Light and Shadow: Keep in mind the interplay of light and shadow on the hair. Observe how light falls on the hair and sculpt accordingly, creating areas of highlights and shadows. This technique adds depth and dimension to the overall sculpture.
7. Refine and Fine-tune: Step back periodically to evaluate the progress and make any necessary adjustments. Ensure that the hair flows naturally and complements the overall look and feel of the sculpture. Continuously refine and fine-tune the individual strands and overall shape until you achieve the desired result.
8. Pay Attention to Detail: Remember to sculpt the hairline and parting realistically. Pay attention to the transition from the hairline to the forehead and sculpt any intricate details near the roots or scalp. These small details can greatly enhance the overall realism of the hair.
9. Consider Hair Accessories or Styling: If your subject wears hair accessories such as clips, headbands, or hats, sculpt them accordingly. Pay attention to the positioning and details of these accessories to accurately represent them in your sculpture.
10. Experiment and Practice: Sculpting hair can be challenging, so don’t be discouraged if you don’t achieve your desired result on the first attempt. Experiment with different techniques and materials, and practice sculpting different hairstyles to refine your skills and improve your ability to capture the essence of the hair.
By following these steps and approaching the sculpting process with patience and attention to detail, you can create lifelike and dynamic hair for your head sculpture. Remember, hair is an important element in portraying the character and personality of your subject, so take the time to accurately depict the desired hairstyle and bring the sculpture to life.
Refining the Details
Once the major features and overall structure of your head sculpture are in place, it’s time to focus on refining the smaller details. This stage is where you can add realism, depth, and intricate nuances to your sculpture. Here are some steps to follow when refining the details of your sculpture:
1. Facial Features: Pay close attention to the facial features, such as the eyes, nose, mouth, and ears. Refine the shapes, contours, and proportions to ensure accuracy and likeness to your subject. Add subtle details like eyelashes, eyebrows, or the texture of the lips to bring a sense of realism to the sculpture.
2. Skin Texture: In this stage, focus on adding texture and surface details to the skin. Use sculpting tools to create fine lines, wrinkles, and pores, taking care to mimic natural skin textures. Observe reference materials or real-life subjects to accurately depict the texture and character of the skin.
3. Expression and Emotion: Sculpting the expression and emotion of your subject requires attention to subtle details. Refine the position of the eyebrows, furrows on the forehead, and the shape of the mouth to capture the desired expression. Small changes in these features can greatly impact the overall mood and personality of the sculpture.
4. Hair and Hairline: Pay special attention to refining the hair and hairline. Sculpt individual strands, varying their thickness, direction, and texture to create a realistic appearance. Take time to shape the hairline, considering how it naturally interacts with the forehead. Add fine details like wisps or flyaway strands to enhance the overall realism of the hair.
5. Fine-Tune Proportions: Continuously evaluate the proportions of your sculpture and make any necessary adjustments. Step back and observe the sculpture from different angles to ensure balance and accuracy. Pay attention to the relationships between the facial features and the overall face shape to achieve a cohesive and harmonious look.
6. Smoothing and Blending: Use sculpting tools and techniques to smooth and blend different areas of the sculpture. Ensure a seamless transition between various elements, such as the face, hair, and neck. Pay attention to the overall surface finish to create a polished and refined appearance.
7. Check for Symmetry: Regularly compare both sides of the sculpture to ensure symmetry. Make any necessary adjustments to bring the features into alignment. Symmetry contributes to the overall visual appeal and realism of your sculpture.
8. Step Back and Evaluate: Periodically step back and evaluate your progress. Take breaks if needed to gain a fresh perspective. Use reference materials or seek feedback to ensure accuracy and make any final adjustments necessary to achieve your desired outcome.
9. Attention to Detail: The devil is in the details, so pay close attention to the smallest elements of your sculpture. Sculpt tiny details like eyelashes, creases, or freckles that add depth and character to your subject. These small touches can elevate your sculpture to a higher level of realism.
10. Practice and Patience: Remember, refining the details takes practice and patience. Sculpting is a skill that improves with time and experience. Don’t be afraid to experiment and try new techniques to refine your abilities as a sculptor.
By following these steps and dedicating time to refining the details, you can elevate your head sculpture to a new level of realism and artistry. The process may require patience and attention to detail, but the end result will be a visually captivating and meticulously crafted piece of art.
Adding Texture and Surface Finish
Adding texture and surface finish to your head sculpture can elevate its visual appeal and bring it to life. This stage allows you to add depth, realism, and tactile qualities to your artwork. Here are some techniques you can use to add texture and surface finish to your sculpture:
1. Sculpting Tools: Utilize various sculpting tools to create texture on the surface of your sculpture. Experiment with different tools, such as brushes, sponges, or carving tools, to achieve the desired effect. Use these tools to carve or indent patterns, create lines, or add texture to specific areas of the sculpture.
2. Surface Treatment: Consider adding a surface treatment to your sculpture to enhance its appearance. This can include techniques such as painting, antiquing, or using patinas to create highlights and shadows. Research and experiment with different surface treatment options to achieve the desired effect for your sculpture.
3. Layering: Create texture through layering different materials or adding sculpting mediums on top of each other. For example, you can add a layer of textured paste or gel medium onto the surface of your sculpture to create a particular texture or roughness. Allow each layer to dry or set before adding another layer to create depth and complexity.
4. Tactile Elements: Consider incorporating tactile elements into your sculpture to engage the sense of touch. You can achieve this by creating rough textures, smooth surfaces, or adding elements like beads, fabrics, or other materials that contrast with the main sculpting medium. Be mindful of how these elements interact with the overall aesthetic and theme of your sculpture.
5. Surface Carving: Carving into the surface of your sculpture can create visually striking texture. Use carving tools to etch patterns, designs, or intricate details onto the surface. It adds dimension and visual interest to your sculpture, creating a unique and captivating appearance.
6. Facial Features: Pay specific attention to the texture and surface finish of the facial features. Use sculpting tools to add details like wrinkles, pores, or fine lines on the skin. Be subtle and realistic in your approach, ensuring that the texture enhances the overall appearance without overpowering the sculpture.
7. Experimentation: Don’t be afraid to experiment with different techniques or materials to achieve the desired texture and surface finish. Test out different combinations and methods on a small section of your sculpture to see how they interact with your chosen sculpting medium. This process of trial and error will help you discover unique and effective ways to add texture.
8. Finishing Touches: Once you’ve achieved the desired texture and surface finish, evaluate the overall appearance of your sculpture. Make any final adjustments or refinements to ensure a cohesive and harmonious look. Pay attention to the areas where different textures meet to ensure a seamless transition.
9. Natural References: Observe and study the textures found in nature or real-life references. Look at how different materials, fabrics, or surfaces create unique textures. Use these observations as inspiration for adding texture to your sculpture, adapting them to suit the artistic vision of your piece.
10. Practice and Patience: Adding texture and surface finish requires practice and patience. Experiment with different techniques, materials, and tools to improve your skills. Be patient with yourself as you explore and refine your ability to create visually captivating and tactile sculptures.
By carefully considering texture and surface finish, you can enhance the overall visual impact of your head sculpture. The texture adds depth, realism, and tactile interest to your artwork, inviting viewers to engage both visually and physically with your creation.
Preparing for Painting
Preparing your head sculpture for painting is an important step in enhancing its overall appearance and bringing out its full potential. Proper preparation ensures that the paint adheres well to the sculpture’s surface and provides a smooth and professional finish. Here are some essential steps to follow when preparing your sculpture for painting:
1. Clean the Surface: Before applying any paint, ensure that the surface of your sculpture is clean and free from dust, debris, or any other contaminants. Use a soft brush or cloth to gently remove any loose particles that may interfere with the paint application.
2. Smoothen Imperfections: Inspect the surface of your sculpture for any imperfections, such as rough spots, uneven surfaces, or visible sculpting marks. Use sandpaper or fine-grit files to smoothen these areas, creating a more even surface for painting. Pay attention to delicate areas, such as facial features, and use sanding tools with care to avoid damaging the sculpture.
3. Fill and Seal: If there are any noticeable gaps or indentations in your sculpture, fill them with an appropriate filler. Choose a filler that matches the material of your sculpture, whether it’s clay, plaster, or another medium. Once filled, smoothen the surface and allow the filler to dry thoroughly. After drying, seal the surface with a suitable primer or sealer to prevent paint from being absorbed unevenly and to create a smoother canvas for painting.
4. Prime the Surface: Applying a primer to your sculpture is particularly important when working with porous materials like clay or plaster. Use a primer that is compatible with your sculpting medium. Priming helps create a base layer that improves paint adhesion, smoothens the surface, and enhances the durability of the final paint job. Apply the primer evenly, following the manufacturer’s instructions, and allow it to dry completely.
5. Choose the Right Paint: Consider the type of paint suitable for your sculpture and the desired effect you want to achieve. Acrylic paint is a popular choice for its versatility, quick drying time, and wide range of colors. Oil-based paints can offer a more traditional and glossy finish but require longer drying times. Select high-quality paints that are durable and vibrant, ensuring they adhere well to the primed surface.
6. Practice Color Mixing: If you plan to mix colors to achieve specific shades or tones, take the time to practice color mixing on a separate palette or surface. Experiment with different ratios to achieve the desired color before applying it to your sculpture. This will help avoid any unwanted surprises and ensure consistency in the final paint application.
7. Test and Layer: Before applying paint to the entire sculpture, consider performing color tests on smaller, less visible sections. This allows you to assess how the paint interacts with the surface and make adjustments if needed. As you layer the paint, consider using thin glazes or washes to build up color gradually, ensuring a more realistic and nuanced appearance.
8. Apply Multiple Coats: Apply multiple thin coats of paint rather than one thick layer to achieve a smoother and more even finish. Allow each coat to fully dry before applying the next, following the recommended drying times specified by the paint manufacturer. Take your time and be patient during this process to obtain a professional-looking result.
9. Protect and Preserve: Once the paint has thoroughly dried, consider protecting and preserving your sculpture with a suitable varnish or finish. Select a varnish that is compatible with the type of paint you have used and follow the recommended application instructions. The varnish not only enhances the appearance but also adds a layer of protection against environmental elements.
10. Evaluate and Adjust: Step back and evaluate your painted sculpture from different angles and lighting conditions. Assess the colors, texture, and overall effect of the paint job. Make any necessary adjustments or touch-ups to areas that may require additional attention or refinement.
By following these steps and properly preparing your head sculpture for painting, you will achieve a professional and aesthetically pleasing finish that brings your artwork to life. Take the time to ensure a clean and smooth surface, select high-quality paint, practice color mixing, and be patient throughout the painting process to create a visually stunning and long-lasting result.
Final Touches and Variations
As you near the completion of your head sculpture, it’s time to add those final touches that will enhance its overall impact and make it truly unique. This stage allows you to add personal flair and explore variations to create a distinct work of art. Here are some important considerations when adding final touches and exploring variations:
1. Fine Details: Take a close look at your sculpture and identify any areas that could benefit from additional detail. Refine the intricacies of facial features, add small textures or imperfections to the skin, or enhance the realism of the hair. Using smaller sculpting tools, carefully carve and shape these details, paying attention to proportion and aesthetics.
2. Painting Enhancements: Consider adding additional layers of paint or subtle color variations to enhance certain features or areas. Use strategic highlights and shadows to create depth, accentuate contours, or add dimension to specific elements of the sculpture. Experiment with different techniques, such as dry brushing or glazing, to achieve the desired effects.
3. Unique Expressions: Explore variations in expressions to capture a different mood or personality in your sculpture. Sculpt slight changes in the positioning of the eyebrows, shape of the mouth, or the gaze of the eyes to convey a specific emotion or create a new narrative. These variations can breathe life and individuality into your sculpture.
4. Experiment with Materials: Consider using different materials or combining them to create a visually interesting contrast. For example, you could incorporate glass or metal elements into your sculpture, experiment with mixed-media techniques, or incorporate natural materials like wood or stone. These variations in materials can create a striking and unique visual impact.
5. Base and Display: Pay attention to the base or display of your head sculpture. Choose a base that complements the overall aesthetic and provides proper support for the sculpture. Consider adding additional elements to the display, such as a plaque with the sculpture’s title or a personalized inscription, to give it a polished and professional touch.
6. Lighting Considerations: Experiment with different lighting conditions to enhance the overall impact of your sculpture. Play with shadows and highlights to create intriguing effects. Consider displaying your sculpture in a well-lit area or using spotlighting to draw attention to specific features.
7. Seek Feedback: Share your sculpture with trusted friends, mentors, or fellow artists to get constructive feedback. Listen to their perspectives and consider any suggestions or insights they provide. Collaboration and feedback can further refine your sculpture and offer fresh perspectives that you may not have considered.
8. Document your Process: Photograph or document the different stages of your sculpting process. This serves as a record of your artistic journey and allows you to reflect on the progress you’ve made. It can also be helpful in showcasing the evolution of your work to others.
9. Embrace Imperfections: Remember that art is subjective and unique to each artist. Embrace and celebrate any imperfections or variations in your sculpture as they add character and depth. These imperfections make your artwork one-of-a-kind and reflect your personal artistic style.
10. Reflect and Celebrate: Take a moment to step back and reflect on the completed sculpture. Celebrate your artistic achievement, knowing that you’ve put your skill, creativity, and passion into creating a captivating and meaningful head sculpture.
By adding final touches and exploring variations, you can inject your personality and creativity into your head sculpture. Embrace the opportunity to refine details, experiment with different materials, seek feedback, and celebrate your completed work. Remember, this is your artistic expression and a reflection of your artistic journey.