
Common Disc Tray Issues
The Xbox 360 disc tray is a vital component that allows you to play your favorite games and watch movies. However, like any mechanical device, the disc tray can encounter issues that prevent it from functioning properly. In this section, we will explore some of the most common disc tray issues that Xbox 360 users might encounter and how to troubleshoot them.
1. Disc Tray Not Opening/Closing: One of the most common issues is when the disc tray fails to open or close. This can be caused by multiple factors, such as a stuck disc, dust build-up, or a faulty motor. To resolve this, try powering off the console and using a small, straightened paperclip to manually eject the tray by inserting it into the small pinhole near the disc tray.
2. Disc Tray Getting Stuck: Another frustrating issue is when the disc tray gets stuck halfway when opening or closing. This can be caused by debris obstructing the tray’s movement or a misalignment of the gears. To fix this, gently clean the disc tray area with compressed air or a soft cloth, removing any dirt or debris. If the problem persists, it might be necessary to contact Xbox support for further assistance.
3. Discs Not Being Detected: If you insert a disc into the tray, but it is not being recognized or read by the Xbox 360, it could be due to a dirty or scratched disc, a faulty laser lens, or a problem with the disc drive. Cleaning the disc using a soft cloth and checking for any visible scratches is the first step. If the disc is in good condition but still not being detected, it may be necessary to seek professional repair or replacement.
4. Disc Tray Making Unusual Noises: A noisy disc tray can indicate a problem with the motor or gears. It could be a sign of wear and tear or a misalignment within the tray mechanism. Try gently cleaning the disc tray and lubricating the gears with a small amount of silicone grease. If the noise persists, it may be necessary to replace the disc tray motor or seek professional assistance.
Remember, these are just a few common disc tray issues that Xbox 360 users might encounter. In the following sections, we will explore various troubleshooting steps and solutions to help you fix these problems and get your disc tray functioning smoothly again.
Clearing Dust and Debris
Dust and debris can accumulate over time and cause various issues with the Xbox 360 disc tray. It can lead to the tray getting stuck, discs not being detected, or even prevent the tray from opening or closing properly. Fortunately, clearing out the dust and debris is a relatively simple and effective solution to these problems.
1. Power off the console: Start by turning off your Xbox 360 console and unplugging it from the power source. This is to ensure your safety and prevent any damage to the system while cleaning.
2. Remove the faceplate (if applicable): If your Xbox 360 has a removable faceplate, carefully detach it by pulling gently from the bottom corners. This will give you better access to the disc tray area.
3. Clean the disc tray area: Use a soft, dry cloth or compressed air to gently remove any visible dust or debris from the disc tray and its surrounding area. Pay close attention to the edges and corners where dirt can accumulate.
4. Remove stuck discs: If there are any discs stuck in the tray, gently try to remove them by carefully pulling them out. Be cautious not to apply excessive force, as this could cause damage to the discs or the tray.
5. Use a vacuum cleaner (optional): For a more thorough cleaning, you can use a handheld vacuum cleaner with a brush attachment to remove any stubborn dust or debris that cannot be easily wiped away. Be sure to use a low-pressure setting to avoid causing any damage.
6. Reassemble and test: Once you have cleared the dust and debris from the disc tray area, reattach the faceplate (if applicable) and plug the console back into the power source. Turn on your Xbox 360 and test the disc tray to ensure it is functioning properly.
Regularly clearing the dust and debris from your Xbox 360 disc tray is essential for maintaining optimal performance and preventing potential issues. By following these simple steps, you can effectively resolve many common problems and enjoy uninterrupted gaming experiences.
Checking for Loose Connections
Another common cause of disc tray issues on the Xbox 360 is loose connections. Over time, the connectors that link the disc tray to the console can become loose or disconnected, leading to malfunctioning or non-responsive tray operations. Thankfully, checking for loose connections and ensuring they are properly secured can often resolve these problems.
1. Power off the console: As a safety precaution, turn off your Xbox 360 console and unplug it from the power source.
2. Open the console: Carefully remove the outer casing of the console to access the internal components. Consult the Xbox 360 user manual or online resources for detailed instructions on how to open your specific model.
3. Locate the disc tray connections: Once inside the console, locate the cables and wires that connect the disc tray mechanism to the main circuit board. These connectors are typically located near the disc drive or in the vicinity of the tray itself.
4. Ensure secure connections: Gently inspect each connector to ensure they are securely attached. If you find any loose or disconnected connections, carefully reattach them to their corresponding ports. Ensure that each connector is properly seated and clicks into place.
5. Test the disc tray: After securing all the connections, reassemble the console casing and plug it back into the power source. Power on your Xbox 360 and test the disc tray to see if the issues have been resolved. Try opening and closing the tray several times to ensure smooth operation.
If checking for loose connections does not resolve the disc tray issues, there may be other underlying problems with the console or the tray mechanism itself, such as a faulty motor or a misaligned gear. In such cases, it is recommended to contact Xbox support or consult a professional repair service for further assistance.
By periodically checking for loose connections and ensuring they are properly secured, you can mitigate potential disc tray issues on your Xbox 360 and enjoy uninterrupted gaming experiences.
Resetting the Console
If you are experiencing persistent disc tray issues on your Xbox 360, performing a console reset can often help resolve these problems. Resetting the console clears temporary data and settings, effectively refreshing the system and potentially resolving any software or firmware-related issues.
1. Power off the console: Start by turning off your Xbox 360 console and unplugging it from the power source. This is to ensure a complete reset and prevent any potential damage to the system.
2. Wait for a few minutes: Allow the console to sit idle for a few minutes. This gives enough time for any background processes or lingering power to dissipate.
3. Reconnect the power: Plug the power cable back into the console and connect it to a reliable power source. Ensure a secure connection.
4. Turn on the console: Press the power button on the console to turn it back on. Wait for the Xbox 360 logo to appear on the screen.
5. Perform a system reset: Depending on your Xbox 360 model, perform either a soft reset or a hard reset:
– Soft reset: Press and hold the power button on the console for about 10 seconds until it shuts down completely. Then, press the power button again to turn it back on.
– Hard reset: If the soft reset does not resolve the issue, you can perform a hard reset. This process varies depending on the Xbox 360 model. Consult the user manual or search online for specific instructions on how to perform a hard reset for your model.
6. Test the disc tray: After the console has reset, power it back on and test the disc tray to see if the issues have been resolved. Open and close the tray multiple times to ensure smooth operation.
If resetting the console does not resolve the disc tray issues, it is recommended to contact Xbox support or seek professional repair services. There may be underlying hardware problems that require further examination and troubleshooting.
Resetting the console is a simple yet effective step to troubleshoot disc tray problems on your Xbox 360. It can help refresh the system and eliminate any temporary glitches, allowing you to enjoy uninterrupted gaming experiences.
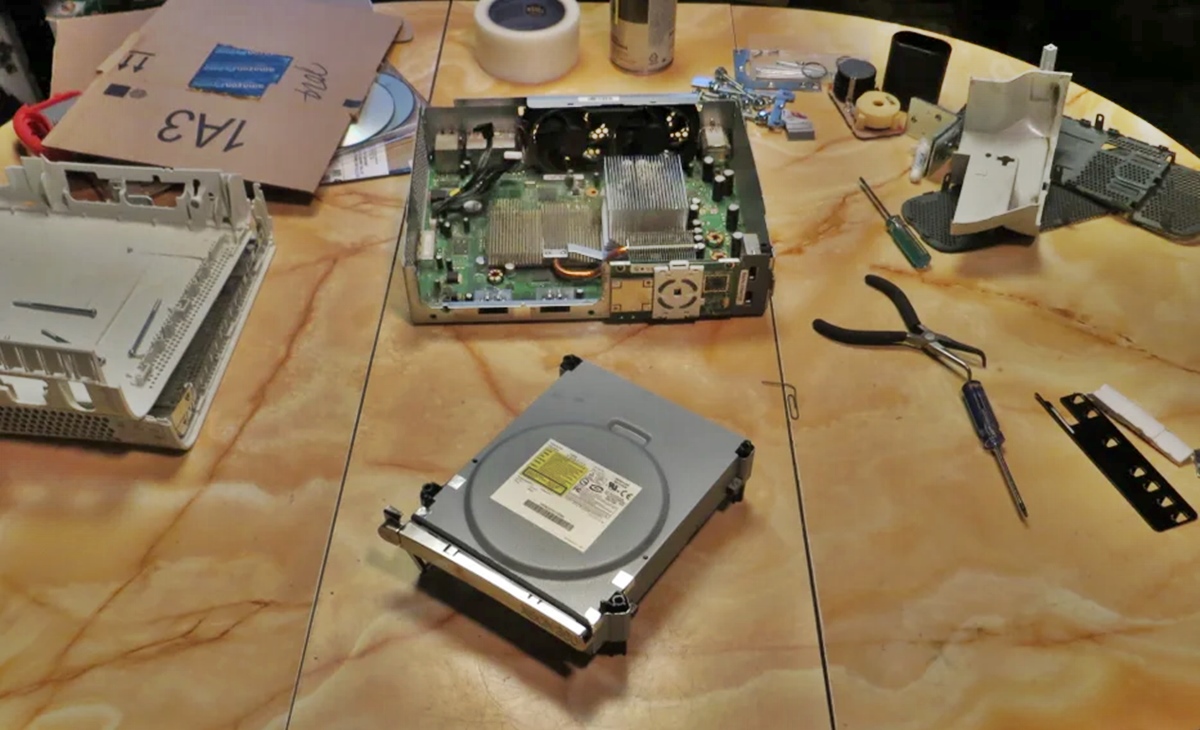
Manually Ejecting the Disc Tray
If your Xbox 360 disc tray is stuck or unresponsive, manually ejecting the tray can provide a solution. This method allows you to physically remove any stuck discs and get the tray functioning again. Follow these steps carefully to safely manually eject the disc tray:
1. Power off the console: Start by turning off your Xbox 360 console and unplugging it from the power source. This is an important safety precaution to prevent any electrical issues while manually ejecting the tray.
2. Locate the manual eject hole: Look for a small pinhole near the disc tray. This hole is usually located below or beside the tray’s opening mechanism.
3. Prepare a paperclip: Straighten out a small paperclip or use a similar object with a thin and sturdy tip. Ensure that it is long enough to reach the manual eject hole.
4. Insert the paperclip: Carefully insert one end of the paperclip into the manual eject hole. Apply gentle pressure until you feel resistance. This is the release mechanism of the disc tray.
5. Manually eject the tray: Push the paperclip further into the hole and you should feel a slight click. Keep applying pressure until the disc tray begins to slide out. When the tray is fully extended, carefully pull it out with your hands.
6. Remove any stuck discs: Once the tray is out, check if there are any discs stuck inside. Gently remove them, being careful not to force or damage them in the process.
7. Power on the console: Plug your Xbox 360 back into the power source and turn it on. Test the disc tray by opening and closing it to ensure it functions properly.
If manually ejecting the disc tray does not resolve the issue or if the tray continues to get stuck, it is recommended to contact Xbox support or consult a professional repair service for further assistance. There may be underlying mechanical or hardware problems that require further examination.
Manually ejecting the disc tray is a useful technique to resolve issues with stuck or unresponsive trays on your Xbox 360. By following these steps, you can safely remove any stuck discs and restore the functionality of the tray.
Cleaning the Disc Tray
Over time, dust, dirt, and fingerprint smudges can accumulate on the surface of the Xbox 360 disc tray, affecting its performance and potentially causing disc read errors. Cleaning the disc tray regularly is an essential maintenance task that can help prevent these issues and ensure optimal functionality. Follow these steps to effectively clean your Xbox 360 disc tray:
1. Power off the console: Start by turning off your Xbox 360 console and unplugging it from the power source. This is crucial to ensure your safety and avoid any potential issues while cleaning.
2. Prepare cleaning materials: Gather the necessary cleaning materials, such as a soft microfiber cloth and a mild glass cleaner or isopropyl alcohol. Avoid using abrasive materials or harsh chemicals that can damage the tray’s surface.
3. Spray cleaning solution: Lightly spray a small amount of the glass cleaner or isopropyl alcohol onto the microfiber cloth. Be sure not to saturate it to avoid any liquid seeping into the console.
4. Wipe the disc tray: Gently wipe the surface of the disc tray using the dampened microfiber cloth. Make sure to cover the entire tray and pay attention to any visible smudges or dirt. Use a circular motion to effectively clean the surface.
5. Remove stubborn stains: For any stubborn stains or dried residue, you can dampen a corner of the cloth slightly more with the cleaning solution and apply gentle pressure to remove them. Avoid using excessive force that could potentially scratch the tray surface.
6. Dry the tray: After cleaning, use a dry section of the microfiber cloth to thoroughly dry the disc tray. Ensure that there is no moisture remaining to prevent any potential damage when powering on the console.
7. Power on the console: Once the disc tray is completely dry, plug your Xbox 360 back into the power source and power it on. Test the tray by opening and closing it to ensure it operates smoothly.
Regularly cleaning the Xbox 360 disc tray keeps it free from dust, dirt, and smudges, preventing potential reading errors and maintaining optimal performance. Make it a part of your routine maintenance to enjoy uninterrupted gaming experiences.
Replacing the Disc Tray Motor
If you have tried various troubleshooting steps but are still experiencing persistent issues with your Xbox 360 disc tray, it may be necessary to replace the disc tray motor. The motor is responsible for the mechanical movements of the tray, and a malfunctioning or faulty motor can lead to problems such as the tray not opening or closing properly. Here are the steps to replace the disc tray motor:
1. Power off the console: Start by turning off your Xbox 360 console and unplugging it from the power source. This is essential to ensure your safety during the replacement process.
2. Open the console: Carefully remove the outer casing of the console to access the internal components. Consult the Xbox 360 user manual or seek online resources for detailed instructions specific to your model.
3. Locate the disc tray motor: Once inside the console, locate the disc tray motor. It is usually positioned near the disc drive or in the vicinity of the tray mechanism. Take note of how the motor is connected to the tray and the circuit board.
4. Disconnect the old motor: Gently disconnect the wires and connectors that are attached to the disc tray motor. Take note of the color coding or labeling to ensure proper reconnection later. You may need to use a small screwdriver or pry tool to release any locking mechanisms.
5. Remove the old motor: Unscrew or unclip the old motor from its mounting position. Take careful note of any screws or clips and their locations, as you will use them to secure the new motor.
6. Install the new motor: Position the new motor in the same location as the old one and secure it with screws or clips. Ensure that it is aligned correctly and fits snugly in the designated spot.
7. Connect the new motor: Reconnect the wires and connectors to the corresponding ports on the new motor. Double-check that each connection is secure and properly aligned.
8. Reassemble the console: Carefully reattach the outer casing of the console, ensuring that all screws and clips are securely fastened. This will enclose the replaced disc tray motor and protect the internal components.
9. Power on the console: Once the console is reassembled, plug it back into the power source and turn it on. Test the disc tray by opening and closing it to ensure that the replacement motor is working properly.
If replacing the disc tray motor does not resolve the issues with your Xbox 360 disc tray, it is recommended to contact Xbox support or consult a professional repair service. There may be other underlying factors causing the problems that require further examination and troubleshooting.
Replacing the disc tray motor can be a more involved process, but it can effectively address persistent issues and restore proper functionality to your Xbox 360 disc tray.
Testing and Troubleshooting
After performing various troubleshooting steps and potential repairs on your Xbox 360 disc tray, it is important to thoroughly test the functionality and continue troubleshooting if issues persist. Here are some key steps you can take to test and troubleshoot your disc tray:
1. Test disc detection: Insert various discs into the tray and verify that they are being recognized and read by the console. Make sure the discs load and play without any errors or interruptions.
2. Check for smooth tray operation: Open and close the disc tray multiple times, paying attention to its movement and any potential sticking or resistance. The tray should operate smoothly without any jerking or hesitation.
3. Listen for abnormal noises: Listen for any unusual or loud noises coming from the disc tray during operation. Grinding or clicking sounds can indicate underlying issues and may require further investigation or repair.
4. Verify connection stability: Check that all cables and connectors related to the disc tray are securely and properly connected. Loose or faulty connections can cause intermittent issues and malfunctions.
5. Clear cache: Clearing the cache on your Xbox 360 can resolve certain software or firmware-related problems. Go to the system settings and select “Storage,” then find and clear the cache for your storage device.
6. Update firmware: Ensure that your Xbox 360 console has the latest firmware updates installed. Outdated firmware can cause compatibility issues with certain games or discs.
7. Reset console settings: Performing a factory reset on your console can help resolve persistent software-related issues. Consult the Xbox 360 user manual or search online for instructions on how to reset your specific model.
8. Seek professional assistance: If you have exhausted all troubleshooting options and the disc tray issues persist, it may be necessary to contact Xbox support or consult a professional repair service. They have the expertise and resources to diagnose and address more complex hardware or mechanical problems.
By thoroughly testing and troubleshooting the disc tray, you can identify and address any remaining issues with your Xbox 360. It is crucial to ensure that the disc tray is functioning properly to enjoy uninterrupted gaming experiences.