
Types of Sphere Ice Cube Trays
When it comes to creating perfectly round and large ice spheres, there are several types of ice cube trays to choose from. Each type has its own unique features and benefits, allowing you to find the perfect tray that suits your needs and preferences. Here are some of the most common types of sphere ice cube trays:
- Silicone Trays: Silicone trays are a popular choice for making sphere ice cubes. They are flexible, which makes it easy to remove the ice spheres once they are frozen. Additionally, silicone trays are non-stick, which means you don’t have to worry about the ice sticking to the tray. These trays often come with a lid to prevent odors from seeping into the ice during freezing.
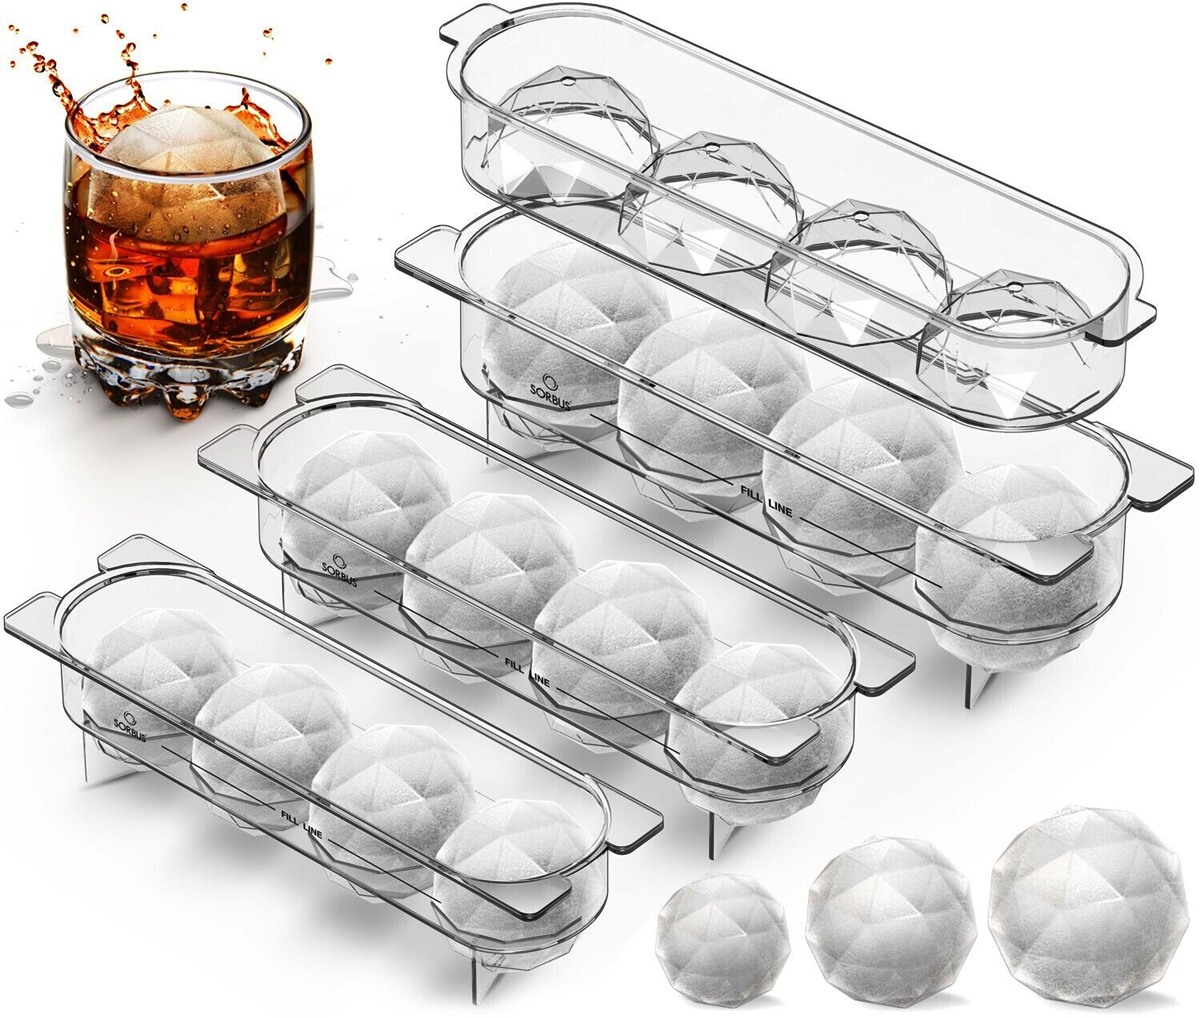
- Plastic Trays: Plastic trays are an affordable option for making larger ice spheres. They are sturdy and durable, allowing for multiple uses. Look for trays that are BPA-free for a healthier ice-making experience. Plastic trays may require a bit more effort to remove the ice spheres, but they still offer a convenient and budget-friendly option.
- Metal Trays: Metal trays are known for their rapid freezing capabilities. They conduct temperature efficiently, enabling you to freeze the ice spheres quickly. Metal trays are often made from stainless steel or aluminum, which makes them sturdy and long-lasting. However, they usually require a tap or a quick rinse with warm water to loosen the ice spheres for easy removal.
- Novelty Trays: For those who want to add a fun and whimsical touch to their drinks, novelty trays are the way to go. These trays come in various shapes and sizes, such as in the form of animals, fruits, or even famous landmarks. While these trays may not produce perfect spheres, they add an element of visual appeal to your beverages.
Consider your preferences, usage frequency, and budget when choosing the right type of sphere ice cube tray. Whether you opt for the flexibility of silicone, affordability of plastic, rapid freezing capability of metal, or the novelty of amusing shapes, there’s a tray out there that will suit your needs perfectly.
Choosing the Right Tray for You
With so many options available, it can be overwhelming to choose the right sphere ice cube tray for your needs. Consider the following factors to help you make an informed decision:
- Size of the Spheres: Determine the size of the ice spheres you prefer for your drinks. Some trays produce larger spheres, while others create smaller ones. Think about the types of beverages you usually enjoy and ensure the tray you choose can accommodate the desired sphere size.
- Material: Consider the material of the tray. Silicone trays are flexible and easy to remove the ice from, while plastic trays are affordable and durable. Metal trays freeze ice quickly, but may require a bit more effort to extract the spheres. Choose a tray material that suits your needs and preferences.
- Capacity: Evaluate the capacity of the tray. How many ice spheres do you need at a time? Some trays can make a few large spheres, while others can produce multiple smaller ones. Determine your usage requirements and choose a tray with the right capacity.
- Easy Release: Look for trays that guarantee easy release of the ice spheres. Non-stick properties in silicone trays or quick release features in metal trays can make a big difference in the ease of removing the spheres. This will save you time and frustration.
- Additional Features: Consider any additional features that may enhance your ice-making experience. For example, some trays come with a lid to prevent odors or freezer burn, while others have stackable designs for easy storage. These extra features can add convenience and functionality to your chosen tray.
By considering these factors, you can find the perfect tray that meets your requirements and suits your lifestyle. Remember, there is no one-size-fits-all solution when it comes to choosing an ice cube tray. It’s all about finding the right combination of size, material, capacity, easy release, and additional features that align with your preferences and needs.
Preparing the Tray for Use
Before filling your chosen sphere ice cube tray, it’s important to properly prepare it to ensure the best results. Taking the time to prepare the tray will help in creating perfect ice spheres that are free from any impurities or unwanted odors. Here’s how to prepare the tray for use:
- Clean the Tray: Start by thoroughly cleaning the tray with warm, soapy water. This helps remove any dust, residue, or manufacturing odors that may be present. Rinse the tray well to ensure all soap is removed.
- Sanitize the Tray: To ensure optimal hygiene, sanitize the tray before use. You can use a mild bleach solution or a food-safe sanitizer. Follow the instructions on the sanitizer packaging and rinse the tray thoroughly afterwards.
- Allow the Tray to Air Dry: After cleaning and sanitizing, let the tray air dry completely. Avoid using towels or paper towels, as they can leave behind fibers that may affect the quality of the ice. Leaving the tray to air dry also helps to prevent any unwanted moisture from freezing onto it when filled with water.
- Check for any Damages: Inspect the tray for any damages or cracks that could affect its performance. If you notice any issues, it’s best to avoid using the tray as it may not produce the desired results.
- Store the Tray Properly: If you have a dedicated space for ice cube trays in your freezer, place the clean and dry tray there. Alternatively, you can stack them neatly in a cupboard or drawer. It’s important to store the tray in a clean and dry environment to prevent any contamination.
By following these simple steps to prepare your tray, you can ensure that your ice spheres are formed in a clean and sanitized manner. Preparing the tray also helps to eliminate unwanted odors or flavors that may transfer to your beverages. With a properly prepared tray, you’re one step closer to creating perfect ice spheres that will enhance your drinking experience.
Properly Filling the Tray
Filling the sphere ice cube tray correctly is crucial to achieve perfect and uniform ice spheres. Here are the steps to follow when filling your tray:
- Level the Tray: Place the tray on a flat surface to ensure even filling and prevent any spills. A level surface ensures that the water is distributed evenly in each compartment.
- Fill to the Rim: Use fresh, cold water to fill each compartment of the tray. Pour the water slowly, filling each compartment to the rim. This allows for the formation of full and round ice spheres.
- Avoid Overfilling: Be careful not to overfill the tray, as this may cause the water to spill out when placing it in the freezer. Overfilling can also result in misshapen or incomplete spheres.
- Remove Excess Air Bubbles: Gently tap the tray on the countertop a few times to remove any air bubbles that may have formed during the filling process. This helps in getting smooth and clear ice spheres without any trapped air pockets.
- Wipe off Excess Water: Use a clean cloth or paper towel to wipe off any excess water from the top of the tray. This prevents the water from freezing over the tray edges, making it easier to remove the frozen ice later on.
It’s important to note that the water used for filling the tray greatly impacts the clarity and taste of the ice. Therefore, it’s recommended to use filtered or purified water to achieve the best results. This helps to minimize impurities and ensures your ice spheres are crystal clear and free from any off flavors.
Follow these steps when filling your sphere ice cube tray, and you’ll be on your way to creating perfectly round and beautiful ice spheres for your favorite beverages.
Tips for a Successful Freeze
Getting the perfect sphere ice cubes requires more than just filling the tray with water. Here are some tips to ensure a successful freeze and achieve the best results:
- Use Filtered Water: As mentioned before, using filtered water helps in producing clear and tasteless ice cubes. It removes impurities that could affect the appearance and flavor of the ice.
- Leave Adequate Space: When placing the filled tray in the freezer, make sure to leave enough space around it. This allows for proper airflow and promotes faster freezing, ensuring that the spheres freeze evenly.
- Freeze on a Level Surface: Placing the tray on a level surface in the freezer helps in maintaining the shape and uniformity of the ice spheres. It prevents any tilting or shifting of the tray during the freezing process.
- Follow the Recommended Freezing Time: Each tray may have a recommended freezing time. Make sure to follow the instructions provided with the tray or freeze the spheres for at least a few hours to ensure they are completely frozen.
- Take Note of Freezer Temperature: Check and calibrate the temperature of your freezer to ensure it is set at the optimal temperature for freezing ice. A temperature around 0°F (-18°C) ensures a solid freeze and minimizes the chance of any melting or partial freezing.
- Be Patient: It’s tempting to check on the progress of the freezing ice, but resist the urge to open the freezer too frequently. Opening the freezer too often can cause temperature fluctuations, which can affect the freezing process and lead to unevenly frozen spheres.
Following these tips will help you achieve the best results when freezing your ice spheres. Remember, patience is key! Allow the spheres to freeze completely before removing them from the tray for the best results.
Removing the Ice Spheres from the Tray
After the ice spheres have completely frozen, it’s time to remove them from the tray. Follow these steps to ensure a smooth and easy removal process:
- Allow for a Brief Thaw: Take the tray out of the freezer and allow it to sit at room temperature for a few minutes. This brief thawing helps to loosen the ice spheres and makes them easier to remove from the tray.
- Flex the Tray: If you’re using a silicone tray, gently flex the bottom of the tray to release the ice spheres. The flexibility of the silicone allows the spheres to pop out easily. For plastic or metal trays, give the tray a slight twist to release the spheres.
- Use Warm Water: If you’re having difficulty removing the ice spheres, try running warm water over the bottom of the tray for a few seconds. The heat will help melt the surface of the ice slightly, making it easier to release the spheres.
- Tap the Tray: Another method to release the spheres is by gently tapping the bottom of the tray on a solid surface. The force from the taps helps dislodge the ice spheres without damaging them.
- Use a Flexible Knife: If all else fails, you can use a flexible knife or spatula to gently lift the edges of the ice spheres and release them from the tray. Be careful not to exert too much force or use a sharp knife that could damage the tray.
It’s important to handle the ice spheres delicately to prevent any cracking or breaking. Once the spheres are removed from the tray, transfer them to a separate container or use them immediately for your drinks.
Remember, each tray may have its own unique method of removing the ice spheres. Always refer to the instructions provided with the tray for specific guidance on how to release the ice spheres without any trouble.
Storing the Ice Spheres
If you have leftover ice spheres or want to make a batch of them in advance, proper storage is important to maintain their quality. Follow these tips to store your ice spheres effectively:
- Transfer to a Freezer Bag or Container: Once you have removed the ice spheres from the tray, transfer them to a freezer-safe bag or airtight container. This helps prevent freezer burn and keeps the ice spheres from absorbing any unwanted odors or flavors.
- Label and Date: To keep track of the storage time, label the bag or container with the date of freezing. This ensures that you use the oldest ice spheres first and helps maintain their freshness.
- Keep in the Freezer: Place the bag or container with the ice spheres back in the freezer as soon as possible. Keep them away from strong-smelling foods as ice can absorb odors, affecting the taste of your drinks.
- Rotate and Use within a Reasonable Timeframe: It’s recommended to use the stored ice spheres within a few weeks for optimal quality. Rotate and use them regularly, so they don’t sit in the freezer for an extended period.
- Handle Delicately: When taking out the stored ice spheres for your drinks, handle them gently to prevent any breakage or damage. Avoid dropping them into glasses or pitchers, as this could cause the spheres to shatter.
- Consider the Size: Take into account the size of the ice spheres when using them in your drinks. Depending on the size of the glass or beverage, you may need to use multiple spheres or adjust accordingly.
By following these storing guidelines, you can enjoy the convenience of having ready-made ice spheres whenever you need them. They will maintain their shape, quality, and taste, providing you with a delightful addition to your beverages.
Unique Uses for Sphere Ice Cubes
While sphere ice cubes are commonly used for chilling drinks, they have more versatile applications beyond the glass. Here are some unique uses for sphere ice cubes:
- Crafting Cocktails: Sphere ice cubes are perfect for craft cocktails, as they melt slowly, preserving the flavors of the drink without dilution. The larger size and elegant appearance of the spheres also add a touch of sophistication to your cocktails.
- Whiskey and Fine Spirits: Whiskey connoisseurs appreciate sphere ice cubes for enjoying their favorite whiskey or fine spirits. The slow melting rate ensures a gradual release of flavors, enhancing the sipping experience.
- Coffee and Tea: Sphere ice cubes can be used to chill hot coffee or tea without excessively diluting the beverage. Simply add a sphere to your cup, and it will gradually cool the drink without sacrificing taste.
- Infused Water or Fruit Punch: Get creative with flavored ice spheres by infusing them with fruits, herbs, or floral elements. These infused spheres can add a burst of flavor to plain water or fruit punch, making your refreshing beverages even more delightful.
- Gourmet Desserts: Use sphere ice cubes as molds for creating impressive frozen desserts. Fill the spheres with flavored creams, sorbet, or even chocolate ganache to make gourmet-style desserts that are sure to impress your guests.
- Iced Soups and Gazpacho: For chilled soups like gazpacho, sphere ice cubes provide an elegant solution. Float a few spheres in your soup bowl to keep the soup chilled while adding visual appeal to the dish.
- Frozen Juices or Punch: Create colorful and fun frozen treats by freezing juices, fruit punch, or even alcoholic beverages into sphere ice cubes. These frozen delights can be enjoyed on their own, added to smoothies, or used as edible decorations for special occasions.
- Herbal Ice Packs: Fill sphere ice cubes with herbal infusions like chamomile or lavender tea. These frozen spheres can be used as soothing ice packs for headaches, minor injuries, or as a relaxation aid.
With their versatile nature, sphere ice cubes can elevate your culinary adventures and enhance your overall enjoyment of beverages. Get creative and explore the various unique uses of these ice sphere creations beyond just chilling drinks.