
Choosing the Right Mirror
When it comes to dressing up a mirror, the first step is choosing the right one. A mirror can be a statement piece in a room, adding style and functionality. Here are some factors to consider when selecting a mirror:
- Size: The size of the mirror should be proportionate to the wall or space where it will be placed. A large mirror can make a small room appear bigger, while a smaller mirror can be a decorative accent in a larger space.
- Shape: Mirrors come in various shapes, such as round, rectangular, oval, or even irregular. The shape should complement the overall style and aesthetic of the room. For example, a round mirror can add a touch of softness to a space with sharp angles.
- Frame: Consider whether you want a framed or frameless mirror. A framed mirror can add visual interest and tie in with the overall decor of the room. Different frame materials, such as wood, metal, or composite, can provide different looks and finishes.
- Functionality: Determine the purpose of the mirror. Will it be used primarily for practical reasons, such as checking your appearance before leaving the house? Or is it more of a decorative piece meant to reflect light and create a focal point?
- Style: Consider the overall style of the room. Do you prefer a modern, minimalist mirror or a vintage-inspired design? Choose a mirror that complements the existing decor and reflects your personal style.
By carefully considering these factors, you can choose a mirror that not only enhances the aesthetic of your space but also serves its intended purpose. Whether you opt for a large statement mirror or a small decorative piece, the right mirror can add depth, light, and style to any room.
Adding a Frame
One of the easiest ways to dress up a mirror is by adding a frame. This simple addition can transform a plain mirror into a stunning focal point. Here are some ideas on how to add a frame to your mirror:
- Purchase a pre-made frame: Many home improvement stores offer a variety of pre-made frames specifically designed for mirrors. These frames come in different finishes and styles, making it easy to find one that matches your decor. Simply attach the frame to the mirror using adhesive or brackets.
- DIY frame using molding: If you want a custom look, consider making your own frame using decorative molding. Choose a molding style that complements your room’s aesthetic, such as ornate, rustic, or modern. Cut and miter the molding to fit the dimensions of your mirror and secure it using adhesive or nails.
- Add trim or molding to an existing frame: If your mirror already has a frame but it lacks pizzazz, consider enhancing it with additional trim or molding. This can be done by attaching the trim directly to the existing frame using adhesive or tiny nails. This technique adds depth and visual interest to the mirror.
- Create a faux frame with paint: If adding a physical frame is not an option or if you prefer a more budget-friendly approach, you can create the illusion of a frame using paint. Choose a color that complements your decor and use painter’s tape to mask off a border around the mirror. Then, paint the border to create the look of a frame.
Adding a frame to your mirror not only enhances its appearance but also allows you to customize it to match your style and decor. Whether you choose a pre-made frame, opt for a DIY project, or create a faux frame with paint, this simple addition can make a big impact in your space.
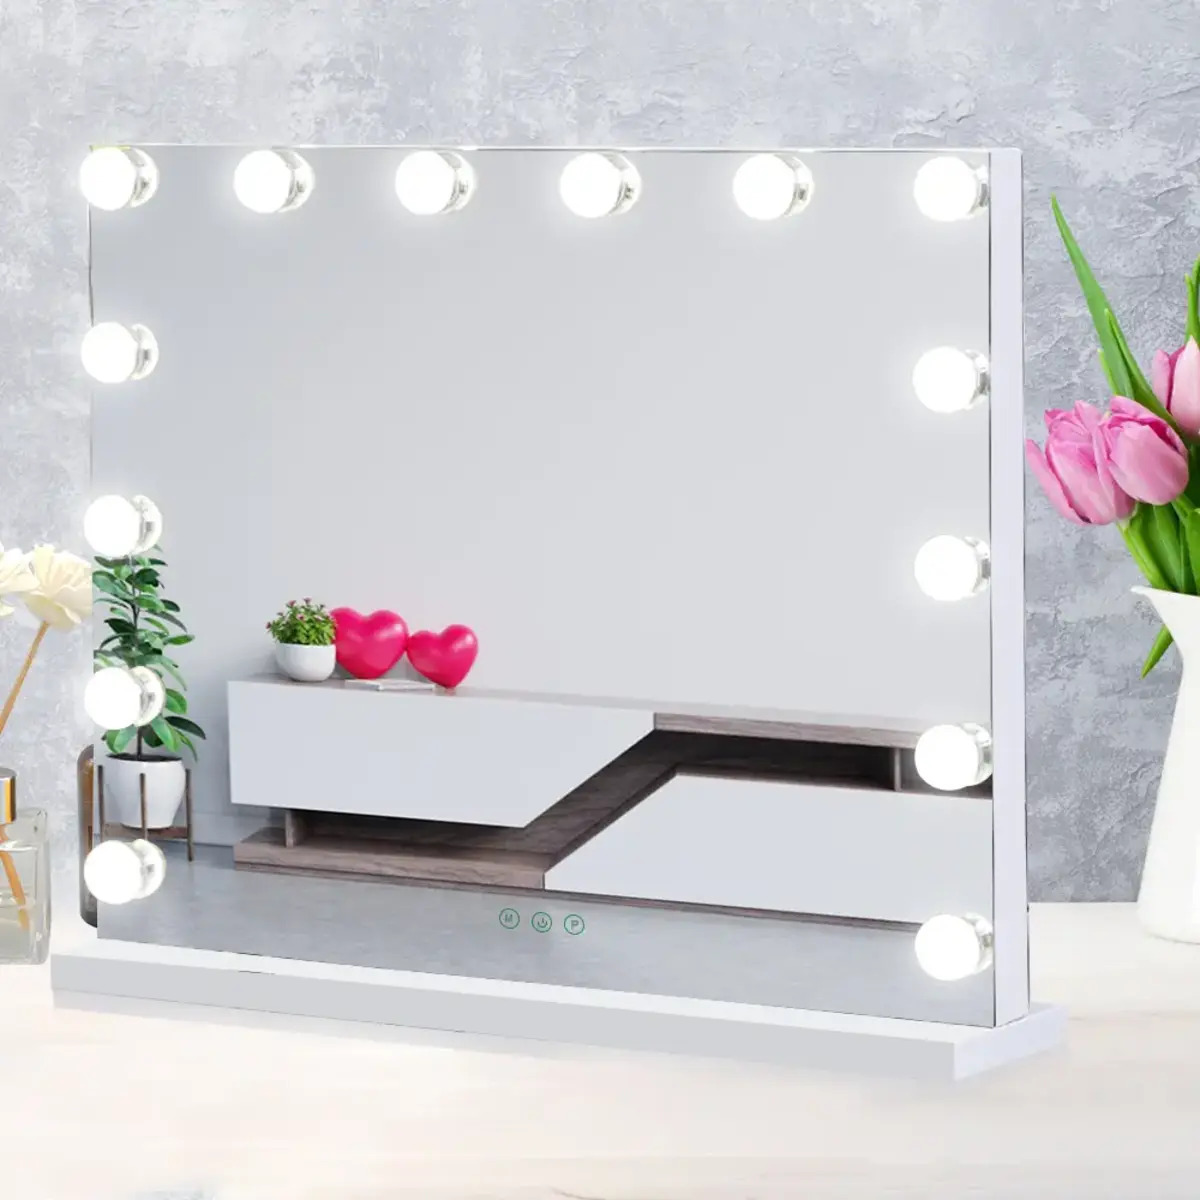
Installing LED Lights
Adding LED lights to your mirror is a great way to elevate its appearance and create a stylish, illuminated effect. Here’s how you can install LED lights on your mirror:
- Choose the right LED lights: Select LED lights that are designed specifically for mirrors and have adhesive backing. Make sure the lights are measured to fit the perimeter of your mirror or the desired pattern you want to create.
- Clean the mirror surface: Before installing the LED lights, ensure that the mirror surface is clean and dry. Use a mild glass cleaner and a soft cloth to remove any dirt or smudges.
- Plan the placement: Determine where you want to place the LED lights on the mirror. You can opt for a simple border around the mirror or get creative with patterns or designs. Use a measuring tape and a pencil to mark the desired placement.
- Attach the LED lights: Peel off the backing of the LED light strip and carefully attach it along the marked area on the mirror. Press and hold the lights firmly to ensure a secure bond. For curved or angled mirrors, consider using adhesive clips or brackets to hold the lights in place.
- Connect the lights: Most LED light strips come with connectors that allow you to connect multiple strips together. Follow the manufacturer’s instructions to connect the lights and create a continuous, illuminated line.
- Hide the wires: To maintain a neat and tidy appearance, conceal the wires of the LED lights. You can use adhesive clips or cable channels to hide the wires along the back of the mirror or along the wall.
- Test the lights: Once the installation is complete, test the LED lights to ensure they are working properly. Use the provided power adapter or connect the lights to a compatible outlet or switch.
Installing LED lights on your mirror not only enhances its aesthetic appeal but also provides functional and ambient lighting. Whether you choose a simple border or an intricate design, LED lights can instantly transform your mirror into a visually striking focal point.
Hanging a Wreath
One creative and festive way to dress up a mirror is by hanging a wreath on it. A wreath can add a touch of seasonal charm or a pop of color to your mirror. Here’s how you can hang a wreath on your mirror:
- Select the right size wreath: Choose a wreath that is proportionate to the size of your mirror. A wreath that is too small may get lost on the mirror, while one that is too large can overwhelm the space.
- Choose a wreath style: Consider the style of your space and the season. Opt for a lush, green wreath for a natural and timeless look or a colorful floral wreath for a vibrant and seasonal touch.
- Determine the hanging method: There are various ways to hang a wreath on a mirror. You can use a wreath hanger that hooks onto the top of the mirror or attach a temporary adhesive hook to the mirror’s frame.
- Position the wreath: Decide where you want to hang the wreath on the mirror. You can center it horizontally and vertically or choose an off-center placement for a more eclectic look.
- Hang the wreath: Use the chosen hanging method to securely attach the wreath to the mirror. Ensure that it is properly balanced and centered on the mirror.
- Enhance with additional elements: If desired, you can embellish the wreath further by adding ribbon, bows, ornaments, or other decorative elements that complement your seasonal or personal style.
Hanging a wreath on your mirror is a simple and versatile way to add a decorative touch and create an inviting atmosphere in your home. Whether you choose a traditional evergreen wreath during holidays or a seasonal floral wreath, it is sure to bring warmth and beauty to your mirror.
Creating a Collage of Small Mirrors
If you’re looking to make a bold statement with your mirror, consider creating a collage of small mirrors. This unique and visually striking arrangement can add depth and visual interest to any room. Here’s how you can create a collage of small mirrors:
- Choose the mirrors: Select a variety of small mirrors in different shapes, sizes, and styles. This can include round, square, or hexagonal mirrors, as well as mirrors with decorative frames.
- Plan the arrangement: Lay out the mirrors on a flat surface and experiment with different arrangements to find the most visually appealing composition. Consider creating a symmetrical arrangement or a more eclectic and asymmetrical design.
- Prepare the wall: Before hanging the mirrors, ensure that the wall is clean and free from any debris. Use a level and pencil to mark the desired placement of each mirror.
- Hang the mirrors: Attach each mirror to the wall using adhesive hooks, mirror clips, or picture hangers. Ensure that each mirror is securely and evenly mounted to create a balanced and cohesive collage.
- Experiment with angles: To add visual interest, vary the angles at which the mirrors are hung. This can create reflection and play with light, making the collage even more captivating.
- Fill in the gaps: If there are noticeable gaps between the mirrors, you can fill them in with small decorative items, such as framed photos, small artworks, or wall decals, to create a cohesive and balanced look.
- Regularly maintain the collage: Periodically check the mirrors to ensure they are secure and adjust if necessary. Clean the mirrors and the surrounding area to keep them looking their best.
A collage of small mirrors is a creative and artistic way to dress up a wall and add a touch of elegance and charm to your space. Whether you prefer a minimalist and sleek arrangement or a more eclectic and whimsical design, this collage is sure to make a striking impact on your decor.
Applying Decals or Stickers
If you’re looking for an easy and temporary way to dress up your mirror, consider applying decals or stickers. This quick and affordable option allows you to add patterns, designs, or inspiring quotes to your mirror without any permanent changes. Here’s how you can apply decals or stickers to your mirror:
- Select the decals or stickers: Choose decals or stickers that match your style and the aesthetic of the room. There are countless options available, from floral patterns to geometric shapes to inspirational quotes.
- Clean the mirror surface: Before applying the decals or stickers, make sure the mirror surface is clean and dry. Use a mild glass cleaner and a soft cloth to remove any dirt or smudges.
- Plan the placement: Determine where you want to place the decals or stickers on the mirror. You can create a pattern, arrange them in a row, or place them randomly for a more eclectic look. Use a measuring tape and a pencil to mark the desired placement.
- Peel off the backing: Carefully peel off the backing of the decal or sticker, exposing the adhesive side.
- Apply the decal or sticker: Starting from one corner, press the decal or sticker onto the mirror surface, gently smoothing it out as you go to avoid any bubbles or wrinkles. Use a credit card or squeegee to ensure a secure adhesion.
- Remove air bubbles: If you notice any air bubbles under the decal or sticker, use a pin or needle to carefully puncture the bubble and smooth it out with your fingers.
- Adjust if necessary: If you’re not happy with the placement of a decal or sticker, gently peel it off and reposition it. Take your time to ensure it’s aligned and centered properly.
Applying decals or stickers to your mirror is a fun and versatile way to add a personal touch and instant visual interest. Whether you choose whimsical shapes, elegant floral motifs, or inspiring quotes, these decals or stickers can easily be removed or replaced whenever you want to change up the look of your mirror.
Painting the Frame
If you want to completely transform the look of your mirror, painting the frame is an excellent option. This allows you to customize the frame’s color to match your decor or create a statement piece. Here’s how you can paint the frame of your mirror:
- Prepare the frame: Begin by removing the mirror from the frame if possible. If the mirror is attached, carefully cover it with a protective covering like painter’s tape and plastic sheeting.
- Clean the frame: Use a mild detergent or sugar soap and a soft cloth to clean the frame thoroughly. Make sure to remove any dirt, dust, or grease that may affect the adhesion of the paint.
- Sand the frame: If the frame has a glossy or varnished finish, lightly sand the surface with fine-grit sandpaper to create a rougher texture. This will help the paint adhere better to the frame.
- Apply a primer: Apply a coat of primer to the frame to create a smooth and even base for the paint. Use a brush or a roller to ensure thorough coverage and allow the primer to dry completely.
- Choose the paint: Select a paint color that suits your desired aesthetic and the overall decor of the room. Consider using a high-quality paint specifically formulated for wood or metal surfaces.
- Apply the paint: Use a brush, roller, or spray paint to apply the chosen paint color to the frame. Work in thin and even coats, allowing the paint to dry between each layer. This will ensure a smooth and professional finish.
- Add additional coats if needed: Depending on the desired color intensity, you may need to apply multiple coats of paint. Make sure each layer is completely dry before applying the next one.
- Seal the paint: Once the paint is completely dry, apply a clear topcoat or sealant to protect the frame from scratches and ensure the longevity of the paint job.
- Reattach the mirror: If the mirror was removed, carefully reattach it to the frame once the paint and sealant are fully cured. Ensure it is securely and evenly mounted.
Painting the frame of your mirror allows you to fully customize its look and effortlessly integrate it into your decor. Whether you want to go bold with a vibrant color or keep it subtle with a neutral tone, painting the frame can breathe new life into your mirror and elevate the style of your space.
Using Washi Tape
Washi tape is a versatile and colorful decorative tape that can be used to instantly transform the frame of your mirror. This budget-friendly option allows you to add patterns, colors, and designs to your mirror without any permanent changes. Here’s how you can use washi tape to dress up your mirror:
- Select the washi tape: Choose washi tape in colors and patterns that complement your decor and personal style. There are various options available, from solid colors to geometric shapes to floral prints.
- Clean the mirror frame: Before applying the washi tape, make sure the mirror frame is clean and dry. Use a mild detergent or glass cleaner to remove any dirt or debris.
- Plan the design: Determine the design or pattern you want to create on the mirror frame. You can opt for a simple border, a geometric pattern, or get creative with stripes, chevron, or other intricate designs.
- Start applying the tape: Begin by sticking the end of the washi tape onto the frame at your desired starting point. Slowly and carefully unroll the tape, pressing it firmly onto the frame as you go. Continue to apply the tape along the desired pattern or design.
- Overlap or layer the tape: Experiment with overlapping or layering different colors or patterns of washi tape to create a more dynamic and textured look. Don’t be afraid to mix and match tapes for a unique and personalized design.
- Trim the excess tape: Once you have completed the desired design, use scissors or a craft knife to trim off any excess tape, ensuring clean and neat edges.
- Smooth out any air bubbles: If you notice any air bubbles under the tape, gently press them out with your fingers or use a credit card to ensure a smooth and wrinkle-free application.
Using washi tape is a fun, reversible, and non-permanent way to add a pop of color and personality to your mirror. Whether you choose a simple and subtle design or go all out with intricate patterns, washi tape allows you to customize your mirror frame with ease.
Adding a Shelf
One practical and stylish way to dress up a mirror is by adding a shelf. This not only enhances the mirror’s aesthetic appeal but also provides a functional space to display decorative items or store everyday essentials. Here’s how you can add a shelf to your mirror:
- Choose the right shelf: Select a shelf that is proportionate to the size of your mirror and complements its style. Consider the material, shape, and color to ensure it blends seamlessly with the mirror and the surrounding decor.
- Locate a suitable mounting area: Determine the ideal location on the wall where you want to attach the shelf. Make sure it is at an appropriate height and centered above or below the mirror.
- Mark the mounting points: Use a pencil to mark the points on the wall where the shelf brackets or supports will be attached. Ensure they are level and evenly spaced.
- Install the shelf brackets: Depending on the type of shelf, follow the manufacturer’s instructions to install the brackets or supports onto the marked points. Use appropriate tools and hardware to ensure a secure and stable installation.
- Attach the shelf: Once the brackets are in place, carefully position the shelf onto the brackets and secure it according to the manufacturer’s guidelines. Ensure it is level and stable.
- Decorate the shelf: Once the shelf is installed, you can decorate it with your favorite items such as small plants, candles, picture frames, or other decorative accents. Make sure to arrange them in an appealing and balanced manner.
- Consider functionality: You can also choose to use the shelf for functional purposes by storing everyday essentials like keys, sunglasses, or small bathroom items. Use small containers or decorative trays to keep the items organized.
- Regularly maintain the shelf: Periodically inspect the shelf and its mounting to ensure it is secure and stable. Clean the shelf and decorative items to keep them looking fresh and well-maintained.
Adding a shelf to your mirror not only adds visual interest but also provides an opportunity to showcase your personal style and creativity. With careful selection and installation, the shelf can become a practical and decorative element that enhances the overall look and functionality of your mirror and the space around it.
Making a Mosaic Design
If you want to take your mirror to the next level of artistic expression, consider creating a mosaic design on its frame. This intricate and visually captivating technique allows you to turn a plain mirror into a stunning piece of art. Here’s how you can make a mosaic design on your mirror:
- Gather mosaic materials: Collect a variety of materials for your mosaic design, such as glass tiles, ceramic pieces, mirror tiles, or even broken china. Choose materials that complement the colors and style of your space.
- Prepare the mirror frame: Start by cleaning the mirror frame thoroughly and ensuring it is dry. If needed, sand down any rough spots and apply a primer to create a smooth surface for the mosaic.
- Design your mosaic: Plan the design for your mosaic by sketching it out on paper or directly on the mirror frame. Consider the placement, color combinations, and patterns you want to create.
- Break or cut the materials: Use mosaic cutters or carefully break larger tiles or china pieces into the desired shapes and sizes. Take caution and follow proper safety measures when handling and working with these materials.
- Apply adhesive: Apply mosaic adhesive directly onto the mirror frame using a trowel or a small spatula. Work in small areas at a time to ensure the adhesive doesn’t dry before placing the mosaic pieces.
- Place the mosaic pieces: Carefully place each mosaic piece onto the adhesive, following your design or creating an abstract pattern. Press them firmly to secure them in place and ensure even spacing between the pieces.
- Allow the adhesive to cure: Follow the manufacturer’s instructions for the adhesive and allow it to cure for the recommended time. Avoid disturbing or moving the mosaic pieces during this period.
- Grout the mosaic: Prepare a batch of mosaic grout and carefully apply it over the mosaic pieces, filling the gaps between them. Use a grout float or a damp sponge to spread the grout evenly and remove any excess.
- Clean the mosaic: Once the grout has partially dried, use a damp cloth or sponge to gently clean the mosaic surface and remove any grout residue from the tiles.
- Seal the grout: After the grout has fully dried, apply a grout sealer to protect and preserve the mosaic. Follow the product instructions for application and drying time.
Making a mosaic design on your mirror frame allows you to unleash your creativity and create a truly unique and eye-catching piece. Whether you opt for a symmetrical pattern, an abstract arrangement, or a representation of a specific image, a mosaic design will undoubtedly elevate the visual appeal and artistic impact of your mirror.