
Materials Needed
To successfully disguise a metal storage rack, you will need a few key materials. These will help you transform the utilitarian look of the rack into a stylish and visually appealing piece of furniture. Here are the materials you’ll need:
- Paint or Wrapping Material: Choose paint in your preferred color or a wrapping material that matches your decor. Make sure to select a paint or wrapping material that is suitable for metal surfaces.
- Paintbrushes or Roller: Depending on the size and complexity of the rack, you may need different sizes of paintbrushes or a paint roller to ensure an even application of paint.
- Measuring Tape and Marking Tools: To determine the dimensions for adding shelves or fabric covers, you’ll need measuring tape and marking tools to create precise guidelines.
- Shelves or Fabric Covers: If you’re looking to add storage or simply hide the contents of the rack, you’ll need shelves or fabric covers. Choose materials that complement your overall design aesthetic.
- Plants or Greenery: Adding plants or greenery can provide a natural touch and soften the appearance of the metal rack. Select plants that thrive in your environment and are suitable for indoor use.
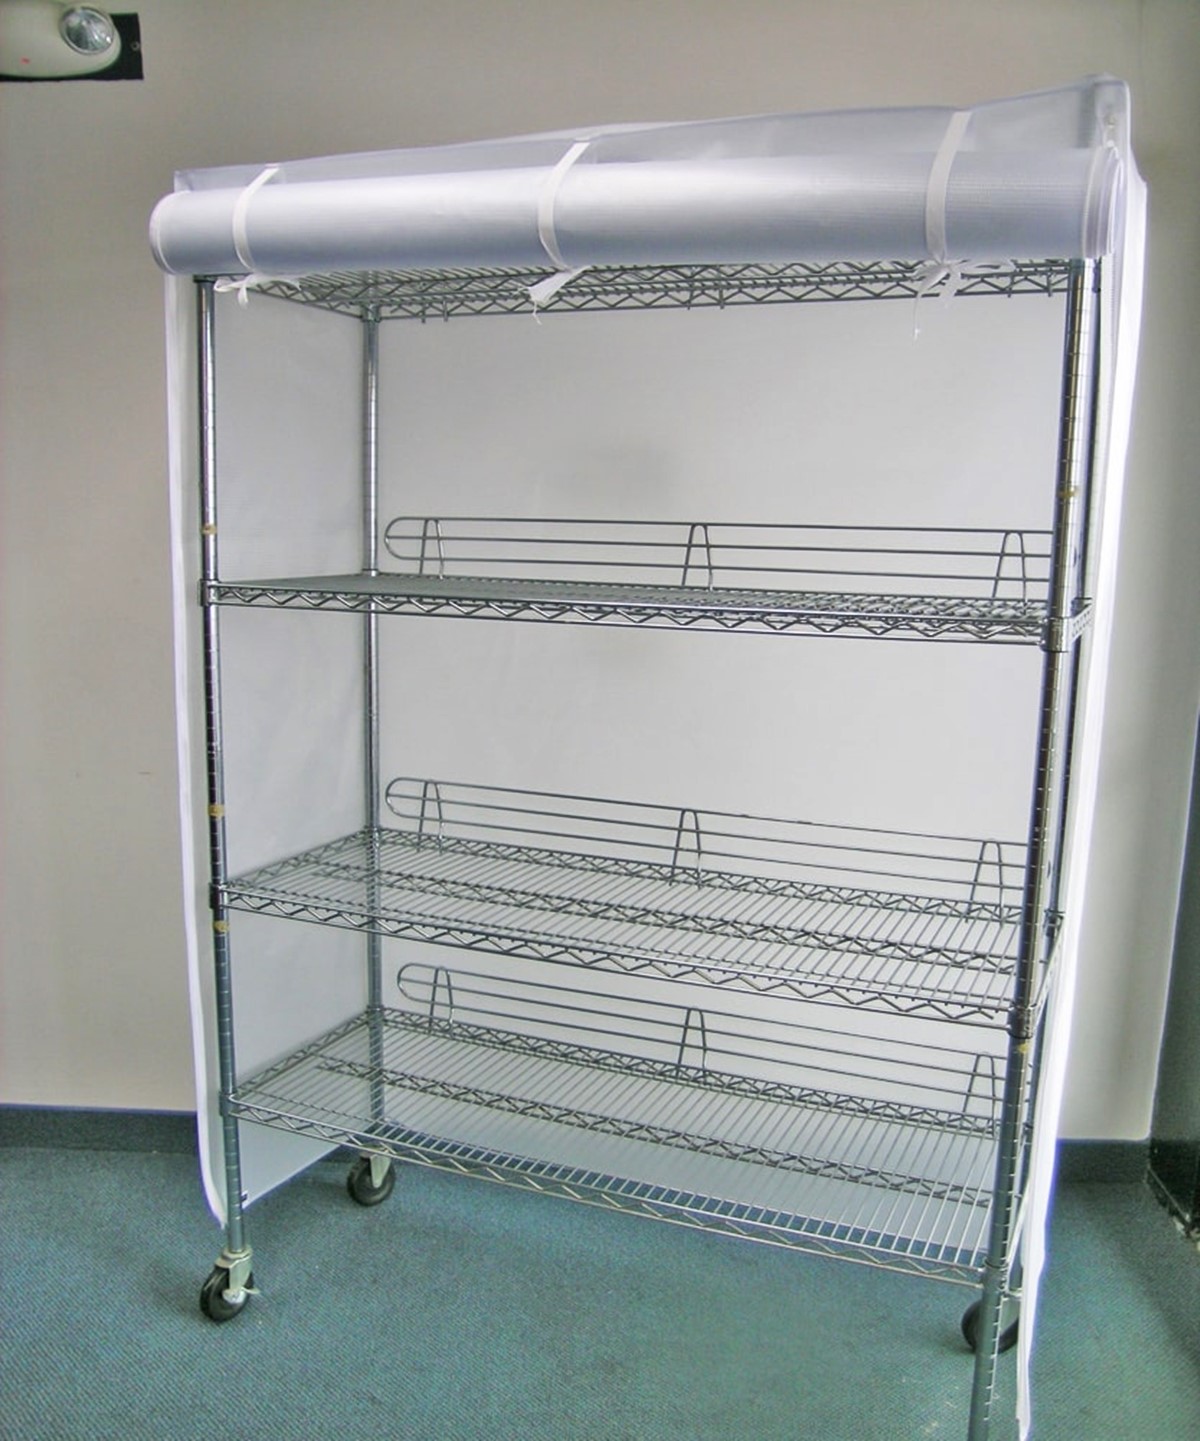
- Curtains or Drapes: If you want to completely conceal the rack, curtains or drapes can be a stylish and effective option. You’ll need the appropriate length of fabric, a curtain rod, and hardware for installation.
- Storage Solutions: To maximize the functionality of the rack, consider storage solutions such as bins, baskets, or boxes that fit seamlessly within the unit.
- Accessories: Personalize your disguised rack with decorative accessories like picture frames, vases, or small sculptures that reflect your style and personality.
- Cleaning Supplies: Finally, don’t forget to have the necessary cleaning supplies on hand to maintain the appearance of your disguised rack.
By gathering these materials, you’ll have everything you need to transform a basic metal storage rack into a visually appealing and functional piece of furniture that seamlessly blends into your space.
Step 1: Choosing the Right Storage Rack
Choosing the right storage rack is crucial when it comes to successfully disguising it. Consider the following factors to ensure that the rack not only meets your storage needs but also aligns with your overall design aesthetic:
1. Size and Dimensions: Evaluate the available space in your home or office and determine the ideal size and dimensions for the storage rack. Consider both the height and width to ensure it fits comfortably in the designated area.
2. Material and Finish: Metal storage racks come in various materials and finishes. Opt for a material that complements your existing furniture and decor. You can choose from options such as steel, chrome, or even wire mesh, depending on the style you’re aiming for.
3. Style and Design: Look for a storage rack that matches or complements the overall design aesthetic of the room. Whether you prefer a modern, minimalist look or a rustic, industrial vibe, there is a wide range of styles available to suit your taste.
4. Durability and Sturdiness: Since storage racks are meant to hold and organize items, it’s important to choose one that is durable and sturdy. Check the weight capacity of the rack and ensure it can accommodate your storage needs without compromising its structural integrity.
5. Accessibility and Functionality: Consider how easy it is to access the items stored on the rack. Look for features like adjustable shelves, drawers, or compartments that can enhance the functionality and ease of use.
6. Versatility: Choose a storage rack that offers flexibility in terms of customization and adaptability to different spaces. This will allow you to easily incorporate it into various rooms or change its configuration if needed.
7. Price and Budget: Set a budget for your storage rack and compare prices across different brands and retailers. Keep in mind that while quality is important, there are budget-friendly options available that can still meet your requirements.
By carefully considering these factors, you can select a storage rack that not only fulfills your storage needs but also serves as a perfect canvas for disguising it in a way that seamlessly blends with the overall design of your space.
Step 2: Measuring and Planning the Disguise
Before you begin disguising your metal storage rack, it’s important to take accurate measurements and create a solid plan. This will ensure that your disguise fits perfectly and enhances the overall appearance of the rack. Follow these steps to measure and plan your disguise:
1. Measure the Rack: Start by measuring the height, width, and depth of the storage rack. Use a measuring tape to get precise measurements. Note down these dimensions as they will be crucial when selecting materials for your disguise.
2. Determine the Coverage Area: Decide how much of the rack you want to conceal. This could be the entire rack, just the sides, or a specific section. Consider the location of the rack and your design goals when making this decision.
3. Select Disguise Materials: Based on the dimensions and desired coverage area, choose the materials for your disguise. This could include paint, wrapping material, fabric, or other creative options. Ensure that the chosen materials are suitable for the surface of the rack.
4. Create a Mock-Up or Sketch: Use a piece of paper or digital design software to create a mock-up or sketch of how you envision the disguised rack. This will help you visualize the final outcome and make necessary adjustments before starting the project.
5. Plan for Access Points: If your disguised rack will still be used for storage, consider how you will access the items. Leave open spaces or incorporate removable covers or doors to maintain functionality without compromising the disguise.
6. Consider Maintenance and Cleaning: Take into account how easy or difficult it will be to clean and maintain the disguise. Ensure that you can easily access the hidden areas for regular upkeep and cleaning.
7. Gather Tools and Supplies: Make a list of the tools and supplies you will need to execute your plan. This may include paintbrushes, masking tape, adhesive, measuring tools, and any other materials specific to your chosen disguise.
By taking accurate measurements, creating a plan, and considering the practical aspects of maintaining the disguise, you will set yourself up for success and achieve a cohesive and well-executed transformation for your metal storage rack.
Step 3: Paint or Wrap the Rack
Once you have measured and planned your disguise, it’s time to transform the appearance of your metal storage rack. This step involves either painting the rack or applying a wrapping material to give it a new, stylish look. Follow these steps to paint or wrap your rack:
1. Prepare the Surface: If you’re painting the rack, start by preparing the surface. Clean the rack thoroughly to remove any dust, dirt, or grease. Sand any rough spots or imperfections to ensure a smooth finish. If you’re wrapping the rack, make sure the surface is clean and dry.
2. Choose the Paint or Wrapping Material: Select a high-quality paint or wrapping material that suits your desired aesthetic. Consider the color scheme of your space and the overall design theme. If using paint, opt for one that adheres well to metal surfaces. If wrapping, choose a material that is durable and easy to apply.
3. Apply Primer (If Necessary): If you’re painting the rack, consider applying a primer before applying the paint. Primer can enhance the adhesion of the paint and improve its durability. Follow the instructions on the primer for the best results.
4. Paint the Rack: If you’ve chosen to paint the rack, start by painting the corners and hard-to-reach areas with a brush. Then, use a roller to cover the rest of the surface evenly. Apply multiple coats if needed, allowing each coat to dry completely before applying the next. Follow the manufacturer’s instructions for drying times.
5. Wrap the Rack: For wrapping the rack, carefully and slowly apply the wrapping material to one side of the rack at a time. Use a squeegee or your fingers to smooth out any wrinkles or air bubbles as you go. Trim off any excess material for a neat finish.
6. Allow for Drying or Setting Time: Whether you paint or wrap the rack, be sure to allow ample drying or setting time before proceeding with any additional steps. Rushing this step could result in damage to the finish or adherence of the disguise.
7. Inspect and Touch Up: Once the rack has fully dried or the wrapping material has adhered, inspect the surface for any missed spots or imperfections. Touch up these areas as needed to ensure a consistent and flawless appearance.
8. Protect the Finish: Consider applying a clear coat or sealant over the painted or wrapped surface to protect it from scratches, stains, and wear and tear. This will help prolong the longevity of your disguised rack.
By following these steps, you can transform the look of your metal storage rack through painting or wrapping. This will allow you to seamlessly integrate it into your space and achieve a cohesive and aesthetically appealing result.
Step 4: Add Shelves or Fabric Covers
To further enhance the disguise of your metal storage rack and make it more functional and visually appealing, consider adding shelves or fabric covers. These additions will not only provide additional storage options but also soften the appearance of the rack. Follow these steps to add shelves or fabric covers:
1. Measure and Plan: Determine the dimensions and spacing for the shelves or fabric covers based on the size and layout of your rack. Measure the height, width, and depth to ensure a proper fit. Consider the items you plan to store and the desired accessibility.
2. Select Materials: Choose materials that align with your design theme and provide the desired level of functionality. For shelves, consider sturdy materials such as wood, metal, or acrylic. For fabric covers, opt for durable and appealing fabrics that complement your decor.
3. Install Shelves: If you’re adding shelves, follow the manufacturer’s instructions for installation. Use a level to ensure they are properly aligned. If needed, attach brackets or supports to the rack to provide stability and weight distribution. Make sure the shelves are securely fixed in place.
4. Attach Fabric Covers: For fabric covers, start by measuring and cutting the fabric to the appropriate size. Use adhesive, Velcro, or other fastening methods to attach the fabric cover to the rack. Ensure that the fabric is taut and free from wrinkles or sagging.
5. Customize with Trims or Accents: Add decorative trims, edgings, or other accents to enhance the appearance of the shelves or fabric covers. These details can further blend the disguise with your overall decor and elevate the aesthetics of the disguised rack.
6. Consider Accessibility: Keep in mind the accessibility of the items stored on the shelves or beneath the fabric covers. Ensure that there is enough space and easy access to reach the stored items without causing any disturbance to the disguise.
7. Enhance Organization: Use containers, baskets, or dividers on the shelves to keep items organized and prevent clutter. Consider incorporating labels or tags to easily identify the contents of each storage section.
By adding shelves or fabric covers to your metal storage rack, you can further enhance its functionality and overall aesthetics. These additions will not only provide additional storage options but also help to seamlessly integrate the disguised rack into your space.
Step 5: Incorporating Plants or Greenery
Bringing in plants or greenery is an excellent way to soften the appearance of your metal storage rack disguise and infuse natural beauty into your space. The addition of plants can create a refreshing and calming atmosphere. Here are the steps to incorporate plants or greenery into your disguised rack:
1. Assess Lighting Conditions: Consider the lighting conditions in the area where your rack is located. Some plants require direct sunlight, while others thrive in low-light conditions. Choose plants that are suitable for the available light.
2. Select the Right Plants: Choose plants that are well-suited for indoor settings and can thrive in your specific environment. Consider factors such as the ease of maintenance, growth habits, and size of the plants.
3. Determine Placement: Decide where you want to place the plants on or around the disguised rack. Consider utilizing the top of the rack, hanging planters from the sides or incorporating plant stands adjacent to the rack.
4. Choose Planters or Pots: Select planters or pots that match your desired aesthetic and the style of your disguised rack. Consider using different sizes and materials such as ceramic, terracotta, or modern geometric designs to add visual interest.
5. Add Soil and Plant: Fill the planters or pots with suitable potting soil and carefully plant the selected greenery. Ensure that you choose the appropriate soil for each plant type and provide enough drainage to prevent waterlogging.
6. Water and Care: Follow the specific watering requirements of each plant to ensure proper hydration. Regularly check the moisture levels in the soil and adjust watering accordingly. Additionally, provide appropriate care such as pruning, fertilizing, and cleaning the leaves to maintain plant health.
7. Consider Maintenance: Keep in mind that plants require regular maintenance. Ensure easy access to the plants for watering, cleaning, and providing necessary care. Place a protective tray or saucer under the planters to catch excess water and prevent damage to the rack or flooring.
8. Incorporate Hanging Greenery: If space allows, consider hanging planters from the sides of the disguised rack or from nearby walls. This adds an extra touch of nature and creates a visually appealing vertical display.
By incorporating plants or greenery into your disguised rack, you can create a harmonious blend of nature and functionality. The presence of plants will not only soften the appearance of the metal but also promote a more vibrant and inviting atmosphere in your space.
Step 6: Hanging Curtains or Drapes
Hanging curtains or drapes is a creative and effective way to completely conceal your metal storage rack, giving it a seamless and cohesive appearance within your space. Follow these steps to successfully incorporate curtains or drapes into your disguised rack:
1. Measure and Plan: Start by measuring the width and height of your rack to determine the size of curtains or drapes needed. Consider the style, fabric, and color that will complement your overall decor. Determine if you want the curtains to touch the floor or if you prefer a shorter length.
2. Select Curtain or Drape Material: Choose a fabric material that suits your design aesthetic and offers the desired level of privacy. Consider light-blocking materials if you want to completely conceal the rack or sheer fabrics for a more airy and translucent look.
3. Install Curtain Rods or Tracks: Depending on the design of your disguised rack, install curtain rods or tracks that can support the weight of the curtains or drapes. Ensure that the rods or tracks are properly secured and level to ensure smooth operation.
4. Hang the Curtains or Drapes: Attach your chosen fabric to the curtain rods or tracks. Make sure the fabric is evenly distributed and hangs straight. Adjust the height and gather the fabric as desired to achieve the desired look and coverage.
5. Consider Tiebacks: If you want to allow access to the rack or create a decorative look, consider using curtain tiebacks. These can hold the curtains or drapes to the sides when not in use, giving you easy access to the hidden contents of the rack.
6. Coordinate with Existing Decor: Ensure that the color, pattern, and texture of the curtains or drapes complement the existing decor in your space. This will help create a cohesive and visually pleasing look.
7. Maintain and Clean: Regularly clean and maintain the curtains or drapes to keep them looking fresh and ensure the disguise remains in good condition. Follow the manufacturer’s instructions for cleaning and care guidelines.
8. Consider Additional Curtain Accessories: Enhance the overall look of your disguised rack by adding decorative curtain accessories, such as curtain rings, tiebacks, or valances. These can add an extra layer of style and sophistication to the treatment.
By hanging curtains or drapes, you can completely conceal your metal storage rack while adding a touch of elegance and privacy to your space. This technique allows for easy access to the rack when needed while seamlessly integrating it into the overall design of your room.
Step 7: Creative Storage Solutions
As you continue to disguise your metal storage rack, consider incorporating creative storage solutions that maximize its functionality and enhance the overall aesthetic appeal of your space. Here are some creative storage ideas to consider:
1. Baskets and Bins: Use decorative baskets or bins to store smaller items on the shelves of your disguised rack. This not only keeps items organized but also adds a visually appealing touch to the overall design.
2. Storage Boxes: Employ stylish storage boxes that fit seamlessly within the compartments of the rack. Opt for boxes with lids or choose those that can be easily stacked for neat and efficient storage.
3. Hanging Organizers: Utilize hanging organizers, such as fabric pockets or wire baskets, to make use of vertical space on the sides of the disguised rack. These are perfect for holding small items and keeping them within easy reach.
4. Magnetic Storage Solutions: Attach magnetic strips or hooks to the inside of the rack to store metal tools, utensils, or other magnetic-friendly items. This helps to free up shelf space and keeps commonly used items easily accessible.
5. Labeling Systems: Implement a labeling system to identify the contents of each storage section or bin. This makes it easier to locate and retrieve specific items, especially when the rack is fully disguised.
6. Vertical Hanging Space: If your disguised rack allows, consider utilizing the vertical space above it by installing hooks or racks to hang coats, bags, or other items. This maximizes the storage potential of the rack and keeps frequently used items within reach.
7. Magazine Holders: Add magazine holders or file organizers to the sides of the rack, allowing you to store papers, documents, or magazines in a neat and organized manner. This is particularly useful in home offices or study areas.
8. Customized Inserts: Create customized inserts, such as foam inserts or dividers, to store delicate or fragile items securely within certain compartments of the rack. This ensures that items remain protected and provides a tailored storage solution.
9. Utilize the Top Space: Make use of the top area of the disguised rack by adding decorative boxes or baskets to store items that are less frequently used. This keeps them out of sight while still maintaining easy access when needed.
By incorporating creative storage solutions, you can optimize the functionality of your disguised rack while maintaining a clutter-free and aesthetically pleasing space. These ideas offer innovative ways to utilize the rack’s storage capacity while adding a stylish touch to your room.
Step 8: Personalizing with Accessories
To add a touch of personality and style to your disguised metal storage rack, consider personalizing it with accessories that reflect your unique taste. By carefully selecting and incorporating decorative elements, you can transform the rack into a statement piece that seamlessly blends into your space. Here are some ideas for personalizing your disguised rack:
1. Picture Frames: Display cherished photos or artwork by attaching picture frames to the sides or top of the rack. This adds a personal touch and brings sentimental value to the disguised piece.
2. Decorative Vases: Place delicate decorative vases or jars on the shelves of the rack, filled with fresh flowers or dried botanicals. This brings a touch of nature and elegance to the overall composition.
3. Sculptural Elements: Add small sculptures or figurines that complement your design aesthetic. Choose pieces that reflect your interests or evoke a sense of artistic expression.
4. Decorative Mirrors: Strategically place decorative mirrors near the disguised rack to create an illusion of space and light. Mirrors also add a touch of sophistication and make the area feel more inviting.
5. Candles or Candle Holders: Enhance the ambiance of the disguised rack by incorporating scented candles or decorative candle holders. This adds warmth and a cozy atmosphere to the surrounding area.
6. Decorative Trays: Place decorative trays on the top or shelves of the rack to hold small accessories, such as jewelry, decorative boxes, or other decorative items. This creates a visually appealing arrangement while maintaining functionality.
7. Colorful Textiles: Add pops of color and texture by incorporating colorful textiles, such as throw pillows or small fabric panels, that complement the overall design scheme of your space.
8. Artwork or Wall Decals: Hang artwork or apply wall decals behind the disguised rack to create a focal point and tie together the overall decor. Choose pieces that resonate with your personal style and add visual interest.
Remember, personalizing your disguised rack with accessories allows you to infuse your space with your own unique flair and create a harmonious blend of functionality and style. Choose items that speak to you and reflect your personality, and watch as your disguised rack transforms into a personalized statement piece.
Step 9: Maintaining and Cleaning the Disguised Rack
After successfully disguising your metal storage rack, it’s important to establish a maintenance and cleaning routine to keep it looking fresh and well-maintained. Regular upkeep will ensure that the disguise remains intact and the rack continues to seamlessly blend into your space. Follow these steps for maintaining and cleaning your disguised rack:
1. Dusting: Dust the surfaces of the rack regularly using a soft cloth or a duster. This helps to remove any accumulated dust or debris that can dull the appearance of the disguise.
2. Spot Cleaning: Attend to any spills or stains promptly by gently blotting the affected area with a clean cloth and mild soap or cleaning solution. Avoid using harsh chemicals that can damage the disguise or the rack itself.
3. Deep Cleaning: Occasionally, deep clean the rack by wiping it down with a damp cloth and a mild, non-abrasive cleaner. Follow the manufacturer’s recommendations for cleaning products and techniques to prevent any damage to the disguise or the rack’s surface.
4. Protecting the Finish: If the disguise is painted or wrapped, consider applying a protective sealant or clear coat to safeguard the finish from scratches, stains, or fading. This extra layer of protection ensures the longevity and durability of the disguise.
5. Inspecting the Disguise: Regularly inspect the disguise for any signs of wear and tear, such as peeling paint or loose wrapping. Address any issues promptly by repairing or replacing the affected areas to maintain the seamless appearance of the disguised rack.
6. Avoid Overloading: Be mindful of the weight capacity of the rack and avoid overloading it with items beyond its capacity. This ensures that the rack remains structurally sound and the disguise stays intact.
7. Organizing and Decluttering: Regularly organize and declutter the contents of the disguised rack. Assess the items stored and remove any unnecessary items to maintain a tidy and organized appearance.
8. Adjusting and Realigning: Over time, the disguise or the rack may shift or become misaligned. Check for any loose components or misplacements and adjust or realign them as needed to keep the disguised rack looking seamless and cohesive.
By implementing a regular maintenance and cleaning routine, you can enjoy a disguised rack that seamlessly integrates into your space while maintaining its visual appeal. With proper care and upkeep, your disguised rack will continue to enhance the aesthetic of your room for years to come.