
Planning the Design
Designing a heavy storage rack with wheels requires careful planning to ensure that it meets your specific needs and fits well within your space. Before you start gathering materials and cutting lumber, take some time to consider the following aspects:
- Available Space: Measure the area where you plan to place the storage rack. Consider the height, width, and depth to ensure a proper fit.
- Weight Capacity: Determine the maximum weight that the rack needs to support. This will help you select materials and design an appropriate structure.
- Intended Use: Think about what items you plan to store on the rack. If you’ll be storing heavy items such as tools or equipment, you may need to incorporate additional support beams.
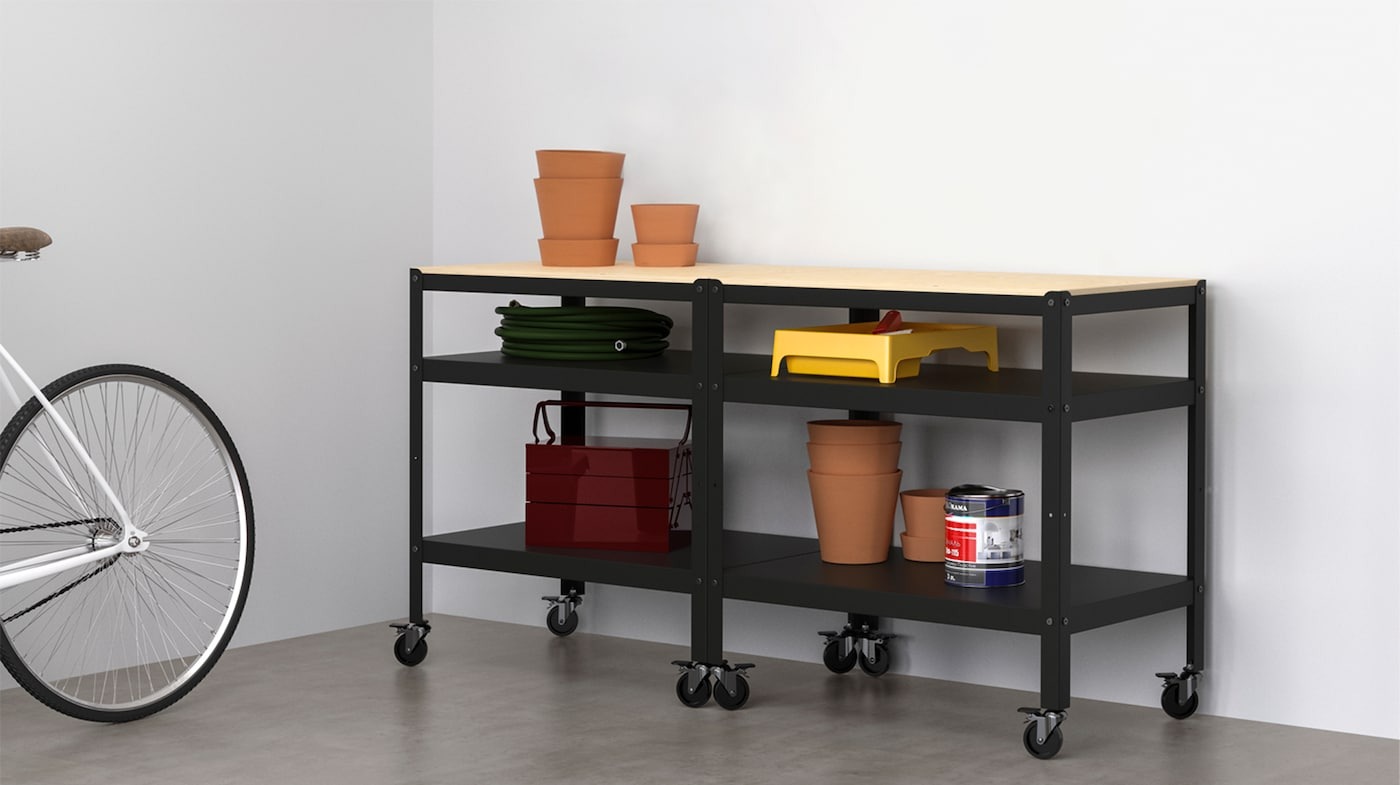
- Mobility: Decide if you want the rack to be stationary or if you want the flexibility to move it around. If mobility is desired, choose sturdy wheels with a locking mechanism.
- Accessibility: Consider how easy it should be to access the items on the rack. Opt for adjustable shelves or implement a sliding mechanism if needed.
- Design Style: Take into account the overall aesthetics of your space. Choose a design that complements your existing décor or matches the style you desire.
Once you have considered these factors, you can start sketching out a rough design for your storage rack. Include the dimensions, additional features, and any other specific requirements. This will serve as a blueprint for the rest of the construction process.
By carefully planning the design of your heavy storage rack with wheels, you can ensure that it meets your functional needs, fits well in your space, and adds a touch of practicality to your storage solution.
Choosing the Right Materials
When it comes to designing a heavy storage rack with wheels, selecting the right materials is crucial for its strength, durability, and stability. Here are some key considerations to keep in mind:
- Frame: Opt for sturdy materials that can support the weight of the items you plan to store. Steel or heavy-duty aluminum are great choices for the frame as they provide excellent load-bearing capabilities.
- Shelves: For the shelves, choose a material that can withstand heavy loads without bending or warping. Plywood or solid wood boards in a thickness of at least ¾ inch are commonly used for heavy-duty storage racks.
- Support Beams: If required, additional support beams may be needed to increase the weight capacity of the rack. Steel or aluminum square tubing is ideal for this purpose, as it provides strength and stability.
- Wheels: Invest in high-quality wheels that can bear the weight of the fully loaded rack. Look for wheels with a strong metal frame, heavy-duty caster wheels, and a reliable locking mechanism to prevent unintentional movement.
- Hardware: Use heavy-duty screws, bolts, and nuts to ensure that all components of the rack are securely fastened together. Consider using steel brackets or angle irons for extra reinforcement.
- Finish: If desired, choose a paint or stain that is suitable for the material used in your rack. This can provide protection against rust, corrosion, and general wear and tear.
It’s important to select materials that are not only strong and durable but also compatible with your intended use and environment. Keep in mind any specific requirements, such as resistance to moisture or chemicals, when choosing the materials for your heavy storage rack.
Overall, by carefully choosing the right materials, you can ensure that your heavy storage rack with wheels is built to withstand heavy loads, withstand the test of time, and provide reliable and efficient storage for your belongings.
Measuring and Cutting the Lumber
Once you have planned the design and chosen the materials for your heavy storage rack with wheels, it’s time to move on to the next step: measuring and cutting the lumber. This step is crucial to ensure that all components fit together correctly and that the rack is structurally sound.
Start by gathering all the necessary lumber and tools for the task. Use a tape measure to take accurate measurements of the various components of the rack, including the frame, shelves, and support beams. Double-check these measurements to avoid any errors.
Next, use a saw or circular saw to cut the lumber based on the measurements you have taken. Take your time to ensure clean and precise cuts, as these will contribute to the overall stability and aesthetics of the rack.
When cutting the lumber, consider the following tips:
- Safety First: Always wear appropriate protective gear, such as safety goggles and gloves, when operating power tools.
- Measure Twice, Cut Once: Double-check your measurements before making any cuts to avoid wasting material.
- Straight Cuts: Use a straight edge or guide to help you make accurate and straight cuts.
- Smooth Edges: Sand the cut edges of the lumber to remove any splinters or roughness.
- Label the Components: To avoid confusion during assembly, label each cut piece of lumber with its corresponding location or purpose.
By taking accurate measurements and making precise cuts, you will ensure that the components of your heavy storage rack with wheels fit together seamlessly, resulting in a sturdy and well-constructed structure.
Assembling the Base Frame
With the lumber cut to the appropriate sizes, it’s time to start assembling the base frame of your heavy storage rack with wheels. The base frame provides the foundation and stability for the entire rack. Follow these steps to assemble it:
- Place the side beams on the floor, parallel to each other, and align them so that they are the correct distance apart according to your design.
- Position the front and back beams perpendicular to the side beams, forming a rectangular shape. Make sure they are flush with the ends of the side beams.
- Attach the beams together using appropriate fasteners, such as screws or bolts. Predrilling holes can help prevent the wood from splitting. Use a level to ensure the frame is even and square.
- If desired, reinforce the joints with steel brackets or angle irons for added stability and strength.
- Double-check the measurements and make any necessary adjustments before securing the base frame.
It’s important to ensure that the base frame is tightly and securely assembled, as it will bear the weight of the entire rack and provide support for the shelves and additional components.
During the assembly process, keep the following tips in mind:
- Work on a level surface to ensure the frame remains square and balanced.
- Use clamps to hold the beams together temporarily while fastening them.
- Refer back to your design or blueprint to ensure that the frame is being assembled according to the intended measurements and dimensions.
- Take your time to ensure accuracy and precision in the assembly process.
By carefully assembling the base frame, you will create a solid foundation for your heavy storage rack with wheels, setting the stage for building the rest of the structure.
Adding Support Beams
After assembling the base frame of your heavy storage rack with wheels, the next step is to add support beams. These beams provide additional strength and stability to the rack, ensuring it can handle heavy loads without sagging or collapsing. Follow these steps to add support beams:
- Measure the required length for each support beam, taking into account the height and weight capacity of your rack.
- Position the support beams vertically inside the base frame, evenly spaced along the length of the rack. Make sure they are flush with the top and bottom beams of the base frame.
- Attach the support beams to the base frame using appropriate fasteners. Predrilling holes may be necessary to prevent splitting of the wood.
- Consider adding additional support brackets or angle irons at the joints between the support beams and the base frame for added stability.
- Secure the support beams tightly to ensure they are properly connected and can withstand the weight they will bear.
When adding support beams, follow these tips for a successful installation:
- Ensure that the support beams are level and vertically aligned to maintain the integrity of the structure.
- Consider reinforcing the joints between the support beams and base frame with wood glue or additional hardware.
- Double-check your measurements and make any necessary adjustments before attaching the support beams permanently.
- Refer back to your design or blueprint to ensure the support beams are placed correctly and according to the intended design.
By adding support beams to your heavy storage rack, you will significantly enhance its strength and durability, allowing it to safely accommodate heavy items while maintaining stability.
Installing the Wheels
Installing wheels on your heavy storage rack provides mobility and flexibility, allowing you to easily maneuver and reposition the rack as needed. Here’s a step-by-step guide on how to install the wheels:
- Choose high-quality wheels that are suitable for the weight capacity of your rack. Look for heavy-duty caster wheels with a sturdy metal frame and a reliable locking mechanism.
- Position one wheel at each corner of the base frame, ensuring that they are evenly spaced.
- Mark the mounting holes of each wheel on the underside of the base frame.
- Using a driller, create pilot holes at the marked positions to make it easier to insert the screws later.
- Attach the wheels to the base frame using appropriate screws or bolts, ensuring they are securely fastened.
- Test the wheels to ensure they rotate smoothly and that the locking mechanism engages properly when needed.
When installing the wheels, keep these tips in mind:
- Consider using wheels with a swivel feature for enhanced maneuverability, especially if you anticipate moving the rack frequently.
- Ensure that the wheels are mounted evenly and aligned properly to prevent wobbling or instability.
- Double-check the weight capacity of the wheels to ensure they can adequately support the total weight of the rack and its contents.
- Regularly inspect and maintain the wheels to keep them in optimal condition, lubricating them if necessary.
By installing sturdy and reliable wheels on your heavy storage rack, you will enjoy the convenience of easily moving it around your space and adjusting its position according to your needs.
Attaching the Shelves
Attaching the shelves to your heavy storage rack is an essential step that allows you to maximize the available space and organize your belongings effectively. Follow these steps to securely attach the shelves:
- Measure the desired height for each shelf and mark the positions on the support beams.
- Place the shelves on top of the support beams, aligning them with the marked positions.
- Ensure that the shelves are level and evenly spaced across the width of the rack.
- Attach the shelves to the support beams using appropriate screws or brackets. Predrilling holes may be necessary to prevent the wood from splitting.
- Double-check the stability and alignment of each shelf, making any necessary adjustments before securing them permanently.
When attaching the shelves, consider the following tips:
- Use sturdy and durable materials for the shelves, such as plywood or solid wood boards, to support the weight of your items without sagging.
- Consider using adjustable shelf brackets to provide flexibility and accommodate items of different heights.
- Reinforce the corners of the shelves with additional brackets or angle irons for added stability.
- Ensure that the screws or brackets used to attach the shelves are properly aligned and tightened to prevent any wobbling.
By securely attaching the shelves to your heavy storage rack, you can optimize the storage capacity and create a well-organized space for your belongings.
Reinforcing the Rack
When designing and building a heavy storage rack with wheels, reinforcing the structure is essential to ensure its strength and stability. Reinforcements help distribute the weight evenly, minimize any potential sway or wobble, and increase the overall durability of the rack. Consider the following steps to reinforce your rack:
- Add cross braces: Install diagonal cross braces between the support beams and the base frame. These braces provide additional support and prevent the rack from twisting or collapsing under heavy loads. Secure them using screws or bolts, making sure they are firmly attached.
- Use corner brackets: Reinforce the joints where the support beams and base frame connect by using corner brackets or angle irons. These metal brackets provide extra reinforcement and stability to the structure. Attach them securely using appropriate screws or bolts.
- Implement mid-span supports: For longer shelves or wider spans between support beams, consider adding mid-span supports. These additional beams or brackets placed in the center of the shelf help distribute the weight more evenly and prevent sagging of the shelves.
- Strengthen the connection points: Pay attention to any weak points in the rack’s structure, such as where the wheels are attached or where the support beams meet the base frame. Reinforce these areas with steel brackets, heavier screws, or additional hardware to ensure the rack can withstand heavy loads without compromising its integrity.
Reinforcing the rack not only improves its structural integrity but also enhances safety and longevity. It helps to prevent potential accidents or damage that could arise from the rack’s failure under excessive weight or stress.
When reinforcing your rack, keep these tips in mind:
- Use high-quality and heavy-duty hardware to ensure the reinforcements are securely and durably attached.
- Regularly inspect the rack and all its reinforcement points to identify any signs of wear or damage. Repair or replace any weakened or compromised areas promptly.
- Consider enlisting the help of a professional or consulting an engineer if you have concerns about the load-bearing capacity or overall strength of your rack.
By reinforcing your heavy storage rack, you can have peace of mind knowing that it is built to handle the heavy loads and provide long-lasting durability.
Painting or Staining the Rack
Once you have assembled and reinforced your heavy storage rack with wheels, the next step is to consider painting or staining it. While this step is optional, it can enhance the rack’s appearance, protect the wood from moisture or UV damage, and add a touch of personal style to your storage solution. Here’s how you can paint or stain your rack:
- Clean and prepare the surface of the rack by removing any dust, dirt, or debris. Use a damp cloth or sponge to wipe down the entire rack and let it dry completely.
- If you choose to paint the rack, apply a coat of primer to help the paint adhere better and provide a smoother finish. Use a brush or roller to apply the primer evenly, following the manufacturer’s instructions for drying time.
- If you prefer to stain the wood, sand the surface of the rack gently to smooth out any rough areas or imperfections. Use medium-grit sandpaper, working in the direction of the wood grain. Wipe away any sanding residue with a tack cloth or clean cloth.
- Apply paint or stain using a brush, roller, or sprayer, following the manufacturer’s instructions. Ensure even coverage and smooth finishing strokes, working in sections if needed. Allow the first coat to dry fully before applying additional coats for a more vibrant color or deeper stain.
- Consider sealing the paint or stain with a clear polyurethane or varnish for added protection and durability. Apply the sealer according to the manufacturer’s guidelines, allowing sufficient drying time between coats.
When painting or staining your rack, keep the following tips in mind:
- Select paint or stain that is suitable for the type of wood used in your rack, taking into consideration its durability, color preferences, and compatibility.
- Work in a well-ventilated area or outdoors to ensure proper air circulation and reduce exposure to fumes.
- Protect the surrounding area with drop cloths or newspapers to prevent any accidental spills or drips.
- Consider applying a second coat of paint or stain for a more polished and long-lasting finish.
- Frequent maintenance may be necessary to touch up or reapply paint or stain over time as the rack encounters wear and tear.
By painting or staining your heavy storage rack, you can not only protect the wood but also add a personal touch that matches your style and complements your space.
Testing the Stability and Functionality
Before loading your heavy storage rack with items, it’s crucial to test its stability and functionality to ensure it can safely support the intended weight and perform as expected. Follow these steps to test your rack:
- Check for Levelness: Use a level to confirm that the rack is positioned and assembled on a level surface. Check both horizontally and vertically to ensure stability.
- Test Weight Capacity: Gradually add weight to the rack, starting with lighter items and gradually increasing the load. Pay attention to any signs of sagging or excessive wobbling. Ensure that the rack remains stable and can handle the intended weight capacity without issues.
- Verify Mobility: If your rack has wheels, test the mobility by moving it around the designated space. Ensure that the wheels roll smoothly and that the locking mechanism effectively holds the rack in place when necessary.
- Open and Close Functionality: If your rack has doors or drawers, test their functionality by opening and closing them multiple times. Ensure that they operate smoothly without sticking or jamming.
- Recheck Connections: Examine all fasteners, joints, and support beams to ensure they remain securely connected. Tighten any loose screws or bolts as needed.
During the testing phase, keep these tips in mind:
- Take your time during the testing process to thoroughly evaluate the rack’s stability and functionality.
- If any issues or concerns arise, address them promptly by reinforcing weak areas, adjusting components, or seeking professional advice if necessary.
- Make adjustments or modifications as needed to ensure the rack meets your specific needs and performs optimally.
- Regularly inspect and maintain your rack to address any wear and tear, loose connections, or structural issues that may arise over time.
By testing the stability and functionality of your heavy storage rack, you can have confidence in its performance and trust that it will reliably and safely accommodate your storage needs.
Tips for Maintenance and Care
Maintaining and caring for your heavy storage rack is key to ensuring its longevity, functionality, and safety. By implementing these tips, you can keep your rack in optimal condition and prolong its lifespan:
- Regular Cleaning: Regularly clean your rack by wiping it down with a damp cloth or sponge to remove any dust, dirt, or spills. This helps prevent build-up that can lead to potential damage or deterioration.
- Inspect for Damage: Periodically inspect your rack for any signs of damage, such as cracks, splinters, or loose fasteners. Address any issues promptly to prevent further damage or compromise to the structural integrity of the rack.
- Organize and Declutter: Routinely organize your items on the shelves and declutter the rack. Remove unnecessary or unused items to prevent overloading the rack and maintain proper weight distribution.
- Protect Against Moisture: If your rack is exposed to moisture or humidity, consider using a waterproof sealant or coating to protect the wood from potential damage or warping.
- Avoid Overloading: Adhere to the weight capacity guidelines of your rack to prevent overloading. This ensures that the rack remains stable and can function properly without risking structural damage or collapse.
- Ensure Proper Ventilation: If you store items that require ventilation, such as chemicals or electronics, ensure proper airflow by leaving spaces between items or integrating ventilation systems into the rack design.
- Regular Maintenance Checks: Schedule periodic maintenance checks to assess the condition of the rack. Tighten any loose screws or bolts, apply touch-up paint or stain as needed, and address any potential issues to maintain the rack in optimal working order.
- Protective Measures: Consider using protective pads or liners on the shelves to minimize scratches or dents caused by heavy items or abrasive materials.
- Follow Manufacturer Recommendations: Follow any specific maintenance recommendations provided by the manufacturer of your rack. This may include specific cleaning instructions, recommended oils or treatments, or guidelines for adjustments or repairs.
- Store with Care: When moving or relocating your rack, handle it with care to avoid unnecessary stress or damage. Take precautions and secure the wheels or components to prevent them from shifting during transportation.
By following these maintenance and care tips, you can ensure that your heavy storage rack remains in excellent condition, preserving its functionality, appearance, and longevity in your space.