
How to Cut Ranunculus for Vase
When it comes to adding beauty and elegance to your home or event, few flowers can rival the charm of ranunculus. With their vibrant colors and delicate petals, ranunculus flowers make a stunning addition to any floral arrangement. To ensure that your ranunculus bouquet looks its best, it’s important to know how to cut the flowers properly. Here are some simple steps to follow:
1. Choose the right time: The best time to cut ranunculus flowers is in the early morning or late afternoon when the plants are well-hydrated. Avoid cutting the flowers during the hottest part of the day to prevent wilting.
2. Select the right blooms: Look for ranunculus blooms that are fully open but not overly mature. Choose flowers with firm stems and vibrant colors. This will ensure that your bouquet will last longer and look fresher.
3. Use sharp cutting tools: It’s important to use sharp and clean cutting tools, such as floral scissors or a sharp knife, to cut the ranunculus stems. Dull blades can crush the stems, preventing proper water uptake and shortening the lifespan of the flowers.
4. Cut at an angle: To maximize water absorption, cut the ranunculus stems at a 45-degree angle. This increases the surface area for water intake, allowing the flowers to stay hydrated and fresh for a longer period.
5. Remove excess foliage: Strip away any leaves that will be below the water line in the vase. This helps prevent bacterial growth that can shorten the lifespan of the flowers. Be careful not to remove too many leaves, as they provide nourishment to the flowers.
6. Prepare the stems: Once the excess foliage is removed, place the cut ranunculus stems in a container with warm water to hydrate them for at least an hour. This encourages the stems to take up water and prolongs the flowers’ freshness.
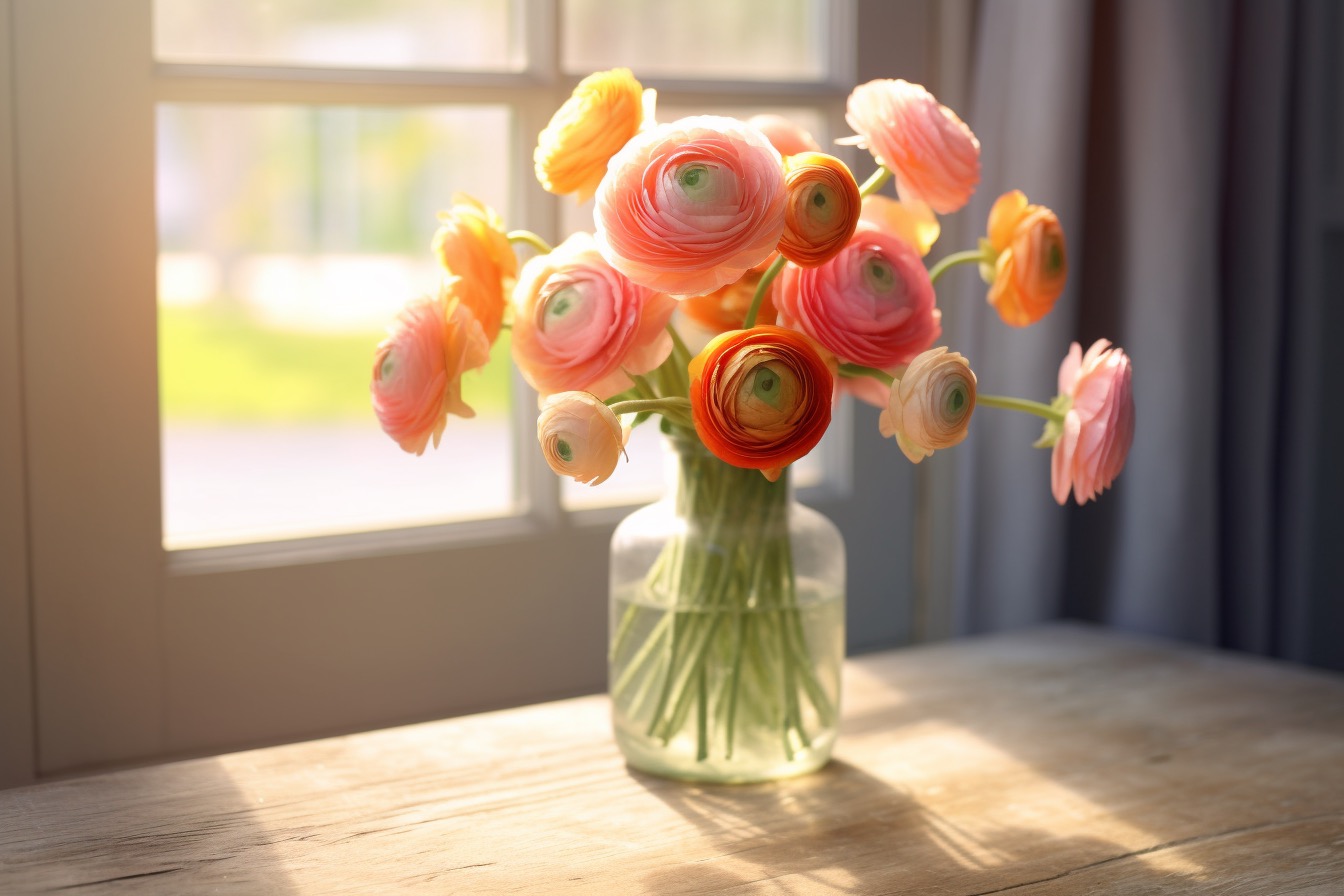
7. Arrange in a vase: After the stems have been properly hydrated, arrange the ranunculus flowers in a clean vase filled with fresh water. You can mix them with other flowers or create a stunning monobotanic arrangement using only ranunculus blooms.
8. Care instructions: To extend the life of your ranunculus bouquet, keep it away from direct sunlight, drafts, and ripening fruit. Change the water every two days and trim the stems slightly each time to ensure better water absorption.
By following these steps, you can ensure that your ranunculus bouquet remains fresh and beautiful for as long as possible. With proper care and attention, you can enjoy the vibrant colors and delicate beauty of ranunculus flowers in your home or event.
Preparing the Vase
Before you start arranging your ranunculus flowers, it’s essential to prepare the vase properly. Creating the right environment for your blooms will help keep them fresh and beautiful for longer. Here are some steps to follow when preparing the vase for your ranunculus:
1. Clean the vase: Start by thoroughly cleaning the vase with warm water and mild soap. Rinse it well to remove any residue or bacteria that could affect the longevity of your flowers. Avoid using harsh chemicals or cleaners as they can leave behind unwanted residue.
2. Choose the right size: Select a vase that is appropriate for the number of ranunculus stems you plan to use. Make sure the vase is tall enough to support the length of the stems and has enough room to allow the flowers to spread out naturally.
3. Add flower food: If your ranunculus bouquet came with a packet of flower food, carefully follow the instructions to mix it with water in the vase. Flower food contains essential nutrients that help nourish the flowers, extend their lifespan, and keep them looking vibrant.
4. Fill with water: Fill the vase with fresh, cool water. Make sure to fill it about halfway to prevent overflowing when you add the flowers. Use filtered or distilled water if possible, as it can help minimize the growth of bacteria and keep the water clear.
5. Recut the stems: Before placing the ranunculus flowers in the vase, recut the stems at a 45-degree angle. This allows the stems to better absorb water and ensures that they are not blocked by any dried or sealed ends.
6. Remove lower foliage: Strip away any leaves that will be submerged in the water. Not only does this create a cleaner look, but it also prevents the buildup of bacteria that can shorten the lifespan of your ranunculus bouquet.
7. Position the vase: Find a suitable spot for your vase, away from direct sunlight, drafts, and ripening fruit. Sunlight and heat can cause the flowers to wilt faster, while drafts and ethylene gas emitted by ripe fruit can accelerate their decay.
By following these steps to prepare the vase, you’ll create an ideal environment for your ranunculus flowers. This will help them stay fresh, hydrated, and vibrant for a longer period, allowing you to enjoy their beauty in your home or event.
Selecting the Best Ranunculus
When it comes to choosing ranunculus flowers for your bouquet or arrangement, selecting the best blooms is crucial. The quality of the flowers will directly impact their longevity and overall appearance. Here are some tips to help you pick the best ranunculus:
1. Look for vibrant colors: Opt for ranunculus blooms that have vibrant and intense colors. Whether you prefer soft pastels or bold and lively hues, choose flowers that catch your eye and match your desired aesthetic. Avoid flowers with dull or faded colors, as they may already be past their prime.
2. Check the petals: Ranunculus flowers have delicate, layered petals that should be firm and intact. Gently touch the petals to ensure they are not bruised or damaged. Avoid flowers with browning or wilted petals, as they indicate poor quality or age.
3. Examine the stems: The stems should be strong, sturdy, and free from any blemishes or mold. Run your fingers along the length of the stem to check for any soft or mushy spots. It’s important to choose ranunculus flowers with healthy stems, as they are essential for water uptake and support.
4. Consider the bud size: Look for ranunculus flowers with buds that are just starting to open. These blooms have the potential to fully reveal their beauty and last longer than those with fully open petals. Avoid flowers with overly mature buds that are beginning to decline.
5. Take note of the foliage: The leaves of ranunculus plants should be lush and green. Avoid flowers with yellowing or wilted leaves, as they may indicate poor health or improper care. However, it’s normal for some lower leaves to be removed for the arrangement to have a cleaner look.
6. Seek freshness: Ranunculus flowers are at their best when they are fresh. If possible, choose flowers that have been recently harvested or have arrived at the florist or market that day. This ensures that you’re starting with the freshest flowers, which will have a longer lifespan.
7. Trust your instincts: Ultimately, trust your instincts and choose ranunculus flowers that appeal to you. Whether you prefer tight buds or fully open blooms, select the ones that resonate with your personal taste and the desired look of your bouquet or arrangement.
By carefully selecting the best ranunculus flowers, you set the foundation for a stunning and long-lasting arrangement. Pay attention to the colors, petals, stems, buds, foliage, freshness, and your own preferences to create a bouquet that will impress and bring joy to any occasion.
Choosing the Right Cutting Tools
When it comes to cutting ranunculus flowers for your vase, having the right tools is essential. The proper cutting tools will make the process easier, more precise, and will help ensure the longevity of your flowers. Here are some factors to consider when choosing the right cutting tools:
1. Sharp blades: The most important feature of cutting tools is sharp blades. Whether you prefer floral scissors or a sharp knife, ensure that the blades are sharp and well-maintained. Dull blades can crush the stems, making it more difficult for the flowers to take up water and stay hydrated.
2. Cleanliness: Clean cutting tools are essential to prevent the spread of bacteria and other contaminants to your flowers. Before working with your ranunculus, make sure to clean your scissors or knife with warm water and mild soap. Rinse them thoroughly to remove any soap residue, and sanitize them with rubbing alcohol if desired.
3. Size and comfort: Consider the size and comfort of the cutting tool. This is especially important if you have a large volume of ranunculus flowers to cut. Choose scissors or a knife that fits comfortably in your hand and allows for easy and precise cutting.
4. Long handles: If you prefer using scissors rather than a knife, consider ones with long handles. Long-handled scissors provide better leverage and make it easier to reach into the flower arrangement to make precise cuts.
5. Non-stick coating: Some cutting tools come with a non-stick coating on the blades. This coating helps prevent plant sap and debris from sticking to the blades, making it easier to clean and maintain the cutting tools over time. It also helps ensure smooth and effortless cutting.
6. Multipurpose functionality: Choosing cutting tools that serve multiple purposes can be beneficial. Some floral scissors come with additional features, such as wire-cutting notches or serrated edges for tackling thicker stems. This versatility can make the cutting process more convenient and efficient.
7. Test and trial: It’s always a good idea to test and trial different cutting tools to see which ones work best for you. Consider borrowing or purchasing a few different options and experiment with them to find the one that feels most comfortable and gives you the best results.
Remember, choosing the right cutting tools can significantly impact the outcome of your ranunculus bouquet or arrangement. By selecting tools with sharp blades, considering cleanliness, comfort, size, and functionality, you’ll ensure a smoother and more enjoyable experience when cutting your flowers.
Harvesting Ranunculus
Harvesting ranunculus flowers at the right time is crucial to ensure their longevity and preserve their beauty. Timing and technique play key roles in the success of the harvest. Here are some important steps to follow when harvesting ranunculus:
1. Choose the right time: The ideal time to harvest ranunculus flowers is when they are in their prime but not fully open. Look for buds that have good color and are starting to show some petal separation. Harvesting too early will result in flowers that fail to open fully, while waiting too long may lead to blooms that are past their prime.
2. Use clean cutting tools: Before you start cutting the ranunculus stems, make sure your cutting tools are clean and sharp. This helps minimize damage to the stems and allows for easier water uptake. Clean your tools with warm water and mild soap, and sanitize them with rubbing alcohol if desired.
3. Cut at an angle: When cutting the ranunculus stems, make a clean cut at a 45-degree angle. This increases the surface area for water absorption, allowing the flowers to take in more water and stay hydrated for longer. Cut the stems just above a healthy leaf node or lateral shoot.
4. Harvest in the morning or evening: It’s best to harvest ranunculus flowers in the early morning or late evening when the plants are well-hydrated. This helps ensure that the flowers are at their freshest and most hydrated state, which can prolong their vase life.
5. Place in clean water immediately: As soon as the ranunculus flowers are cut, place them in a clean container filled with water. This prevents dehydration and allows the flowers to start taking up water immediately. It’s also a good idea to keep a bucket of water nearby while harvesting to keep the cut stems submerged until you can transfer them to a clean container.
6. Keep the stems cool: To prolong the freshness of the harvested ranunculus flowers, keep the stems cool during the entire process. Consider placing the cut stems in a bucket of cool water or storing them in a cool location until you’re ready to arrange them.
7. Remove lower foliage: After harvesting the ranunculus flowers, remove any foliage that will be submerged in the water. This helps prevent bacterial growth and keeps the water clean. Be careful not to strip away too many leaves, as they provide nourishment to the flowers.
By following these steps, you can ensure a successful harvest of ranunculus flowers. Keep in mind that timing, cleanliness, angled cuts, immediate placement in water, and cool storage are all vital factors in maintaining the longevity and beauty of the harvested blooms.
Removing Unwanted Leaves and Thorns
When preparing your ranunculus flowers for a vase arrangement, it’s important to remove any unwanted leaves and thorns. Not only does this create a cleaner and more visually appealing arrangement, but it also helps prolong the life of your flowers. Here are some steps to follow when removing unwanted leaves and thorns from ranunculus:
1. Assess the foliage: Take a close look at the leaves of your ranunculus stems and identify any that are damaged, wilted, or discolored. These leaves will not only detract from the beauty of the arrangement but can also promote bacterial growth in the water. Remove them by gently pulling them downward along the stem.
2. Remove leaves below the water line: Strip away any leaves that will be below the water line in the vase. These submerged leaves can decompose and create a breeding ground for bacteria, which can shorten the lifespan of your ranunculus flowers. Use your fingers or a sharp knife to gently strip away the unwanted foliage.
3. Watch out for thorns: Some varieties of ranunculus have thorns or small prickles along the stems. These thorns can be sharp and cause injury, so it’s important to remove them carefully. Use a pair of gardening gloves or a thorn stripper tool to grasp the thorn and gently pull it off the stem. Be cautious not to damage the stem or petals in the process.
4. Handle with care: When removing leaves and thorns, handle the ranunculus stems with care to avoid bruising or damaging the delicate petals. Hold the stem firmly but gently, and work methodically from the base upward, removing any unwanted foliage or thorns along the way.
5. Leave some foliage intact: While it’s important to remove unwanted leaves, it’s also beneficial to leave some foliage intact. The leaves provide nourishment to the flowers and can enhance the overall appearance of the arrangement. Aim to keep a few healthy leaves near the top of the stem, just below the flower head.
6. Dispose of removed foliage properly: After removing the unwanted leaves and thorns, discard them in a compost bin or your green waste bin. Avoid leaving them near the arrangement or in the water, as they can quickly deteriorate and affect the cleanliness and health of your ranunculus flowers.
By taking the time to remove unwanted leaves and thorns from your ranunculus flowers, you create a cleaner and more visually appealing arrangement. This simple step helps ensure the longevity and health of your blooms, allowing you to enjoy their beauty for an extended period.
Preparing the Ranunculus Stems for Vase
Preparing the ranunculus stems properly before placing them in a vase is crucial for preserving their freshness and ensuring optimal water uptake. By following a few simple steps, you can help extend the lifespan of your ranunculus bouquet. Here’s how to prepare the ranunculus stems for a vase:
1. Recut the stems: Start by recutting the ranunculus stems at a 45-degree angle. This fresh cut helps promote water absorption and removes any sealed or dried ends that may impede water uptake. Use sharp floral scissors or a clean, sharp knife for a clean and precise cut.
2. Trim the stems to the desired length: Measure the height of your vase and trim the ranunculus stems accordingly. The stems should be cut to a length that allows the flowers to sit just above the rim of the vase. Remember to consider the desired height of the arrangement and the length of the stems necessary to achieve it.
3. Remove excess foliage: Strip away any foliage that will be submerged in the water. This prevents bacterial growth and keeps the water clean and clear. Remove any leaves or side shoots that will be below the water line in the vase. However, it’s important to leave some healthy leaves near the top of the stem to provide nourishment to the flowers.
4. Hydrate the stems: Before placing the ranunculus stems in the vase, hydrate them for at least an hour. Fill a container with warm water and submerge the cut ends of the stems. This allows the stems to take up water and rehydrate, keeping the flowers fresher for longer.
5. Consider using floral preservatives: If available, add floral preservatives to the vase water. These packets contain essential nutrients and antimicrobial agents that help nourish the flowers and prevent bacterial growth. Follow the instructions on the packet for the proper dosage and mixing ratio.
6. Avoid overcrowding: When arranging the ranunculus flowers in the vase, avoid overcrowding them. Give each flower enough space to open fully and allow air circulation between the blooms. Overcrowding can lead to increased humidity and can cause the flowers to wilt prematurely.
7. Check and adjust water level: After arranging the ranunculus stems in the vase, check the water level. Ensure that the stems are fully submerged in the water and that there is enough water to keep them hydrated. Monitor the water level daily and add fresh water as needed to maintain proper hydration.
By properly preparing the ranunculus stems for the vase, you set the stage for a long-lasting and visually stunning arrangement. Taking the time to recut the stems, trim them to the right length, remove excess foliage, and hydrate them properly ensures that your ranunculus flowers will thrive and bring joy to your space for as long as possible.
Arranging Ranunculus in the Vase
Arranging ranunculus flowers in a vase is an opportunity to bring your creative vision to life. By following a few guidelines, you can create a visually stunning and balanced arrangement that showcases the beauty of the ranunculus blooms. Here’s how to arrange ranunculus in a vase:
1. Determine the focal point: Before you begin arranging the ranunculus in the vase, decide on the focal point of your arrangement. This can be a single larger bloom, a group of blooms, or a differently colored ranunculus that stands out from the rest. Identifying the focal point helps guide the placement of the other flowers.
2. Start with a clean vase: Use a clean vase with fresh water for your arrangement. Make sure the vase is tall enough to accommodate the length of the ranunculus stems and has enough room for the desired number of flowers.
3. Trim the stems: Before placing the ranunculus flowers in the vase, trim the stems if needed. Cut them at a 45-degree angle to promote better water absorption. The length of the stems should allow the flowers to sit just above the rim of the vase.
4. Create a framework: Begin by creating a framework for your arrangement. Insert a few ranunculus stems into the vase at different heights and angles to form a base structure. These stems will provide a foundation and help establish the overall shape of the arrangement.
5. Add the focal flowers: Place the focal flowers in the vase, positioning them strategically to draw attention to the designated focal point. Arrange them in a way that highlights their unique features and complements the surrounding blooms.
6. Fill in with additional ranunculus: Once the focal flowers are in place, fill in the empty spaces with additional ranunculus stems. Vary the heights and angles to create depth and dimension in the arrangement. Consider mixing different colors for an eye-catching display.
7. Group similar colors or create a gradient: Grouping ranunculus flowers of similar colors together can create a cohesive and visually pleasing arrangement. Alternatively, you can create a gradient effect by arranging the colors from light to dark or vice versa. Experiment with different combinations to find the arrangement that speaks to you.
8. Add greens or other complementary flowers: To enhance the beauty of the ranunculus blooms, consider adding greenery or other complementary flowers to the arrangement. This adds texture, depth, and visual interest. Choose foliage or filler flowers that complement the color palette and style of the ranunculus.
9. Step back and adjust: After arranging the ranunculus and any additional flowers, step back and take a look at the arrangement. Assess the overall balance, height variations, and color distribution. Make any necessary adjustments to ensure a pleasing composition.
10. Display with care: Once you’re satisfied with the arrangement, find a suitable location to display it. Keep the vase away from direct sunlight, drafts, and ripening fruits, as these factors can accelerate the wilting process of the flowers.
By following these steps, you can create a stunning ranunculus arrangement that showcases the beauty and elegance of these charming blooms. Let your creativity shine as you arrange the flowers and enjoy the visual delight that your ranunculus bouquet brings to your space.
Adding Water and Care Instructions
Proper water care is essential for keeping your ranunculus flowers looking fresh and vibrant. By following a few simple steps and providing the right care, you can extend the lifespan of your ranunculus bouquet. Here’s how to add water and care for your ranunculus flowers:
1. Fill the vase with clean water: Start by filling the vase with fresh, cool water. Fill it approximately halfway to prevent overflowing when you add the flowers. Opt for filtered or distilled water if possible, as it can help reduce the growth of bacteria and keep the water clear.
2. Add flower food: If your ranunculus bouquet came with a packet of flower food, carefully follow the instructions to mix it with the water in the vase. Flower food contains essential nutrients that provide nourishment to the flowers and help prolong their lifespan. It also has antimicrobial properties to keep the water clean.
3. Trim the stems regularly: Every two to three days, trim the ends of the ranunculus stems slightly. Recut at a 45-degree angle to maintain a fresh surface for water absorption. Removing a small portion of the stem helps to promote better water uptake, keeping the flowers hydrated and vibrant.
4. Monitor the water level: Check the water level in the vase daily and ensure that the stems are fully submerged. Ranunculus flowers are thirsty and can drink up a significant amount of water, especially during warmer months. If the water level gets low, replenish with fresh water to keep the flowers hydrated.
5. Change the water regularly: Every two to three days, change the water in the vase completely. Empty the vase, rinse it with clean water, and refill it with fresh water. This helps prevent the accumulation of bacteria and keeps the water clear, which in turn extends the vase life of the ranunculus flowers.
6. Keep away from direct sunlight and drafts: Place the vase of ranunculus flowers in a location away from direct sunlight and drafts. Exposure to direct sunlight can cause the flowers to wilt and fade faster. Additionally, drafts can accelerate dehydration and shorten the lifespan of the blooms.
7. Avoid ripe fruit: Keep the ranunculus bouquet away from ripening fruits. As fruits ripen, they release ethylene gas, which can cause the flowers to age more quickly. To ensure the longevity of your arrangement, display it in a separate area from ripening fruit.
8. Enjoy with care: As you admire your ranunculus bouquet, handle the flowers with care. Avoid touching the petals excessively, as this can cause bruising or damage. Also, be cautious not to place anything heavy on top of the flowers, as it can crush the delicate petals.
By providing proper water care and following these care instructions, you can extend the life of your ranunculus bouquet and enjoy their vibrant beauty for days to come. Regularly monitoring the water level, keeping the flowers away from sunlight and drafts, and changing the water will help ensure that your ranunculus bouquet stays fresh and visually captivating.