
Necessary Supplies
Before you embark on cleaning your vinyl shower curtain in the washer, it’s important to gather the necessary supplies. Having these items on hand will ensure that the cleaning process goes smoothly and efficiently. Here are the essential supplies you’ll need:
- Mild detergent or soap
- Vinegar
- Baking soda
- Soft cloth or sponge
- Bucket or basin
- Old toothbrush
- Washing machine
- Mesh laundry bag or pillowcase (optional)
Having mild detergent or soap is crucial for cleaning the vinyl shower curtain without causing damage. Avoid using harsh chemicals or abrasives that could erode or discolor the material. Vinegar and baking soda are natural cleaning agents that can help remove stains and odors. They are particularly effective for tackling mildew or mold buildup.
To scrub away stubborn stains or dirt, use a soft cloth or sponge. Avoid using abrasive scrub brushes or scouring pads as these can scratch the surface of the curtain. An old toothbrush can come in handy for reaching tight spots or crevices.
Using a bucket or basin to pre-treat stains or soak the curtain can be helpful. It allows you to apply cleaning solutions directly to problem areas before washing. You may also want to consider using a mesh laundry bag or placing the shower curtain in a pillowcase to protect it during the washing cycle.
Lastly, having a washing machine that offers a gentle cycle is important for preserving the integrity of the vinyl material. Make sure to read the manufacturer’s instructions to ensure that your curtain is suitable for machine washing.
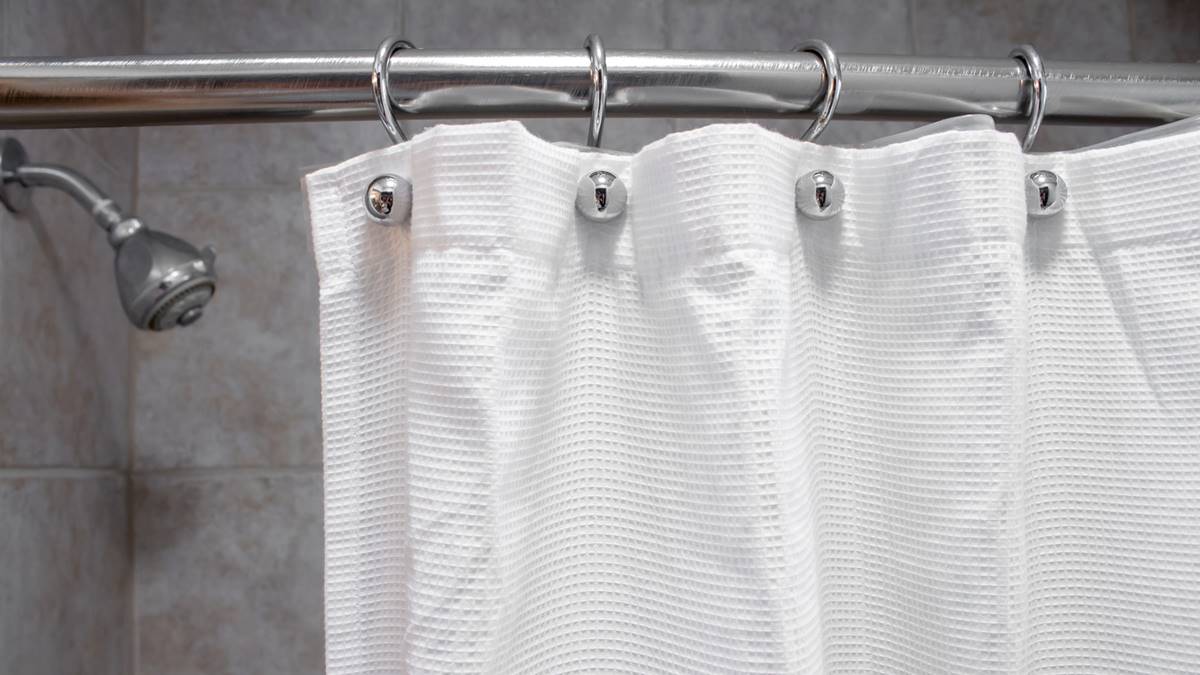
Step 1: Remove Curtain from Hooks
Before you begin the cleaning process, the first step is to remove the vinyl shower curtain from its hooks or rings. You want to have easy access to the entire curtain for thorough cleaning.
Start by pulling the curtain away from the hooks one section at a time. Take care not to tug too forcefully, as this could cause the hooks to come loose or damage the curtain. Work your way along the rod, detaching the curtain until it is completely free.
Once the curtain is removed, carefully set it aside in a clean and spacious area. It’s important to handle the curtain gently to prevent any tears or rips.
If your vinyl shower curtain has a separate fabric or decorative liner, detach it as well and set it aside. The liner may require different cleaning methods than the vinyl curtain, so be sure to check the care instructions and clean it accordingly.
Removing the curtain from the hooks also allows you to inspect the hooks or rings for any buildup or grime. If necessary, take this opportunity to clean them using a gentle soap and water solution or replace them if they are damaged.
Remember to keep track of the order of the hooks or rings as you remove the curtain. This will make it easier to reattach the curtain later, ensuring it hangs in the same position as before.
By taking the time to remove the vinyl shower curtain from its hooks, you’ll be able to give it a proper and thorough cleaning. This step sets the stage for the next steps in the cleaning process and ensures that each section of the curtain will be effectively cleaned.
Step 2: Shake Off Loose Debris
Once you have removed the vinyl shower curtain from its hooks, it’s time to get rid of any loose debris that may have accumulated on the surface. This step is important to prepare the curtain for deeper cleaning and prevent any dirt or particles from clogging the washing machine.
To shake off the loose debris, take the curtain outside or to a well-ventilated area. Hold it firmly at one end and gently shake it back and forth. This motion will help dislodge any dirt, dust, or hair that may be clinging to the vinyl material.
While shaking the curtain, be mindful of any delicate or decorative elements that could come loose. If your curtain has embellishments, such as sequins or beads, take extra care to avoid damaging them during this process.
If the curtain is too large to shake comfortably, you can lay it flat on a clean surface and use a soft cloth or brush to brush away the debris. Work from one end of the curtain to the other, applying gentle strokes to dislodge any loose particles. Make sure to brush both sides of the curtain to ensure a thorough cleaning.
It’s particularly important to pay attention to the bottom edge of the curtain, as this area tends to accumulate more dirt and debris. Give it a few extra shakes or brush strokes to ensure that this area is cleared of any loose particles.
By shaking off the loose debris from your vinyl shower curtain, you are taking an important step to improve its cleanliness. This process eliminates the initial layer of dirt, dust, and hair, making way for a more effective deep cleaning in the subsequent steps. It also reduces the likelihood of clogging your washing machine and prevents dirt particles from being spread throughout the rest of the curtain during the cleaning process.
Step 3: Pre-Treat Stubborn Stains
Before you toss your vinyl shower curtain in the washing machine, it’s a good idea to pre-treat any stubborn stains that may be present. This extra step will help to ensure that the stains are effectively removed during the cleaning process.
Start by inspecting the vinyl curtain for any visible stains or discoloration. Common culprits include soap scum, mildew, and hard water stains. If you notice any of these, it’s time to break out your cleaning arsenal.
One of the most effective pre-treatment methods for vinyl shower curtains is using a mixture of vinegar and water. Simply dilute white vinegar with equal parts of water in a spray bottle or small container. Spray or apply the vinegar solution directly onto the stained areas of the curtain.
If the stains are particularly stubborn, you can create a paste by mixing baking soda and water. Apply the paste to the stains and gently scrub with a soft cloth or sponge. The gentle abrasive action of the baking soda will help to lift the stains without damaging the vinyl material.
For mildew or mold stains, it’s recommended to use hydrogen peroxide. Apply a small amount to the affected areas and let it sit for a few minutes before scrubbing with a soft brush or cloth. Be sure to wear gloves and work in a well-ventilated area when using hydrogen peroxide.
If you’re dealing with grease or oil stains, you can use a bit of mild dish soap. Apply a small amount directly to the stains and gently rub it in with your fingers or a soft cloth. Leave the soap on for a few minutes to allow it to penetrate the stain before rinsing.
After pre-treating the stubborn stains, give the curtain a thorough rinse with clean water to remove any residue. This will ensure that the cleaning solution doesn’t cause any discoloration or damage to the vinyl material during the washing process.
By taking the time to pre-treat stubborn stains, you’re giving your vinyl shower curtain the best chance for a thorough and effective cleaning. This step will help to remove stubborn discoloration and ensure that your curtain comes out looking fresh and stain-free after it goes through the washing machine.
Step 4: Place Curtain in Washing Machine
Now that you have pre-treated any stubborn stains on your vinyl shower curtain, it’s time to move on to the actual washing process. Placing the curtain in the washing machine will allow for a deep and thorough cleaning of the entire surface.
Ensure that your washing machine is clean and free of any debris or dirt before proceeding. You don’t want any residual grime to transfer onto your vinyl curtain during the washing cycle.
If your washing machine has an agitator or center column, it’s best to remove it or choose a gentle or delicate cycle that doesn’t have a center agitator. This will prevent the agitator from potentially causing damage to the curtain or creating wrinkles.
Before placing the curtain in the machine, consider using a mesh laundry bag or pillowcase to protect it during the wash cycle. This additional layer of protection can help to reduce any potential damage caused by the movement of the machine.
Fold or roll the vinyl shower curtain loosely so that it fits comfortably in the washing machine. Avoid overcrowding the machine, as this can restrict movement and hinder the cleaning process.
If you have other items to wash, such as towels or fabric shower curtain liners, you can include them in the same load as long as they are suitable for machine washing. Just make sure that the curtain is not overcrowded and has enough room to move freely.
Once the curtain is in the machine, double-check that any zippers, hooks, or decorative attachments are securely closed or fastened. This will prevent them from snagging or damaging the curtain during the wash cycle.
Now that your vinyl shower curtain is safely nestled in the washing machine, you’re ready to move on to the next step: adding the cleaning solution and starting the machine.
Placing the curtain in the washing machine is a crucial step in the cleaning process. It allows you to take advantage of the machine’s ability to agitate and rinse the curtain thoroughly, ensuring that dirt, stains, and odors are effectively removed. With the curtain securely in place, you’re one step closer to enjoying a fresh and clean shower experience.
Step 5: Add Cleaning Solution and Start Machine
Now that your vinyl shower curtain is safely inside the washing machine, it’s time to add the cleaning solution and start the machine. This step will ensure that your curtain receives a thorough and effective cleaning.
First, measure out the appropriate amount of mild detergent or soap. Read the instructions on the detergent packaging for guidance on the recommended amount based on the size of your load. If you prefer a more natural cleaning solution, you can also use a mixture of equal parts white vinegar and water.
If your vinyl curtain has a strong odor or is heavily soiled, you can add half a cup of baking soda to the cleaning solution. Baking soda is known for its odor-fighting properties and can help remove any lingering smells from the curtain.
Next, pour the cleaning solution directly into the detergent dispenser of the washing machine. If your machine doesn’t have a dispenser, you can pour the cleaning solution into the drum along with the curtain.
Before starting the machine, set the water temperature to warm or hot. Hot water is more effective at breaking down oils, soap scum, and stubborn stains. However, if your curtain is not labeled as safe for hot water, opt for warm water instead.
Choose a gentle or delicate cycle on your washing machine to ensure that the curtain is not subjected to rough agitation. High-speed spin cycles may cause damage to the vinyl material, so choose a lower spin setting or skip the spin cycle altogether if possible.
Once you have selected the appropriate settings, press the start button to initiate the wash cycle. Sit back and let the machine work its magic, cleaning your vinyl shower curtain to perfection.
Keep an eye on the machine throughout the cycle to ensure that everything is running smoothly and without any issues. If you notice any excessive shaking or loud noises, pause the cycle and rearrange the curtain to redistribute the weight evenly.
Once the cycle is complete, resist the temptation to immediately remove the curtain from the machine. Instead, allow the curtain to go through the spin cycle to remove excess water and facilitate faster drying.
The addition of the cleaning solution and starting the machine are crucial steps in the cleaning process. The combination of the gentle washing action and the cleaning agents will effectively remove dirt, stains, and odors from your vinyl shower curtain. By following these steps, you’re well on your way to enjoying a fresh and spotless curtain for your next shower.
Step 6: Extra Cleaning Tips
While the previous steps cover the essential process of cleaning a vinyl shower curtain in the washing machine, there are some additional tips and tricks that can help you achieve even better results. Consider the following extra cleaning tips:
- Use a gentle cycle: For delicate vinyl curtains, selecting a gentle or delicate cycle is highly recommended. This will minimize the risk of damage to the material and help extend the life of your curtain.
- Avoid using excessive detergent: Using too much detergent can leave behind a residue on the vinyl material, making it sticky or prone to attracting dirt. Follow the detergent manufacturer’s instructions for the appropriate amount to use.
- Opt for air drying: Instead of using the dryer, which can cause the vinyl material to shrink or warp, opt for air drying. Hang the curtain outside on a clothesline or lay it flat on a clean surface indoors, ensuring that it is stretched out evenly to prevent wrinkles.
- Remove promptly from the machine: Once the washing cycle is complete, try to remove the curtain from the machine as soon as possible. Leaving it in the machine for an extended period can cause wrinkles or mold/mildew growth.
- Inspect for any missed spots: After the curtain is dry, take a close look to ensure all stains and dirt have been fully removed. If you notice any missed spots, you can spot clean them using a cloth or sponge dipped in a mild cleaning solution.
- Regular maintenance: To keep your vinyl shower curtain clean and fresh, it’s essential to establish a regular cleaning routine. Regularly shake off loose debris, wipe down with a mild cleaning solution, and air dry to prevent the buildup of dirt and mold.
By incorporating these extra cleaning tips, you can maximize the cleanliness and longevity of your vinyl shower curtain. These simple steps will ensure that your curtain remains fresh, vibrant, and free from stains and dirt, allowing you to enjoy a hygienic and inviting shower environment.
Step 7: Drying the Vinyl Shower Curtain
After the washing cycle is complete and the vinyl shower curtain is clean, it’s time to properly dry it. Drying the curtain correctly will help to prevent water spots, mold, and musty odors. Here are some guidelines for drying your vinyl shower curtain:
- Air drying: The best method for drying a vinyl shower curtain is air drying. This can be done by hanging the curtain on a clothesline outside, in a well-ventilated area, or laying it flat on a clean surface indoors.
- Stretch out the curtain: When air drying, make sure to stretch the curtain out evenly to avoid any wrinkles or creases. Smooth out any folds or wrinkles before leaving it to dry.
- Avoid using the dryer: Vinyl shower curtains should not be placed in the dryer, as the heat can cause them to shrink, warp, or melt. It’s best to stick with air drying to preserve the integrity of the material.
- Allow ample drying time: Depending on the humidity level and airflow in the drying area, it may take a few hours or longer for the curtain to completely dry. Be patient and give it sufficient time to air dry before reinstallation.
- Inspect for moisture: Before rehanging the curtain, make sure it is completely dry. Check for any damp spots or moisture that may be trapped in folds or pockets. If you find any remaining moisture, gently blot it dry with a clean towel or cloth.
By following these steps for drying your vinyl shower curtain, you’ll ensure that it is thoroughly dried without any damage. Properly drying the curtain prevents water spots, mold growth, and musty odors, allowing you to maintain a clean and fresh shower environment.
Step 8: Reinstalling the Curtain
With your vinyl shower curtain now clean and completely dry, it’s time to move on to the final step: reinstalling it in your bathroom. Follow these simple steps to ensure a smooth and hassle-free reinstallation:
- Prepare the hooks or rings: If your curtain uses hooks or rings, make sure they are clean and free of any residue or dirt. Wipe them down with a damp cloth if necessary. If any hooks or rings are damaged, now is the time to replace them.
- Start from one end: Begin by attaching the first hook or ring to the curtain rod. Ensure that it is securely fastened before moving on to the next hook. Starting from one end will make it easier to hang the curtain straight.
- Work your way across: Once the first hook is secure, move on to the next one, attaching it to the curtain rod. Continue this process, working your way across the curtain, until all hooks or rings are attached.
- Smooth out wrinkles: As you hang the curtain, take a moment to smooth out any wrinkles or creases. Gently pull and adjust the curtain to ensure an even and wrinkle-free appearance.
- Ensure proper alignment: Make sure the curtain is hanging evenly along the rod. Adjust the hooks or rings as needed to ensure that the curtain hangs straight and doesn’t sag or bunch up in any areas.
- Check the length: Take a step back and check the length of the curtain. It should be hanging at the desired height, slightly touching or slightly above the bottom of the shower or bathtub. If necessary, make any adjustments to achieve the desired length.
- Double-check for any missed spots: Once the curtain is reinstalled, inspect it closely to ensure that all areas are clean and free from stains or residue. If you notice any missed spots, you can spot clean them using a mild cleaning solution and a soft cloth or sponge.
By following these steps, you’ll be able to reinstall your vinyl shower curtain with ease and ensure that it is hanging properly. The curtain should be smooth, wrinkle-free, and at the desired length, ready to enhance the look and functionality of your bathroom once again.
Step 9: Maintaining a Clean Curtain
Now that you have gone through the process of cleaning and reinstalling your vinyl shower curtain, it’s important to establish a regular maintenance routine to keep it clean and in good condition. Here are some tips for maintaining a clean curtain:
- Regularly shake off loose debris: Get into the habit of shaking off any loose debris, such as dirt or hair, from your curtain on a regular basis. This will prevent the accumulation of dirt and make your cleaning routine easier.
- Wipe down the curtain regularly: Use a soft cloth or sponge and a mild cleaning solution to wipe down the surface of the curtain. This can be done weekly or as needed to remove any soap scum, mildew, or water stains.
- Avoid harsh chemicals: When cleaning your curtain, avoid using harsh chemicals or abrasive cleaners that can damage the vinyl material. Stick to mild detergents, vinegar, or baking soda for safe and effective cleaning.
- Prevent mold and mildew: To prevent the growth of mold and mildew, ensure that your bathroom is well-ventilated. Open windows or use a bathroom exhaust fan during and after showers to remove excess moisture.
- Remove soap scum promptly: Soap scum can quickly build up on a shower curtain. When you notice soap residue, clean it off promptly to prevent it from becoming stubborn stains that are harder to remove.
- Replace as necessary: Over time, your vinyl shower curtain may start to show signs of wear and tear. If you notice significant damage, such as rips, tears, or mold that cannot be removed, it may be time to replace the curtain.
By following these maintenance tips, you can prolong the cleanliness and lifespan of your vinyl shower curtain. Regular cleaning and care will help to prevent the buildup of dirt, stains, and mold, ensuring that your curtain stays fresh, hygienic, and visually appealing.