
Preparation
Before you begin cleaning your Bissell Crosswave’s tray, it’s important to make sure you have everything you need for the task. Taking the time to gather your supplies and set up the work area will help to streamline the process and ensure a successful cleaning session.
Here are the steps you should follow to prepare for the cleaning of your Bissell Crosswave’s tray:
- Gather Your Supplies: Start by collecting all the necessary tools and materials. You will need a screwdriver, a soft cloth or sponge, warm water, mild detergent, and a clean towel.
- Find a Suitable Work Area: Look for a well-lit and spacious area where you can comfortably work on cleaning the tray. It’s best to choose a location with easy access to a sink or water source.
- Disconnect and Unplug the Bissell Crosswave: Ensure that the machine is turned off and unplugged from the power source. This step is essential for your safety and to prevent any accidental water damage during the cleaning process.
- Read the User Manual: Take a few minutes to go through the user manual provided by Bissell. Familiarize yourself with the specific instructions and guidelines for cleaning the tray of your particular model.
By following these preparatory steps, you will set yourself up for a smooth and efficient cleaning process. Now that you have everything ready, you can proceed to the next step of removing the tray from your Bissell Crosswave.
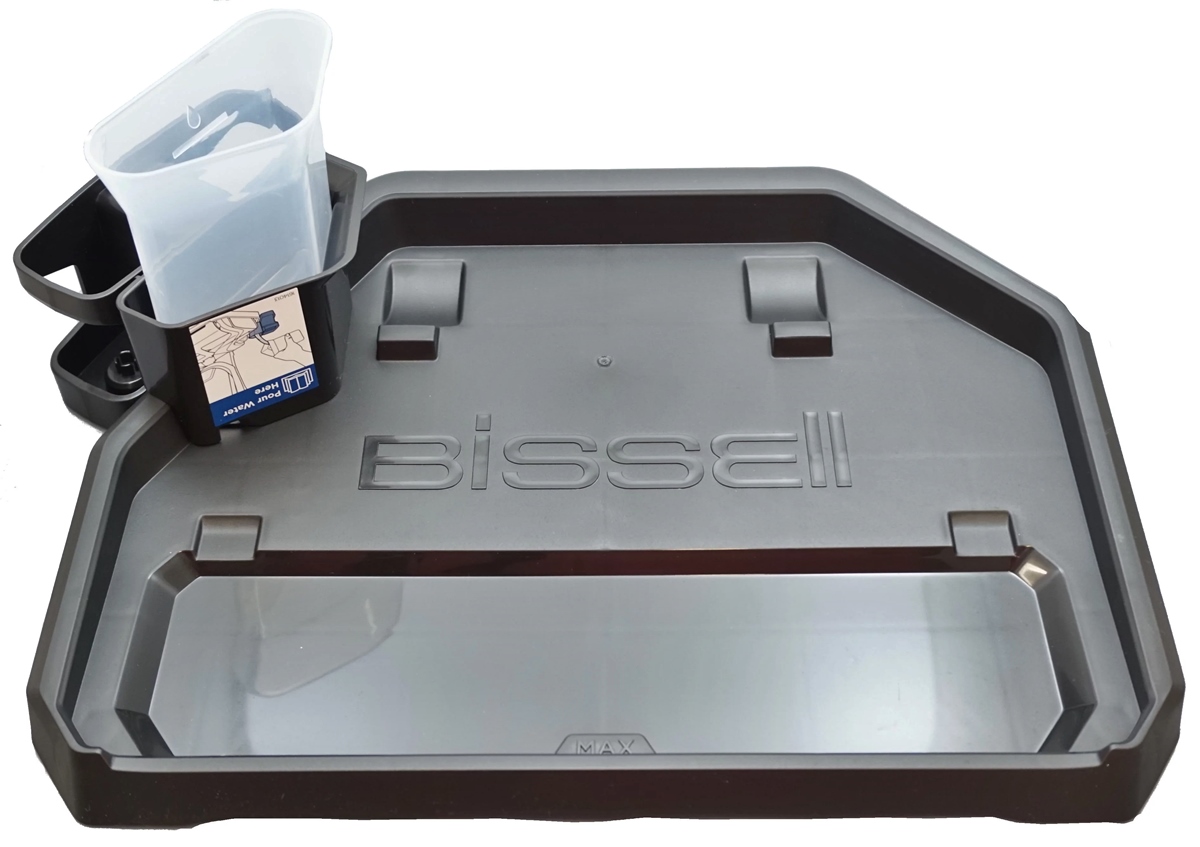
Removing the Tray
Before you can clean the tray of your Bissell Crosswave, you’ll need to remove it from the machine. Removing the tray is a relatively simple process that can be done by following a few easy steps:
- Ensure the Bissell Crosswave is turned off and unplugged: This is an important safety measure to prevent any accidents or damage while handling the machine.
- Locate the release buttons: Depending on the model of your Bissell Crosswave, you will find one or two release buttons on the top or side of the unit. These buttons are designed to release and remove the tray.
- Press the release buttons: Firmly press the release buttons to unlock the tray. If there are two buttons, press them simultaneously.
- Gently lift the tray: Once the release buttons are pressed, carefully lift the tray out of the machine. Take care not to force it or tilt it too much to avoid any spills or damage.
- Place the tray on a clean surface: Set the tray down on a flat and stable surface. Make sure it is in a convenient location for cleaning.
By following these steps, you can easily remove the tray from your Bissell Crosswave, preparing it for thorough cleaning. With the tray removed, you can now proceed to the next step of emptying any debris or residue that may be present.
Emptying the Tray
After removing the tray from your Bissell Crosswave, the next step is to empty any debris or liquid that may have accumulated inside. Properly emptying the tray is essential to ensure efficient cleaning and maintain the performance of your machine. Here’s how you can empty the tray:
- Inspect the tray: Take a moment to visually inspect the tray and identify any visible debris, hair, or particles. This will give you an idea of how much cleaning is required.
- Dispose of larger debris: If there are larger pieces of debris such as pet hair or food particles, use your hands or a paper towel to remove them from the tray and discard them in a trash bin.
- Empty any liquid: Carefully tilt the tray over a sink or garbage container to pour out any liquid contents. Be mindful not to spill any leftover cleaning solution or dirty water onto your surroundings.
- Thoroughly rinse the tray: Rinse the tray with warm water to remove any residual dirt or cleaning solution. Use your fingers or a soft cloth to gently scrub the interior surface of the tray and dislodge any stubborn debris.
- Place the tray upside down to dry: After rinsing, flip the tray upside down and allow it to air dry completely. This step is crucial to prevent any buildup of moisture, which can lead to unpleasant odors or mold growth.
By emptying the tray properly, you ensure that it is free from any debris or liquid residue, minimizing the risk of clogs and maintaining the optimal performance of your Bissell Crosswave. With the tray now empty, you can move on to cleaning the tray itself to remove any dirt or buildup that may be present.
Cleaning the Tray
Once you have emptied the tray of your Bissell Crosswave, it’s time to give it a thorough cleaning to remove any dirt, grime, or residue that may have accumulated. Cleaning the tray is essential to maintain the cleanliness and proper functioning of your machine. Here are the steps to clean the tray effectively:
- Prepare a cleaning solution: Mix warm water with a mild detergent or cleaning solution that is safe for use on your Bissell Crosswave. Avoid using harsh chemicals or abrasive cleaners that may damage the tray.
- Dip a soft cloth or sponge in the cleaning solution: Wet the cloth or sponge with the cleaning solution, ensuring that it is damp but not saturated.
- Wipe down the tray: Use the damp cloth or sponge to gently wipe down the interior and exterior of the tray. Pay extra attention to the corners and crevices where dirt and residue may accumulate.
- Remove stubborn stains: For stubborn stains or buildup, you can use a soft brush or toothbrush to gently scrub the affected areas. Be careful not to scrub too hard, as it may cause damage to the tray.
- Rinse the tray: Once you have cleaned the tray thoroughly, rinse it with clean water to remove any remaining cleaning solution or residue.
- Dry the tray: After rinsing, use a clean towel to dry the tray completely. Ensure that there is no moisture left behind to prevent any odor or mold growth.
By following these steps, you can effectively clean the tray of your Bissell Crosswave and maintain its optimal performance. Regularly cleaning the tray will ensure that your machine continues to provide excellent cleaning results and prolong its lifespan. With the tray now cleaned, it’s important to inspect it for any clogs that may hinder its functionality.
Removing Clogs
Occasionally, you may encounter clogs in the tray of your Bissell Crosswave, which can affect its performance and prevent proper cleaning. If you notice that the water is not flowing freely or if the suction is weak, it may indicate a clog. Here’s how you can remove clogs from the tray:
- Ensure the Bissell Crosswave is turned off and unplugged: Safety should always be the first priority when working on any cleaning task, including removing clogs.
- Inspect the tray and hoses: Visually examine the tray and hoses for any visible blockages. Look for items like hair, debris, or string that may be obstructing the flow of water.
- Remove the clog manually: Use your fingers or a pair of tweezers to carefully remove any visible clogs or blockages. Be gentle to avoid damaging the tray or the machine.
- Clear the hoses: If the clog is not found in the tray but in the hoses, detach them from the machine and run water through them to dislodge the blockage. You can use a pipe cleaner or a small brush to assist in clearing the hoses.
- Rinse the tray and hoses: After removing the clog, rinse both the tray and the hoses with clean water to ensure they are free from any remaining debris.
- Reassemble the tray: Once the tray and hoses are cleaned and clear of any clogs, reattach the hoses and secure the tray back onto the Bissell Crosswave machine.
By following these steps, you can effectively remove clogs from the tray of your Bissell Crosswave, ensuring that it functions at its best. Regularly checking for and removing any clogs will help to prevent future issues and keep your machine running smoothly. After addressing any clogs, it’s essential to clean the brushroll to maintain its performance.
Cleaning the Brushroll
The brushroll of your Bissell Crosswave plays a crucial role in effectively cleaning your floors. Over time, it can become clogged with hair, threads, and debris, which can hinder its performance. Regularly cleaning the brushroll will help maintain its efficiency and ensure optimal cleaning results. Follow these steps to clean the brushroll:
- Turn off and unplug the Bissell Crosswave: This step is essential to prevent any accidents or injuries while cleaning the brushroll.
- Locate and remove the brushroll: Depending on your Bissell Crosswave model, you can find the brushroll underneath the machine. Use a screwdriver to remove any screws or clips that secure the brushroll in place.
- Remove hair and debris: Carefully lift the brushroll out of the machine and remove any hair, threads, or debris tangled around the bristles. You can use your fingers, a pair of tweezers, or a small brush to dislodge and remove the debris.
- Clean the brushroll: Use a damp cloth or sponge to wipe down the brushroll and remove any dirt or residue. Pay close attention to the bristles and ensure they are free from any trapped debris.
- Dry the brushroll: After cleaning, use a clean towel to dry the brushroll thoroughly. Ensure that it is completely dry before reassembling it into the Bissell Crosswave.
- Reassemble the brushroll: Once the brushroll is dry, securely reattach it to the Bissell Crosswave machine. Make sure it is properly aligned and fastened, following the instructions provided by Bissell.
By cleaning the brushroll regularly, you can maintain its efficiency and prolong its lifespan. A clean brushroll will contribute to excellent cleaning performance and ensure that your Bissell Crosswave continues to deliver remarkable results. With the brushroll cleaned, you can now move on to reassembling the tray and testing it for proper functionality.
Reassembling the Tray
After cleaning and drying the tray of your Bissell Crosswave, it’s time to reassemble it and ensure that it is properly secured before using the machine again. Follow these steps to reassemble the tray:
- Inspect the tray: Before reassembling, take a quick look at the cleaned tray to ensure it is free from any debris or moisture.
- Align the tray: Position the tray in the correct orientation and make sure it is aligned with the connection points on the Bissell Crosswave machine.
- Attach the tray: Carefully insert the tray back into the machine, ensuring that it slides in smoothly without any resistance.
- Secure the tray: Once the tray is fully inserted, check if there are any latches or clips that need to be engaged to secure it in place.
- Test the tray: Gently push and pull the tray to verify that it is securely attached and does not wobble or come loose.
By following these steps, you can successfully reassemble the tray of your Bissell Crosswave. It’s important to ensure that the tray is firmly attached to prevent any leaks or malfunctions during operation. Now that the tray is reassembled, it’s time to test it before resuming your cleaning tasks.
Testing the Tray
Once you have reassembled the tray of your Bissell Crosswave, it’s crucial to perform a quick test to ensure that it is functioning correctly. Testing the tray will give you peace of mind and verify that it is securely attached and ready for use. Here’s how you can test the tray:
- Ensure the Bissell Crosswave is turned on: Plug in the machine and turn it on, following the manufacturer’s instructions.
- Add clean water: Fill the clean water tank of the Bissell Crosswave with fresh, clean water according to the recommended guidelines.
- Check for leaks: Keep a close eye on the tray and surrounding area for any signs of water leakage. If you notice any leaks, immediately turn off the machine and inspect the tray for proper alignment and security.
- Trigger the cleaning action: Activate the cleaning action of the Bissell Crosswave according to the operating instructions. Observe if the water flows smoothly through the tray and the cleaning process is effective.
- Monitor the suction power: Pay attention to the suction power of the Bissell Crosswave and make sure that it adequately picks up the water and debris from the floor.
- Observe the tray’s stability: During operation, watch for any movements or instability of the tray. It should remain securely attached to the machine without any wobbling or detachment.
- Check for proper water drainage: Once you have finished using the Bissell Crosswave, verify that the tray effectively drains the dirty water into the dirty water tank without any clogs or overflow.
By performing these tests, you can ensure that the tray of your Bissell Crosswave is functioning correctly. If you encounter any issues during the testing process, refer to the user manual or contact Bissell’s customer support for further assistance. With the tray successfully tested, you can confidently continue using your Bissell Crosswave for your cleaning needs.