
Safety Precautions
When assembling a steel storage rack from Costco, it is essential to prioritize safety. Following these precautions will help ensure a smooth and accident-free assembly process:
- Before starting the assembly, carefully read and understand the manufacturer’s instructions included in the packaging. Familiarize yourself with the steps and safety guidelines.
- Ensure you have a proper workspace free from obstructions and with adequate lighting. Clear the area of any debris or trip hazards.
- Wear appropriate personal protective equipment (PPE) such as gloves and safety goggles to protect your hands and eyes from potential injuries during the assembly process.
- Use caution and proper lifting techniques when handling the heavy parts of the rack. If needed, ask for assistance to prevent strain or injury.
- Ensure that the surface where you are assembling the rack is stable and level. Avoid placing it on an uneven or sloped surface to prevent any wobbling or tipping.
- Be cautious when using tools during the assembly process. Use the correct tools for each step and ensure they are in good condition. Follow the manufacturer’s instructions for safe tool usage.
- If the rack includes any sharp or protruding edges, handle them with care to avoid cuts or punctures. Use caution when attaching shelves or putting weight on the rack to prevent injuries from falling items.
- If required, secure the rack to the wall using appropriate brackets or anchors to prevent tipping or instability, especially in areas prone to earthquakes or high traffic.
- Keep children and pets away from the assembly area to avoid accidents or injuries.
- Take breaks as needed and stay hydrated to prevent fatigue or muscle strain during the assembly process.
By following these safety precautions, you can ensure that the assembly of your steel storage rack from Costco is a safe and successful process. Remember, your well-being and the well-being of those around you is of utmost importance during any assembly project.
Tools and Materials Needed
Before beginning the assembly of your steel storage rack from Costco, it is important to gather all the necessary tools and materials. Here is a list of items you will need for a smooth and efficient assembly process:
- Rubber mallet or hammer – This will be used to gently tap the parts into place.
- Phillips head screwdriver – You may need this to tighten screws or fasten certain parts of the rack.
- Adjustable wrench – This will be useful for tightening bolts and nuts.
- Power drill (optional) – If the instructions recommend using a power drill, make sure you have one on hand.
- Level – To ensure the rack is assembled evenly and remains stable.
- Pencil – This will come in handy for marking the wall if you need to secure the rack.
- Tape measure – Use this to measure the dimensions of the area where the rack will be placed.
- Safety goggles and gloves – These will protect your eyes and hands during the assembly process.
- Step ladder or stool – If the shelves are tall, having a step ladder or stool will make it easier to reach higher parts.
- Clean, flat workspace – Ensure you have enough space to lay out all the parts and organize them during assembly.
In addition to the tools, make sure you have the following materials before you start assembling your steel storage rack:
- Steel storage rack kit – This should include all the necessary parts and hardware for assembly.
- Wall anchors and brackets (if required) – Check the instructions to see if your rack needs to be secured to the wall.
Having these tools and materials prepared beforehand will streamline the assembly process and minimize any potential delays or frustration. Make sure everything is easily accessible and within reach before you begin assembling your steel storage rack from Costco.
Unboxing and Organizing the Parts
Once you have gathered all the necessary tools and materials, it’s time to unbox and organize the parts of your steel storage rack from Costco. Following these steps will help you keep track of the components and make the assembly process more efficient:
- Open the packaging of the steel storage rack and carefully inspect the contents. Check if all the parts and hardware are included as stated in the instructions.
- Sort the parts into categories. Group similar components together, such as uprights, beams, shelves, and hardware. This will make it easier to find the right pieces as you assemble the rack.
- Dispose of any packaging materials responsibly, ensuring that you have a clean and safe work area.
- Read through the instructions provided by the manufacturer. Familiarize yourself with the labeled diagrams and part names to understand how the rack will come together.
- Double-check your inventory of parts against the parts list in the instructions. This will help ensure that you have all the necessary components before starting the assembly.
- Arrange the parts in the order they will be used during the assembly process. This will help streamline the workflow and prevent confusion or delays.
- If any parts are damaged or missing, contact the manufacturer or retailer immediately to address the issue and ensure a successful assembly.
By carefully unboxing and organizing the parts of your steel storage rack, you set the foundation for a smooth and efficient assembly process. Taking the time to sort and familiarize yourself with the components will minimize confusion and ensure that you have all the necessary parts to complete the project successfully.
Reading the Instructions
Before you begin assembling your steel storage rack from Costco, it is crucial to read and understand the provided instructions. This step will ensure that you have a clear understanding of the assembly process and can follow the correct steps. Here are a few tips for effectively reading and comprehending the instructions:
- Read through the instructions from start to finish before beginning the assembly. This will give you an overview of the entire process and help you anticipate any potential challenges or requirements.
- Pay attention to any cautionary notes or warnings highlighted in the instructions. These will provide important safety information or potential risks to be aware of during assembly.
- Take note of any specific tools or materials that are required for certain steps. Ensure that you have them on hand before starting the assembly process.
- Follow the instructions step-by-step, referring to the labeled diagrams or illustrations if provided. Take your time to understand each step and visualize how the different components fit together.
- If any section of the instructions is unclear or confusing, consult the manufacturer’s website or customer support for additional guidance. They can provide clarification or answer any questions you may have.
- Use a highlighter or pen to mark important steps or reference points in the instructions. This will help you easily locate them as you progress through the assembly process.
- Double-check each step as you go along to ensure that you haven’t missed anything or made any errors. Taking the time for accuracy will save you time and frustration later on.
By carefully reading and understanding the provided instructions, you will have a solid foundation for assembling your steel storage rack. Following the recommended steps and paying attention to important details will lead to a successful and hassle-free assembly process.
Preparing the Workspace
Before you start assembling your steel storage rack from Costco, it’s important to prepare your workspace to ensure a smooth and efficient assembly process. Here are some steps to follow when setting up your workspace:
- Choose a suitable location for the assembly. Clear out a spacious area in a well-lit room or garage where you can spread out the parts and have enough space to move around.
- Remove any obstacles or clutter from the workspace to prevent accidents or damage to the rack components.
- Ensure that the floor or surface where you’ll be assembling the rack is clean, stable, and level. This will provide a solid foundation for the rack and ensure its stability once assembled.
- If the rack is going to be placed against a wall, make sure there is enough clearance between the rack and the wall to comfortably attach the shelves and maneuver during the assembly process.
- If you have a carpeted floor, consider placing a sturdy, flat surface underneath the assembly area to provide extra stability and prevent potential sinking or instability.
- Set up a small table or workbench nearby to hold the tools and hardware. This will keep everything organized and easily accessible during the assembly process.
- If the rack is located near electrical outlets, take necessary precautions to ensure cords and cables are safely tucked away to avoid accidents or tripping hazards.
- Consider having a step ladder or stool for reaching higher parts of the rack during the assembly process, especially if the rack has multiple tiers or adjustable shelves.
- Lastly, ensure there is adequate ventilation in the workspace, particularly if you will be working with any paints, adhesives, or cleaning products during the assembly process.
Taking the time to properly prepare your workspace will contribute to a more organized and efficient assembly of your steel storage rack. By implementing these steps, you will create a safe and comfortable environment to complete the assembly process with ease.
Assembling the First Tier
Now that you have prepared your workspace, it’s time to start assembling the first tier of your steel storage rack from Costco. Follow these step-by-step instructions to ensure a smooth and successful assembly:
- Refer to the instructions to identify the specific parts required for the first tier assembly. Familiarize yourself with the labels and names of the components.
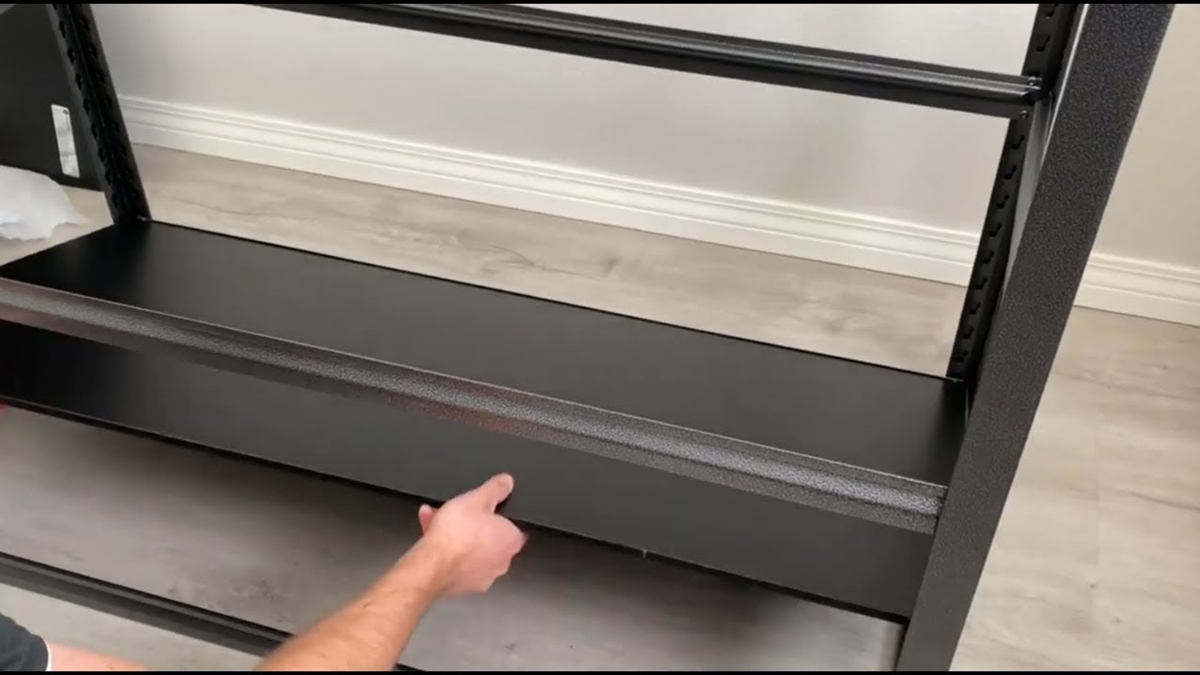
- Start by connecting the uprights (vertical poles) with the beams (horizontal bars). Insert the beams into the designated slots or brackets on the uprights. Use a rubber mallet or hammer to tap them gently into place if needed.
- Once the uprights and beams are connected, secure them using the provided hardware. This usually involves tightening bolts or screws using a Phillips head screwdriver or adjustable wrench. Follow the instructions for the correct tightening procedure.
- Check the uprights and beams to ensure they are level and aligned correctly. Use a level to verify their position accuracy. Adjust if necessary by loosening the hardware and making small adjustments.
- Attach the crossbars or support bars if they are included in your specific model. These bars provide additional stability and support to the rack. Follow the instructions for their proper placement and attachment.
- If your first tier includes adjustable shelves, position them according to your desired height configuration. Insert the shelves onto the beams, making sure they are securely in place.
- Double-check all connections and ensure that all bolts and screws are tightened securely. This will ensure the stability and structural integrity of the first tier.
By following these steps, you can successfully assemble the first tier of your steel storage rack. Carefully refer to the instructions and take your time to ensure each step is executed accurately. Once the first tier is complete, you can move on to assembling the additional tiers to complete the rack assembly.
Adding Additional Tiers
After successfully assembling the first tier of your steel storage rack from Costco, it’s time to add additional tiers to increase the storage capacity. Follow these steps to seamlessly add more tiers to your rack:
- Refer to the instructions to identify the components required for each additional tier. Ensure you have all the necessary parts and hardware at hand.
- Place the next set of uprights on top of the already assembled tier, aligning them with the corresponding holes or brackets on the lower tier.
- Insert the beams into the slots of the new set of uprights, securely connecting them. Use a rubber mallet or hammer to tap them gently into place if needed.
- Secure the uprights and beams together using the provided hardware, following the instructions for the correct tightening procedure. Make sure to check the level and alignment of the newly added tier.
- If your rack includes crossbars or support bars, attach them to the new tier according to the instructions. These bars further enhance the stability of the rack.
- Continue adding tiers, repeating the same steps for each additional level. Take your time to ensure that each tier is securely connected and aligned properly.
- If your rack has adjustable shelves, position them on the beams of each tier according to your desired configuration. Ensure they are securely in place.
- Double-check all connections and tighten all bolts and screws to ensure the stability and structural integrity of the entire rack.
By following these steps, you can easily add additional tiers to your steel storage rack. Pay close attention to the instructions and take your time to ensure that each tier is securely connected and aligned properly. Adding more tiers will significantly increase the storage capacity of your rack and help you make the most of your available space.
Installing the Shelves
Once you have successfully assembled all the tiers of your steel storage rack from Costco, the next step is to install the shelves. Follow these steps to properly install the shelves and maximize the storage capabilities of your rack:
- Refer to the instructions to identify the components required for installing the shelves. Check for any specific instructions or guidelines provided by the manufacturer.
- Position the shelves on the beams of each tier according to your desired configuration. Ensure they are properly aligned and evenly spaced.
- Double-check that the shelves are securely inserted in the designated slots or brackets on the beams. Give them a gentle tug to ensure they are firmly in place. Make any necessary adjustments to ensure the shelves are level and stable.
- Consider using a rubber mallet or hammer to gently tap the shelves onto the beams if they require a more snug fit. Be cautious not to damage the shelves or the beams during this process.
- If your rack includes adjustable shelves, take advantage of this feature to customize the height spacing for different storage needs. Simply adjust the shelves to the desired positions and ensure they are securely locked in place.
- Check the load capacity indicated in the instructions or on the packaging to ensure that the weight distributed on each shelf does not exceed the recommended limit. Overloading the shelves can compromise the stability of the rack.
- After installing the shelves, perform a final inspection of the rack to ensure all components are securely in place. Give each shelf a slight push to check for any instability or wobbling. If any adjustments are needed, make them accordingly.
By following these steps, you can successfully install the shelves on your steel storage rack. Properly installing the shelves will optimize the storage capacity of your rack and ensure a safe and organized space for your belongings. Take your time to make sure each shelf is securely positioned and leveled correctly to achieve the desired functionality of your rack.
Securing the Rack to the Wall (if applicable)
Securing your steel storage rack from Costco to the wall adds an extra level of stability and safety, especially if you live in an area prone to earthquakes or if the rack will be holding heavy items. Follow these steps to properly secure the rack to the wall:
- Check the instructions provided by the manufacturer to determine if your specific rack model requires wall mounting. Not all racks need to be secured to the wall.
- Identify the wall mounting brackets or anchors included in the packaging. Ensure that you have all the necessary hardware for the installation.
- Locate the wall studs or use a stud finder to determine the most secure points for attaching the mounting brackets. Mark the positions with a pencil.
- Hold the mounting brackets against the wall, aligning them with the marked positions. Use a level to ensure they are straight and level.
- Secure the mounting brackets to the wall using the appropriate screws or anchors. Use a power drill or screwdriver to tighten them securely into place.
- Carefully lift the assembled rack and position it in front of the mounted brackets. Align the holes on the back of the rack with the brackets.
- Insert the provided screws or bolts through the holes in the back of the rack and into the mounting brackets. Use a screwdriver or wrench to tighten them securely.
- Double-check the stability of the rack by giving it a gentle push and ensuring it is securely attached to the wall. If there is any wobbling or instability, tighten the screws or bolts further or make any necessary adjustments.
- Once the rack is securely attached to the wall, test its stability by placing a moderate amount of weight on the shelves. Monitor the rack for any signs of instability or movement.
- Regularly inspect the wall mounting brackets and the rack’s attachment to ensure they remain secure over time. Make any necessary adjustments or tighten any loose screws or bolts.
Remember, securing the rack to the wall is crucial for maintaining its stability and preventing accidents. Always refer to the manufacturer’s instructions for specific guidelines on wall mounting your steel storage rack. By following proper installation procedures, you can ensure a safe and secure storage solution for your belongings.
Testing the Stability and Adjusting the Leveling Feet
Once you have assembled and secured your steel storage rack from Costco, it is essential to test its stability and adjust the leveling feet if necessary. Follow these steps to ensure that your rack is stable and properly positioned:
- Make sure the rack is fully loaded with the intended weight or items that will be stored on it. This will provide an accurate assessment of its stability.
- Give the rack a gentle shake or push to test its stability. If there is any wobbling or movement, check the levelness of the rack and ensure it is resting evenly on the floor.
- If the rack is not level, adjust the leveling feet located at the base of the uprights. Turn the feet clockwise or counterclockwise to raise or lower the height of the rack on each corner until it is level and stable.
- Use a level tool or place a small bubble level on top of the rack to check its levelness. Make adjustments to the leveling feet as needed until the rack is perfectly level.
- Once the rack is level, place a moderate amount of weight on the shelves to simulate typical storage conditions. Observe if there are any signs of instability or shifting of the rack.
- If necessary, recheck the tightness of the bolts and screws throughout the rack and tighten any loose connections. This will ensure that all components are securely fastened.
- Continue to periodically monitor the stability of the rack, especially after adding or rearranging items. Make adjustments to the leveling feet if needed to maintain optimal stability and prevent any potential accidents.
- If the rack is still unstable after adjusting the leveling feet and tightening the connections, reassess the assembly and consult the manufacturer’s instructions or customer support for additional guidance.
Properly testing the stability and adjusting the leveling feet of your steel storage rack is crucial to ensure the safety and reliability of your storage solution. By following these steps and regularly inspecting the rack, you can maintain its stability and confidently store your belongings without the risk of tipping or instability.
Organizing and Storing Items on the Rack
Now that you have assembled and tested the stability of your steel storage rack from Costco, it’s time to start organizing and storing your items on the rack. Follow these tips to optimize the space and create an efficient storage system:
- Categorize your items: Sort your belongings into categories based on their type or usage. This will help you allocate the appropriate shelves or sections for each category.
- Utilize storage containers: Consider using storage bins, baskets, or plastic tubs to group similar items together. This will help keep your items organized and prevent them from falling off the shelves.
- Label your containers: Place clear labels on your storage containers to easily identify the contents and quickly locate items when needed.
- Arrange items by frequency of use: Keep frequently used items within easy reach on the lower shelves, while items that are used less often can be placed on higher shelves or towards the back of the rack.
- Maximize vertical space: Take advantage of the height of your rack by using taller shelves to store items such as gardening tools, brooms, or long-handled equipment.
- Group heavy items on lower shelves: Place heavier items on the lower shelves to ensure stability and prevent the risk of toppling over.
- Consider weight distribution: Distribute the weight evenly across the shelves to maintain the stability of the rack. Avoid placing too much weight on a single shelf.
- Leave space for future additions: Keep some empty shelves or sections for future storage needs or new items that may be acquired later on.
- Regularly declutter and reorganize: Periodically go through your items, declutter, and reorganize the rack. This will help maximize storage space and keep your belongings organized.
- Ensure accessibility: Arrange items in a way that allows easy access to each shelf. Consider placing frequently used or seasonal items near the front of the rack for quick retrieval.
By following these tips, you can efficiently organize and store your items on your steel storage rack. Creating an organized storage system will make it easier to find what you need and optimize the use of your space. Regularly maintain the organization of your rack to keep it tidy and functional, ensuring a hassle-free storage experience.
Maintenance and Cleaning Tips
To ensure the longevity and functionality of your steel storage rack from Costco, it’s important to implement regular maintenance and cleaning practices. Here are some tips to help you keep your rack in excellent condition:
- Regularly inspect the rack: Take the time to visually inspect your rack to check for any signs of wear, damage, or loose connections. Tighten any loose bolts or screws and repair or replace any damaged components as needed.
- Wipe down the surfaces: Use a damp cloth or mild cleaning solution to wipe down the surfaces of the rack, including the shelves, beams, and uprights. This will help remove any dust or dirt that has accumulated over time.
- Avoid overloading: Be mindful of the weight capacity of your rack and avoid overloading it. Distribute the weight evenly across the shelves and avoid placing items that exceed the recommended weight limit.
- Watch for rust or corrosion: If your steel storage rack is located in a damp or humid environment, be vigilant for signs of rust or corrosion. Regularly inspect the metal components and promptly address any rust spots by sanding them down and applying touch-up paint.
- Adjust leveling feet if necessary: Over time, the leveling feet of your rack may become uneven due to floor settling or movement. Periodically check the levelness of the rack and adjust the leveling feet as needed to maintain stability.
- Maintain proper ventilation: If your rack is in an enclosed space or near any heat sources, ensure there is sufficient ventilation to prevent the accumulation of moisture or the risk of overheating.
- Keep the area around the rack clean: Regularly sweep or vacuum the area around the rack to prevent debris or dust from accumulating. This will help maintain a clean and organized storage space.
- Reorganize periodically: Take the opportunity to reorganize the items on your rack periodically. This will not only keep your storage area tidy but also give you the chance to assess your storage needs and make any necessary adjustments.
- Follow the manufacturer’s guidelines: Always refer to the manufacturer’s maintenance recommendations specific to your rack model. They may provide additional information on cleaning products to use or any other specific maintenance instructions.
By following these maintenance and cleaning tips, you can ensure the durability and functionality of your steel storage rack. Regular upkeep and care will keep your rack in excellent condition, providing you with a reliable storage solution for years to come.