
Choose a Safe Location
When it comes to watching a solar eclipse, one of the most important factors to consider is choosing a safe and suitable location. This will ensure that you have the best view of the eclipse while also protecting your eyes and equipment. Here are a few tips to help you choose the perfect location:
1. Find an open area: Look for a spot that provides an unobstructed view of the sky. Avoid crowded places, buildings, and tall trees that may block your view.
2. Consider the weather conditions: Check the weather forecast to ensure clear skies and minimal chance of cloud cover. A cloudy sky can hinder your ability to see the eclipse.
3. Seek elevated ground: If possible, find a location that is slightly elevated, such as a hill or a rooftop. This will give you a better vantage point to observe the eclipse.
4. Stay away from light pollution: Light pollution from urban areas can diminish the visibility of the eclipse. Try to find a location that is far from city lights or any other source of light pollution.
5. Research the eclipse path: Determine the path of the eclipse and choose a location that falls within this path. The path of totality, where the moon completely covers the sun, offers the most spectacular view. However, even being outside the path, you can still witness a partial eclipse.
6. Consider accessibility and comfort: Ensure that the location is easily accessible and has the necessary amenities, such as restrooms or shade, if needed. Additionally, bring comfortable seating arrangements and snacks to enhance your viewing experience.
Remember, safety should always be a priority when observing a solar eclipse. Never look directly at the sun without proper eye protection, and ensure that children are supervised to prevent any accidental eye damage. By choosing a safe location, you can make the most of this awe-inspiring celestial event.
Check the Eclipse Path
Before planning your solar eclipse viewing experience, it is crucial to check the path of the eclipse. The path of totality, where the moon completely blocks the sun, provides a truly mesmerizing experience. Here are some important points to consider:
1. Research the eclipse date and time: Find out the exact date and time of the eclipse in your area. This will help you plan your schedule accordingly and ensure that you don’t miss the event.
2. Determine the path of totality: The path of totality refers to the specific geographic area where the sun is entirely covered by the moon. This is the most dramatic phase of the eclipse. If you are within this path, you will be able to witness the awe-inspiring phenomenon of a total solar eclipse. However, even if you are outside the path of totality, you can still enjoy a partial eclipse.
3. Use online resources and apps: There are various online resources and smartphone apps available that provide detailed maps and information about the eclipse path. These resources will help you visualize the path and determine if you are located within it or close to it.
4. Consult experts and local authorities: Reach out to local astronomy groups, observatories, or meteorological agencies in your area for accurate information about the eclipse path. They will have the latest updates and can provide valuable insights to help you plan your viewing experience.
5. Consider travel options: If you are not within the path of totality, you may consider traveling to a location that is. This can involve a road trip or even a short flight to a nearby destination. Make sure to plan your travel logistics well in advance to avoid any last-minute complications.
Remember, the path of the eclipse can vary from one eclipse to another, so it’s important to stay informed about the specific details of each event. By checking the eclipse path and understanding its significance, you can maximize your chances of witnessing this extraordinary celestial event in all its glory.
Get the Right Equipment
When it comes to watching a solar eclipse, having the right equipment is essential to ensure a safe and enjoyable experience. Here are some key items you’ll need:
1. Eclipse glasses: Never look directly at the sun during an eclipse without proper eye protection. Eclipse glasses are specially designed to filter out harmful ultraviolet (UV) and infrared (IR) rays. Make sure to get certified eclipse glasses from reputable sources to protect your eyes while observing the eclipse.
2. Solar filters for telescopes and cameras: If you plan on using a telescope or camera to capture close-up shots of the eclipse, you’ll need a solar filter to protect your equipment. These filters are specifically designed to block out the intense light and heat from the sun, allowing you to capture stunning images without damaging your gear.
3. Binoculars or a telescope: While eclipse glasses are sufficient for viewing the eclipse with the naked eye, using binoculars or a telescope can enhance your experience. With these tools, you’ll be able to see more details, such as sunspots or the moon’s shadow as it passes over the sun. Just make sure to use the appropriate solar filters for your equipment.
4. Camera or smartphone: If you want to document the eclipse, a camera or smartphone with a good quality lens can help you capture stunning photos. Experiment with different settings and techniques to achieve the best results. Consider using a tripod to keep your shots steady, especially during the longer duration of a total eclipse.
5. Tripod or stable surface: To ensure clear and steady images, use a tripod or find a stable surface to set up your equipment. This will minimize any blurring caused by shaky hands and help you capture precise moments during the eclipse.
6. Solar eclipse apps and guides: Downloading a solar eclipse app or using online guides can provide you with valuable information, such as the timing of various eclipse phases, duration, and other relevant data. These resources can enhance your understanding of the eclipse and help you plan your viewing experience more effectively.
Remember, acquiring the right equipment is crucial for both your safety and the quality of your experience. Make sure to obtain proper eye protection, consider investing in solar filters for your equipment, and use additional tools like binoculars or a camera to enhance your observations and capture lasting memories of this celestial event.
Use Eclipse Viewing Glasses
One of the most important aspects of watching a solar eclipse is protecting your eyes from the intense rays of the sun. Eclipse viewing glasses are specially designed to do just that. Here’s everything you need to know about using eclipse viewing glasses:
1. Certified glasses: Ensure that the eclipse viewing glasses you use are certified and meet international safety standards. Look for glasses labeled with ISO 12312-2, which indicates that they provide adequate eye protection. Avoid using regular sunglasses or homemade filters, as they do not offer sufficient protection.
2. Proper usage: Before wearing your eclipse glasses, inspect them for any damage or scratches. Any compromised glasses should be discarded and replaced. Put on the glasses before looking at the sun and keep them on throughout the duration of the eclipse. Remind everyone around you, including children, to never remove their glasses while looking at the sun.
3. Observe the sun safely: When using eclipse viewing glasses, look directly at the sun without removing the glasses. Remember to glance at the sun for short intervals rather than prolonged periods to avoid eye strain. Enjoy the mesmerizing sight of the eclipse while protecting your eyes at the same time.
4. Share responsibly: If you are watching the eclipse with others, ensure that everyone has access to their own pair of certified eclipse glasses. Sharing glasses can be risky, as it increases the chances of accidentally looking at the sun without proper protection.
5. Keep children supervised: Children should always be supervised by adults while observing a solar eclipse. Teach them the importance of wearing their eclipse glasses and explain the potential dangers of looking directly at the sun without proper eye protection.
6. Safe storage: After the eclipse, store your eclipse viewing glasses in a safe and protected place. Keep them away from direct sunlight and inspect them before future use. If the lenses become damaged or scratched, it’s time to replace them before the next eclipse.
Eclipse viewing glasses are an essential tool for safely witnessing the beauty of a solar eclipse. By following these guidelines and using certified glasses, you can protect your eyes and fully immerse yourself in the extraordinary celestial event.
Make a DIY Solar Filter
If you’re feeling adventurous and want to take a hands-on approach to watching a solar eclipse, you can create your own do-it-yourself (DIY) solar filter. A DIY solar filter is a cost-effective alternative to commercially available filters. Here’s how you can make one:
1. Obtain the necessary materials: To make a DIY solar filter, you’ll need a few essential items. These include a piece of optical solar film or aluminized mylar, a cardboard or plastic frame, tape, scissors, and a small screw or rivet.
2. Measure and cut the optical film: Start by measuring your frame to determine the size of the optical film needed. Cut a piece of the film slightly larger than your frame, ensuring it covers the entire opening of the frame.
3. Secure the film to the frame: Place the cut optical film onto the frame and carefully attach it using tape. Make sure the film is taut and properly secured to prevent any movement or slipping during use.
4. Create a handle: Attach a small screw or rivet to one end of the frame, creating a handle that allows you to hold the DIY solar filter comfortably.
5. Test the filter: Before using the DIY solar filter, test it to ensure that it provides adequate protection. Find a safe way to look at a distant, bright light source, such as the sun, using the filter. Ensure that the filter blocks out the majority of the light and allows for clear viewing without risking eye damage.
6. Safety precautions: Remember that even with a DIY solar filter, it is crucial to exercise caution when observing the sun during a solar eclipse. Always wear the filter and avoid prolonged direct exposure to the sun. Keep in mind that a DIY solar filter may not provide the same level of protection as certified eclipse glasses or professionally made filters.
Creating a DIY solar filter can be a fun and rewarding project. However, it’s important to note that this option should only be pursued if you have the necessary materials, skills, and understanding of the risks involved. If you’re unsure about making your own filter, it’s best to opt for certified eclipse glasses or professionally made filters to ensure maximum safety during the eclipse.
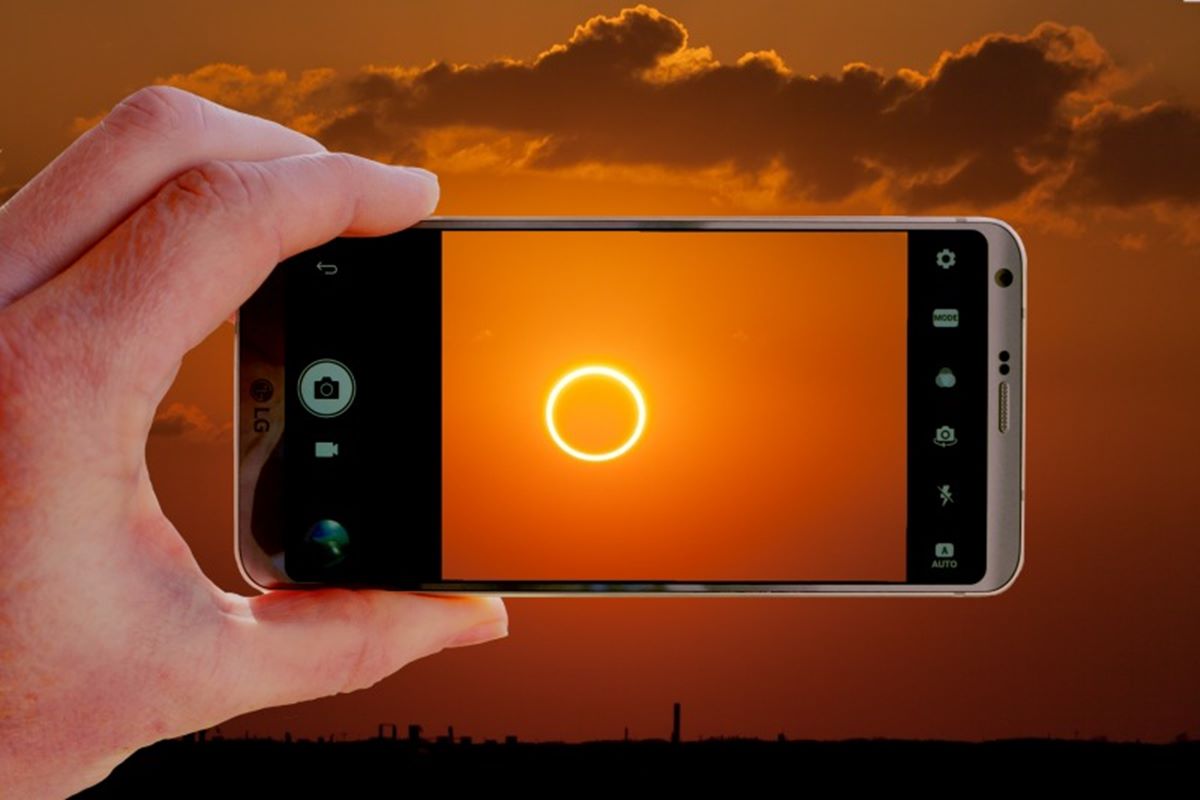
Set Up Your Smartphone
Using your smartphone to capture the mesmerizing moments of a solar eclipse can be a convenient and rewarding experience. Here are some essential steps to set up your smartphone for capturing stunning eclipse photos:
1. Check camera capabilities: Start by familiarizing yourself with the capabilities of your smartphone’s camera. Check if it has manual camera settings or features like HDR (High Dynamic Range) mode, which can help you capture better-looking images during the challenging lighting conditions of an eclipse.
2. Clean the lens: Ensure that the lens of your smartphone’s camera is clean and free from any smudges or dust. Use a microfiber cloth or lens cleaning solution to gently wipe the lens and eliminate any potential obstructions that could ruin your images.
3. Use a tripod or stabilizing option: To capture sharp and steady images, it’s advisable to use a tripod or find a stable surface to place your smartphone on. This will prevent any blurring caused by shaky hands, particularly during the longer duration of a total eclipse.
4. Enable gridlines: Activate the gridlines on your smartphone’s camera settings. Gridlines help you compose your shots more effectively, allowing you to align key elements such as the sun and any surrounding objects or landscapes.
5. Experiment with exposure settings: Since the brightness of the sun during an eclipse can vary, experimenting with exposure settings is important to achieve well-balanced images. Use manual camera controls to adjust the exposure levels and find the sweet spot that captures the intricate details of the eclipse without overexposing or underexposing the image.
6. Assess the focusing options: Depending on your smartphone’s camera app, you may have different focusing options available. Some phones offer tap-to-focus, while others have manual focus capabilities. Experiment with these options to ensure that the desired area, typically the sun or partially eclipsed sun, is in sharp focus.
7. Protect your eyes and smartphone: It is crucial to never look directly at the sun through the smartphone’s screen while taking pictures. This can damage both your eyes and the camera sensor. Utilize a solar filter or eclipse viewing glasses while composing and adjusting your shots.
By following these steps, you can set up your smartphone effectively for capturing stunning photos of a solar eclipse. Remember to prioritize your safety by using proper eye protection and avoiding direct exposure to the sun. Happy photographing!
Download a Solar Eclipse App
When it comes to watching a solar eclipse, technology can be your best friend. By downloading a solar eclipse app onto your smartphone, you can enhance your viewing experience and stay informed about the various aspects of the eclipse. Here are some reasons to consider downloading a solar eclipse app:
1. Accurate eclipse information: Solar eclipse apps provide accurate and up-to-date information about the timing, duration, and phases of the eclipse. You can rely on the app to know when the eclipse will start, peak, and end in your location.
2. Interactive maps: Many apps offer interactive maps that showcase the path of the eclipse, including the path of totality. With these maps, you can easily see if you are within the path or determine the closest location for optimal viewing.
3. Notifications and reminders: Solar eclipse apps often offer notification features, sending you alerts and reminders about upcoming celestial events. This ensures that you never miss an eclipse or any important updates related to the event.
4. Astronomical data: Apps dedicated to solar eclipses often provide additional astronomical data. You can access information about the moon’s angle, the position of the sun, and technical details that can deepen your understanding of the celestial event.
5. Virtual reality experiences: Some solar eclipse apps offer virtual reality (VR) experiences, allowing you to immerse yourself in a simulated eclipse. This can be a fascinating way to explore the visual and audio aspects of an eclipse in a unique and interactive manner.
6. Educational resources: Solar eclipse apps often include educational resources, such as articles, videos, and interactive elements. These resources can help you learn more about solar eclipses, the science behind them, and their cultural significance throughout history.
7. Social sharing: Some apps provide features that allow you to share your eclipse experiences with others. You can upload photos, videos, or notes about your observations and engage with a community of fellow eclipse enthusiasts.
To make the most of your solar eclipse experience, consider downloading a solar eclipse app that suits your preferences and requirements. Whether you are a casual observer or a passionate astronomer, having easy access to accurate information and interactive features can greatly enhance your enjoyment of this celestial spectacle.
Use Manual Camera Settings
For those looking to capture truly stunning photos of a solar eclipse, utilizing manual camera settings is key. While automatic settings may work in certain scenarios, manual controls give you greater control over the exposure and focus of your shots. Here’s how to make the most of manual camera settings:
1. Adjust ISO: ISO determines the sensitivity of your camera’s sensor to light. In bright lighting conditions during a solar eclipse, it’s best to set your ISO to the lowest value (e.g., ISO 100 or 200) to maintain image quality and reduce noise.
2. Set aperture: Aperture controls the amount of light entering your camera. For solar eclipse photography, set your aperture to a moderate value (around f/8 or f/11) to strike a balance between capturing enough light and maintaining sharpness across the frame.
3. Shutter speed: The shutter speed determines how long your camera’s sensor is exposed to light. During a solar eclipse, start with a fast shutter speed (around 1/500 or 1/1000) to freeze any motion and capture crisp details. Adjust the shutter speed if needed based on the lighting conditions and desired effect.
4. Manual focus: Most cameras struggle with autofocus during a solar eclipse due to the dynamic lighting conditions. Switch to manual focus and carefully adjust the focus ring until the sun appears sharp and well-defined in your viewfinder or on your camera’s screen.
5. Bracket exposures: Bracketing exposures involves taking a series of shots with different exposure settings to capture a wider range of details. This technique can be particularly useful during a solar eclipse when there are variations in brightness. Experiment with bracketing to find the optimal exposure for each shot.
6. Review and adjust settings: Regularly review your images on your camera’s screen or through the viewfinder to gauge the exposure and overall quality. Make adjustments to your settings as needed to ensure accurate and well-exposed images of the eclipse.
7. Practice long exposures: If you are capturing a partial eclipse or the period of totality, consider experimenting with long exposures to capture the corona or any other dimmer details. Use a tripod and a shutter release cable to minimize camera shake during longer exposures.
By utilizing manual camera settings, you can have greater control over your images and capture stunning, detailed photos of a solar eclipse. Remember, practice and experimentation are key to finding the perfect settings that best represent the breathtaking beauty of this celestial event.
Capture Time-Lapse Photography
Time-lapse photography offers a unique and captivating way to document the progression of a solar eclipse. By capturing a series of photos at regular intervals, you can create a mesmerizing visual representation of the eclipse’s movements and changes. Follow these steps to capture stunning time-lapse photography of a solar eclipse:
1. Plan your composition: Before setting up your camera, decide on the composition you want to capture for your time-lapse sequence. Consider including interesting foreground elements such as landscapes or structures to add depth and context to your shots.
2. Use a stable setup: To ensure smooth and stable footage, it’s essential to mount your camera on a tripod or another stable surface. This will help keep your shots consistent throughout the entire time-lapse sequence.
3. Set up manual camera settings: Switch your camera to manual mode and adjust the necessary settings. Set the ISO, aperture, and shutter speed based on the lighting conditions and desired effect you want to achieve.
4. Determine time interval: Decide on the time interval between each shot. This depends on the length of the eclipse and the desired speed of your final time-lapse video. Consider intervals of a few seconds to a few minutes between shots.
5. Use an intervalometer or time-lapse app: If your camera doesn’t have a built-in intervalometer, use an external intervalometer or a time-lapse app on your smartphone to automate the process of capturing shots at the specified intervals.
6. Ensure continuous power supply: To avoid interruptions during the time-lapse sequence, connect your camera to a power source or use a fully charged battery. This will help ensure that your camera has enough power to capture the entire eclipse without running out of battery.
7. Monitor and adjust as needed: Continuously monitor your shots throughout the time-lapse sequence to ensure proper exposure and composition. Adjust your camera settings if the lighting conditions change or if you want to experiment with different effects.
8. Post-processing: Once you have captured your time-lapse sequence, import the images into software such as Adobe Lightroom or Premiere Pro. Adjust the exposure, color, and any other desired settings to enhance the visuals and create a smooth and compelling time-lapse video.
Time-lapse photography allows you to capture the magic of a solar eclipse in a unique and visually captivating way. With careful planning, a stable setup, and attention to camera settings, you can create a remarkable representation of the eclipse’s progression and share it with others to enjoy.
Share Your Eclipse Experience
After witnessing the awe-inspiring event of a solar eclipse, it’s natural to want to share your experience with others. Whether it’s through social media, photography, or storytelling, here are some creative and engaging ways to share your eclipse experience:
1. Social media: Take to platforms like Instagram, Facebook, or Twitter to share your eclipse photos, videos, and thoughts. Use relevant hashtags, such as #solareclipse, #eclipse2022, or location-specific tags, to connect with fellow eclipse enthusiasts and reach a wider audience.
2. Create a photo album: Compile your best eclipse photos into a digital or physical photo album. Share it with friends, family, or even your local community to inspire and educate others about the beauty and significance of a solar eclipse.
3. Write a blog post or article: Reflect on your eclipse experience by writing a detailed blog post or article. Share your emotions, insights, and any interesting observations you made during the event. Consider submitting your piece to online publications or local newspapers to reach a broader audience.
4. Host a viewing party: Organize a gathering with friends, neighbors, or fellow astronomy enthusiasts to watch a recorded version of the eclipse together. Share your personal experience, showcase your photos, and engage in discussions about the significance and science behind solar eclipses.
5. Create a time-lapse video: If you captured a time-lapse sequence of the eclipse, consider editing it into a visually stunning video. Share the video on your social media platforms or video-sharing websites like YouTube or Vimeo. It can serve as a mesmerizing visual showcase of the eclipse’s progression.
6. Engage with online communities: Join online forums, groups, or communities dedicated to solar eclipses and astronomy. Share your experience, contribute to discussions, and connect with like-minded individuals who share your passion for celestial events.
7. Educate others: Offer to give presentations or host workshops at local schools, libraries, or community centers. Share your knowledge about solar eclipses, including the science behind them, safety precautions, and your personal experiences. Inspire others to appreciate and learn more about these remarkable celestial occurrences.
By sharing your eclipse experience, you can inspire, educate, and raise awareness about the beauty and significance of solar eclipses. Whether through social media, photography, storytelling, or engaging with communities, your perspective and insights can enrich the understanding and appreciation of this extraordinary celestial event.