
Getting Started
Watching a DVD on your Xbox One is a great way to enjoy your favorite movies and TV shows on the big screen. To get started, you will need a few things:
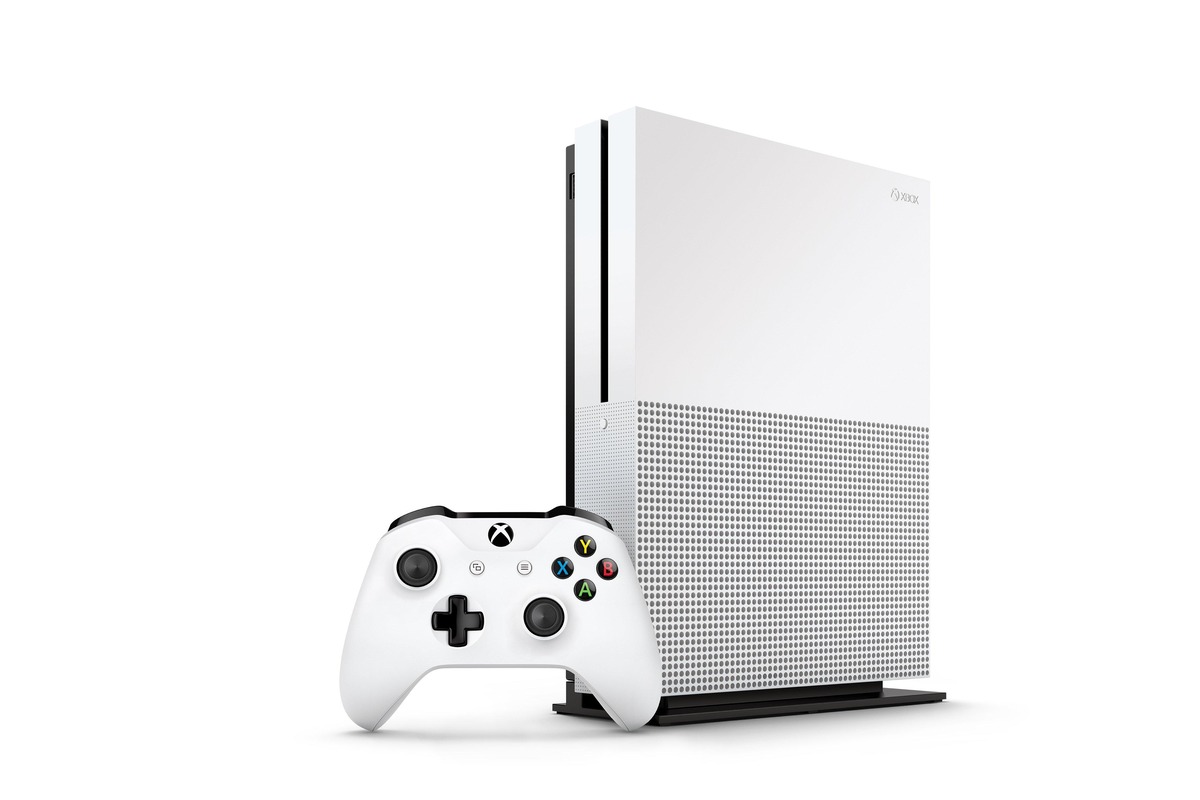
- An Xbox One console
- A compatible DVD
- A television or monitor
- An HDMI cable to connect your Xbox One to the television
- A controller to navigate the Xbox One dashboard
Before you begin, make sure that your Xbox One is updated with the latest system software. This will help ensure a smooth playback experience and compatibility with your DVD.
Once you have everything ready, follow these steps to watch a DVD on your Xbox One:
- Insert the DVD into the disc drive on the front of the Xbox One console.
- Turn on your television and switch it to the appropriate input source for your Xbox One.
- Power on your Xbox One console by pressing the Xbox button on your controller or the console itself.
With these simple steps, you are now ready to dive into the world of DVD entertainment on your Xbox One. Keep reading to learn how to navigate the Xbox One dashboard and access the media player to start playback of your DVD.
Checking Requirements
Before you begin watching a DVD on your Xbox One, it’s important to ensure that you have all the necessary requirements in place. Here’s what you need to check:
- Xbox One console: Make sure you have access to an Xbox One console. This is the central device that will enable you to play DVDs on your television or monitor.
- Compatible DVD: Ensure that you have a DVD that is compatible with the Xbox One. Most DVDs should work without any issues, but it’s a good idea to check if the DVD is region-free or compatible with your console’s region.
- Television or monitor: You’ll need a television or monitor to connect your Xbox One and enjoy the DVD playback. Make sure it’s in working condition and properly connected to your console.
- HDMI cable: To connect your Xbox One to the television, you’ll need an HDMI cable. Check if you have one available or purchase one if needed. Ensure it is securely connected to both the console and the TV.
- Controller: You’ll need a controller to navigate through the Xbox One dashboard and control playback functions. Ensure your controller is charged and in good working condition.
Verifying these requirements beforehand will help ensure a smooth and hassle-free DVD playback experience on your Xbox One. Once you have everything in place, you’re ready to move on to the next step of inserting the DVD into the console’s disc drive.
Inserting the DVD
Now that you have checked the requirements, it’s time to insert the DVD into your Xbox One console. Follow these simple steps:
- Locate the disc drive on the front of your Xbox One console. It is usually located just below the power button or on the side of the console, depending on the model.
- Gently press the eject button on the disc drive to open it. The button is typically marked with an icon resembling a horizontal line with an arrow pointing up or a triangle.
- Take your compatible DVD and carefully place it into the disc drive, with the label facing up. Make sure it is aligned properly and fully inserted into the drive.
- Press the eject button again to close the disc drive. It will pull the DVD inside and start reading it.
After you have successfully inserted the DVD, your Xbox One console will automatically recognize the disc and display information about it on the screen. You are now ready to navigate the Xbox One dashboard and access the media player to start watching your DVD.
If you encounter any issues with inserting the DVD or if the console does not recognize the disc, double-check the compatibility of the DVD and ensure it is inserted correctly. You may also try gently cleaning the DVD and restarting your console if necessary.
With the DVD inserted, it’s time to explore the Xbox One dashboard and learn how to access the media player for an enjoyable DVD playback experience.
Navigating the Xbox One Dashboard
Before you can start watching your DVD on the Xbox One, you need to navigate through the console’s user interface, also known as the Dashboard. Follow these steps to access the media player:
- After inserting the DVD, turn on your Xbox One console by pressing the Xbox button on your controller or the console itself. Wait a moment for the console to boot up.
- The Xbox One Dashboard will now appear on your television screen. This is the main interface where you can access various features and apps.
- Using your controller, navigate through the Dashboard by moving the thumbsticks or pressing the directional pad. You can move left, right, up, or down to select different options.
- Look for the “Media Player” app, which is usually located in the “My Games & Apps” section or the main menu. Highlight and select it to open the app.
Once you access the Media Player app, you will be able to see the DVD that you inserted in the disc drive. From here, you can start playing the DVD and control various playback settings. You may also have additional options to select subtitles, audio settings, and more, depending on the DVD and your personal preferences.
Exploring the Xbox One Dashboard is straightforward, and you will quickly get the hang of navigating through the different menus and apps. If you encounter any difficulties, refer to the Xbox One user manual or the Xbox support website for further guidance.
Now that you know how to access the Media Player app, let’s move on to selecting the DVD and starting the playback.
Opening the Media Player
After successfully navigating through the Xbox One Dashboard, it’s time to open the Media Player app to start playing your DVD. Follow these steps to access the Media Player:
- From the Xbox One Dashboard, locate and select the “Media Player” app using your controller. It is usually found in the “My Games & Apps” section or the main menu.
- The Media Player app will open, and you will be greeted with a list of available media options.
- Using the controller, navigate to the DVD icon and select it to highlight the DVD you want to play.
- Press the “A” button on your controller to open the selected DVD in the Media Player.
Once you have successfully opened the DVD in the Media Player, you will see the main playback screen, which includes options for controlling the playback, adjusting settings, and more.
At this point, you are ready to start watching your DVD on the Xbox One. Depending on the DVD’s content, you can enjoy movies, TV shows, special features, and more. You can use the Xbox controller to control various playback functions such as play, pause, fast forward, and rewind.
Remember to refer to the DVD’s menu and on-screen instructions for any additional features, such as chapter and scene selection, subtitles, audio settings, and more.
Now that you have successfully opened the Media Player and loaded the DVD, let’s explore the playback controls and learn how to navigate through your DVD content.
Selecting the DVD
Once you have opened the Media Player on your Xbox One, it’s time to select the DVD you want to watch. Follow these steps to choose your preferred DVD:
- Using the controller, navigate through the list of available media options displayed in the Media Player app.
- Locate the DVD you want to play from the list and highlight it.
- Press the “A” button on your controller to select the DVD and load its content.
After selecting the DVD, you will be taken to the main playback screen where you can access the different features and controls for an immersive viewing experience.
Keep in mind that if you have multiple DVDs inserted, you will need to navigate to the specific DVD by scrolling through the list of available options in the Media Player app.
Additionally, some DVDs may have additional content like bonus features, director’s commentary, or different language options. Explore the various options and menus to customize your viewing experience according to your preferences.
Once you have successfully selected the DVD, it’s time to dive into the content and start enjoying your favorite movies or TV shows on your Xbox One.
Playback Controls
When watching a DVD on your Xbox One, it’s essential to familiarize yourself with the playback controls. Knowing how to navigate through the content and control the playback will enhance your viewing experience. Here are the main playback controls you need to know:
- Play/Pause: The play and pause button allows you to start or pause the playback of the DVD. Press the “A” button on your controller to play or pause the content.
- Fast Forward and Rewind: To skip forward or backward in the DVD, use the right and left triggers on your controller. Press and hold the right trigger to fast forward and the left trigger to rewind. Release the trigger when you want to resume normal playback.
- Chapter and Scene Selection: Some DVDs are divided into chapters or scenes, making it easier to navigate through specific parts of the content. Press the “X” button on your controller to open the chapter or scene selection menu. Use the directional pad or thumbsticks to highlight and select the desired chapter or scene.
- Subtitles and Audio Settings: Depending on the DVD and your preferences, you may have the option to enable subtitles or adjust the audio settings. Press the “Menu” or “Options” button on your controller to access the settings menu. Navigate to the subtitles or audio options and make your desired selections.
These playback controls give you the flexibility to pause, rewind, fast forward, and navigate through the content of your DVD. Take your time to explore these controls and experiment with different settings to enhance your viewing experience on the Xbox One.
Now that you are familiar with the playback controls, you can fully enjoy your DVD and have control over your viewing experience. Keep in mind that specific DVDs may have their own unique features and controls, so always refer to the on-screen instructions and menus to make the most out of your DVD playback on the Xbox One.
Play/Pause
When watching a DVD on your Xbox One, the play and pause controls allow you to start or pause the playback at any time. Understanding how to use these controls effectively is key to enjoying your DVD experience. Here’s how to utilize the play and pause feature:
To Play:
- Ensure that the DVD is selected and loaded in the Media Player on your Xbox One.
- Press the “A” button on your controller to initiate playback.
- The DVD will begin playing, and the video and audio will be displayed on your screen with synchronized playback.
To Pause:
- While the DVD is playing, press the “A” button on your controller to pause the playback.
- The video and audio will freeze, displaying the current frame where the playback was paused.
By utilizing the play and pause controls, you can easily start and halt the playback of your DVD to suit your viewing preferences. This feature is useful if you need to take a break or want to stop the DVD momentarily without interrupting the overall viewing experience.
Additionally, you can also use the play and pause controls in conjunction with other playback features, such as fast forward and rewind, to navigate through specific scenes or chapters of the DVD. This provides you with even more control over your viewing experience on the Xbox One.
Remember that the play and pause controls are accessible through your Xbox One controller, making it convenient to operate while comfortably seated and immersed in your movie or TV show. Take full advantage of these controls to make your DVD watching experience seamless and enjoyable.
Now that you understand how to play and pause the DVD, let’s dive into the next section to learn about the fast forward and rewind functions.
Fast Forward and Rewind
When watching a DVD on your Xbox One, the fast forward and rewind controls allow you to skip forward or backward through the content. By using these controls, you can easily navigate to specific scenes, skip through commercials, or rewatch a favorite moment. Here’s how to utilize the fast forward and rewind feature:
To Fast Forward:
- While the DVD is playing, hold down the right trigger on your Xbox One controller.
- The DVD will begin fast forwarding, allowing you to quickly skip ahead in the content.
- Release the right trigger when you reach the desired scene or moment.
To Rewind:
- While the DVD is playing, hold down the left trigger on your Xbox One controller.
- The DVD will begin rewinding, allowing you to quickly go backward through the content.
- Release the left trigger when you reach the desired scene or moment.
By utilizing the fast forward and rewind controls, you have the flexibility to navigate through the DVD content at your own pace. This feature is particularly useful when you want to skip through uninteresting parts of a movie or TV show, or when you want to rewatch a specific scene.
While using the fast forward and rewind controls, keep an eye on the on-screen display or pay attention to the audio cues to ensure you stop at the desired point. This will help you find the exact scene or moment you’re looking for without overshooting or missing it entirely.
It’s important to note that the speed at which the DVD fast forwards or rewinds may vary depending on the specific DVD or the settings you’ve established. Experiment with different durations to find a speed that suits your preferences.
Now that you know how to fast forward and rewind through the content, you have more control over your DVD viewing experience. In the next section, we’ll explore how to navigate through chapters and scenes within the DVD.
Chapter and Scene Selection
When watching a DVD on your Xbox One, you have the ability to navigate through different chapters and scenes within the content. This feature allows you to easily jump to specific parts of the DVD, whether it’s a favorite scene, a particular chapter, or a specific moment you want to rewatch. Here’s how to use the chapter and scene selection feature:
Accessing the Chapter and Scene Selection:
- While the DVD is playing in the Media Player on your Xbox One, press the “X” button on your controller to open the options or menu screen.
- Navigate to the chapter or scene selection option using the directional pad or thumbsticks on the controller.
- Select the chapter or scene selection option to access the available choices.
Using Chapter Selection:
- Once you’ve accessed the chapter selection menu, select the desired chapter you want to jump to.
- The DVD will automatically skip to the selected chapter, allowing you to start watching from that specific point.
Using Scene Selection:
- If the DVD offers scene selection, navigate to the scene selection option within the menu.
- Choose the scene you want to watch by selecting it from the provided list.
- The DVD will jump to the selected scene, allowing you to enjoy that specific part of the content.
By utilizing the chapter and scene selection feature, you can easily navigate through different segments of the DVD, saving time and allowing you to jump to your preferred scenes or chapters. This is especially useful if you want to skip to a specific moment or if you are rewatching a favorite part of the content.
Keep in mind that not all DVDs may have chapter or scene selection options. However, most DVDs are divided into chapters, making it easier to navigate through the content. Explore the available options and menus to customize your viewing experience according to your preferences.
Now that you know how to navigate through chapters and scenes within the DVD, you have even more control over your viewing experience on the Xbox One. In the next section, we’ll explore how to adjust subtitles and audio settings.
Subtitles and Audio Settings
When watching a DVD on your Xbox One, you have the option to customize your viewing experience by adjusting subtitles and audio settings. This feature allows you to enhance your comprehension of the content and tailor the audio output to your preferences. Here’s how to adjust subtitles and audio settings:
Accessing Subtitles and Audio Settings:
- While the DVD is playing in the Media Player on your Xbox One, press the “Menu” or “Options” button on your controller to open the settings menu.
- Navigate to the subtitles or audio settings option using the directional pad or thumbsticks on the controller.
- Select the subtitles or audio settings option to access the available choices.
Adjusting Subtitles:
- Once you’ve accessed the subtitles settings, select the desired subtitle language from the provided list.
- You may also have the option to toggle subtitles on or off, adjust the size or style of the subtitles, or choose the preferred position on the screen.
- Make your desired selections by using the controller and confirm your choices by pressing the appropriate button.
Modifying Audio Settings:
- If you want to adjust the audio settings, select the audio option within the settings menu.
- You may have the option to change the audio language, adjust the volume levels, enable or disable surround sound, or choose different audio tracks if available.
- Make the desired adjustments using the controller and confirm your selections by pressing the appropriate button.
By adjusting subtitles and audio settings, you can improve your understanding of the content, especially if you prefer watching movies or TV shows with subtitles or if you want to optimize the audio output according to your audio setup and personal preferences.
Keep in mind that the available subtitle and audio options may vary depending on the specific DVD and its features. Explore the settings menu to see the available choices and make adjustments that best suit your needs.
Now that you know how to adjust subtitles and audio settings when watching a DVD on the Xbox One, you can enjoy a personalized and immersive viewing experience. In the next section, we’ll explore some troubleshooting tips in case you encounter any issues while playing your DVD.
Troubleshooting
While watching a DVD on your Xbox One, you may occasionally encounter some common issues or problems. However, worry not, as most of these issues can be resolved easily with a few troubleshooting steps. Here are some common troubleshooting tips to help you get back to enjoying your DVD:
1. DVD Not Playing:
If your DVD is not playing on your Xbox One, try the following steps:
- Ensure that the DVD is inserted properly into the disc drive of the console.
- Check the DVD for any visible scratches, dirt, or damage. Gently clean the DVD using a soft, lint-free cloth.
- Restart your Xbox One console by holding down the power button on the console for a few seconds.
- Make sure your Xbox One console is updated with the latest system software. Go to the settings menu and check for any available updates.
2. Reduced Video Quality:
If you notice a decrease in video quality while playing a DVD, try these troubleshooting steps:
- Check your HDMI cable connections to ensure they are securely plugged in.
- Check the video output settings on your Xbox One to make sure they are set to the appropriate resolution for your television or monitor.
- Try playing the DVD on a different television or monitor to see if the issue persists.
- Ensure that the DVD itself is of good quality and not damaged or scratched.
If the above troubleshooting steps do not resolve the problem, consult the Xbox support website or contact their customer support for further assistance.
Remember, troubleshooting steps can vary depending on the specific issue and equipment you’re using. It’s always a good idea to consult the user manual, Xbox support resources, or online forums for additional troubleshooting tips specific to your situation.
By following these troubleshooting steps, you can overcome common issues that may arise while watching a DVD on your Xbox One and get back to enjoying your movie or TV show without interruptions.
Now that you are armed with troubleshooting tips, you can confidently resolve any issues that may arise and continue to enjoy your DVD playback on the Xbox One.
DVD Not Playing
If you encounter the issue of your DVD not playing on your Xbox One, it can be frustrating. However, there are several troubleshooting steps you can take to resolve this problem and get your DVD playing again. Here are some steps to try:
- Ensure that the DVD is inserted correctly into the disc drive of your Xbox One console. Double-check that it is facing the right way and fully inserted.
- Inspect the DVD for any visible scratches, dirt, or damage. Gently clean the disc using a soft, lint-free cloth to remove any fingerprints or smudges that might affect playback.
- Restart your Xbox One console. Press and hold the power button on the front of the console for about 10 seconds until it shuts down completely. Wait a few seconds, then press the power button again to turn it back on.
- Make sure your Xbox One console has the latest system software updates installed. Go to the Settings menu, select “System,” and then choose “Updates” to check for any available updates.
If you have followed these steps and your DVD still isn’t playing on your Xbox One, there may be an issue with the disc or the console. Here are additional troubleshooting options to consider:
- Try playing a different DVD on your Xbox One to determine if the issue is specific to the DVD or a more general problem.
- Make sure the DVD isn’t region-locked and is compatible with your Xbox One console. Some DVDs are designed to be played only in specific regions, so check the DVD’s packaging or documentation for compatibility information.
- If your Xbox One console is under warranty, consider contacting Xbox Support or the retailer where you purchased the console for further assistance or a possible replacement.
- Consider trying the DVD on a different DVD player or game console to determine if the issue is isolated to the Xbox One.
By following these troubleshooting steps, you can often resolve the issue of your DVD not playing on your Xbox One. However, if the problem persists, it may require further investigation or assistance from technical support.
Remember to always handle DVDs with care and keep them in good condition to ensure optimal playback. If you continue to experience issues with your DVD not playing, consult the user manual for your Xbox One console or visit the Xbox Support website for additional guidance.
Now, armed with these troubleshooting tips, you can tackle the problem of a DVD not playing on your Xbox One and hopefully enjoy uninterrupted DVD playback in no time.
Reduced Video Quality
If you notice a decrease in video quality while playing a DVD on your Xbox One, it can be frustrating and impact your viewing experience. However, there are several troubleshooting steps you can take to address the issue of reduced video quality. Here are some steps to consider:
- Check your HDMI cable connections to ensure they are securely plugged in. Disconnect and reconnect the HDMI cable at both ends to ensure a proper and stable connection.
- Inspect the HDMI cable for any visible damage, such as fraying or bent pins. If the cable appears damaged, consider replacing it with a new HDMI cable.
- Verify that your Xbox One console is set to the correct video output resolution for your television or monitor. To do this, go to the Settings menu, select “Display & sound,” and then choose “Video output.” Adjust the resolution settings as needed.
- Try using a different HDMI port on your television or monitor. Some HDMI ports may have better compatibility or support higher quality output.
- If possible, try connecting your Xbox One directly to the television or monitor instead of using an HDMI switch or other intermediate device. This can help eliminate any compatibility or signal degradation issues.
- Check for any firmware updates for your television or monitor. Visit the manufacturer’s website or review the user manual for instructions on updating the firmware.
If you have followed these steps and are still experiencing reduced video quality, consider the following additional troubleshooting options:
- Try playing the DVD on a different television or monitor to see if the issue persists. This can help determine if the problem is with your Xbox One console or the display device.
- Inspect the DVD for any visible scratches or damage. A damaged DVD disc may result in reduced video quality. If the disc is damaged, consider replacing it or trying a different DVD.
- Ensure that your television or monitor is set to the appropriate display mode or picture settings. Consult the user manual for your specific device and adjust the settings accordingly.
- If available, try adjusting the picture settings on your Xbox One under the Display & sound settings. Experiment with settings such as brightness, contrast, and color to see if it improves the video quality.
By following these troubleshooting steps, you can often improve or resolve the issue of reduced video quality while playing a DVD on your Xbox One. However, if the problem persists, it may be worth contacting Xbox Support or seeking assistance from a professional to further diagnose and address the issue.
Now armed with these troubleshooting tips, you can confidently tackle the problem of reduced video quality and enjoy a better playback experience on your Xbox One.