
Preparing for Band Replacement
So, you’ve decided to give your Galaxy Watch 4 a fresh new look by replacing its band. Before you dive into the exciting process of band replacement, there are a few preliminary steps you should take to ensure a smooth and successful transition. By following these guidelines, you can minimize the risk of damaging your watch and make the band replacement process a breeze.
First and foremost, gather all the necessary tools and materials. You will need a small screwdriver or a spring bar tool, depending on the type of band attachment mechanism your Galaxy Watch 4 has. Additionally, make sure you have the replacement band ready, ensuring that it is compatible with your watch model and comes with the correct attachment mechanism.
Next, find a clean and well-lit workspace. It’s crucial to have ample lighting and a clutter-free area to prevent any small parts from getting lost. Consider laying down a soft cloth or towel to protect both your watch and the surface you’re working on.
Before proceeding, power off your Galaxy Watch 4. This will prevent any accidental button presses or notifications that could disrupt the band replacement process. Once the watch is powered off, remove it from your wrist and place it on the prepared workspace.
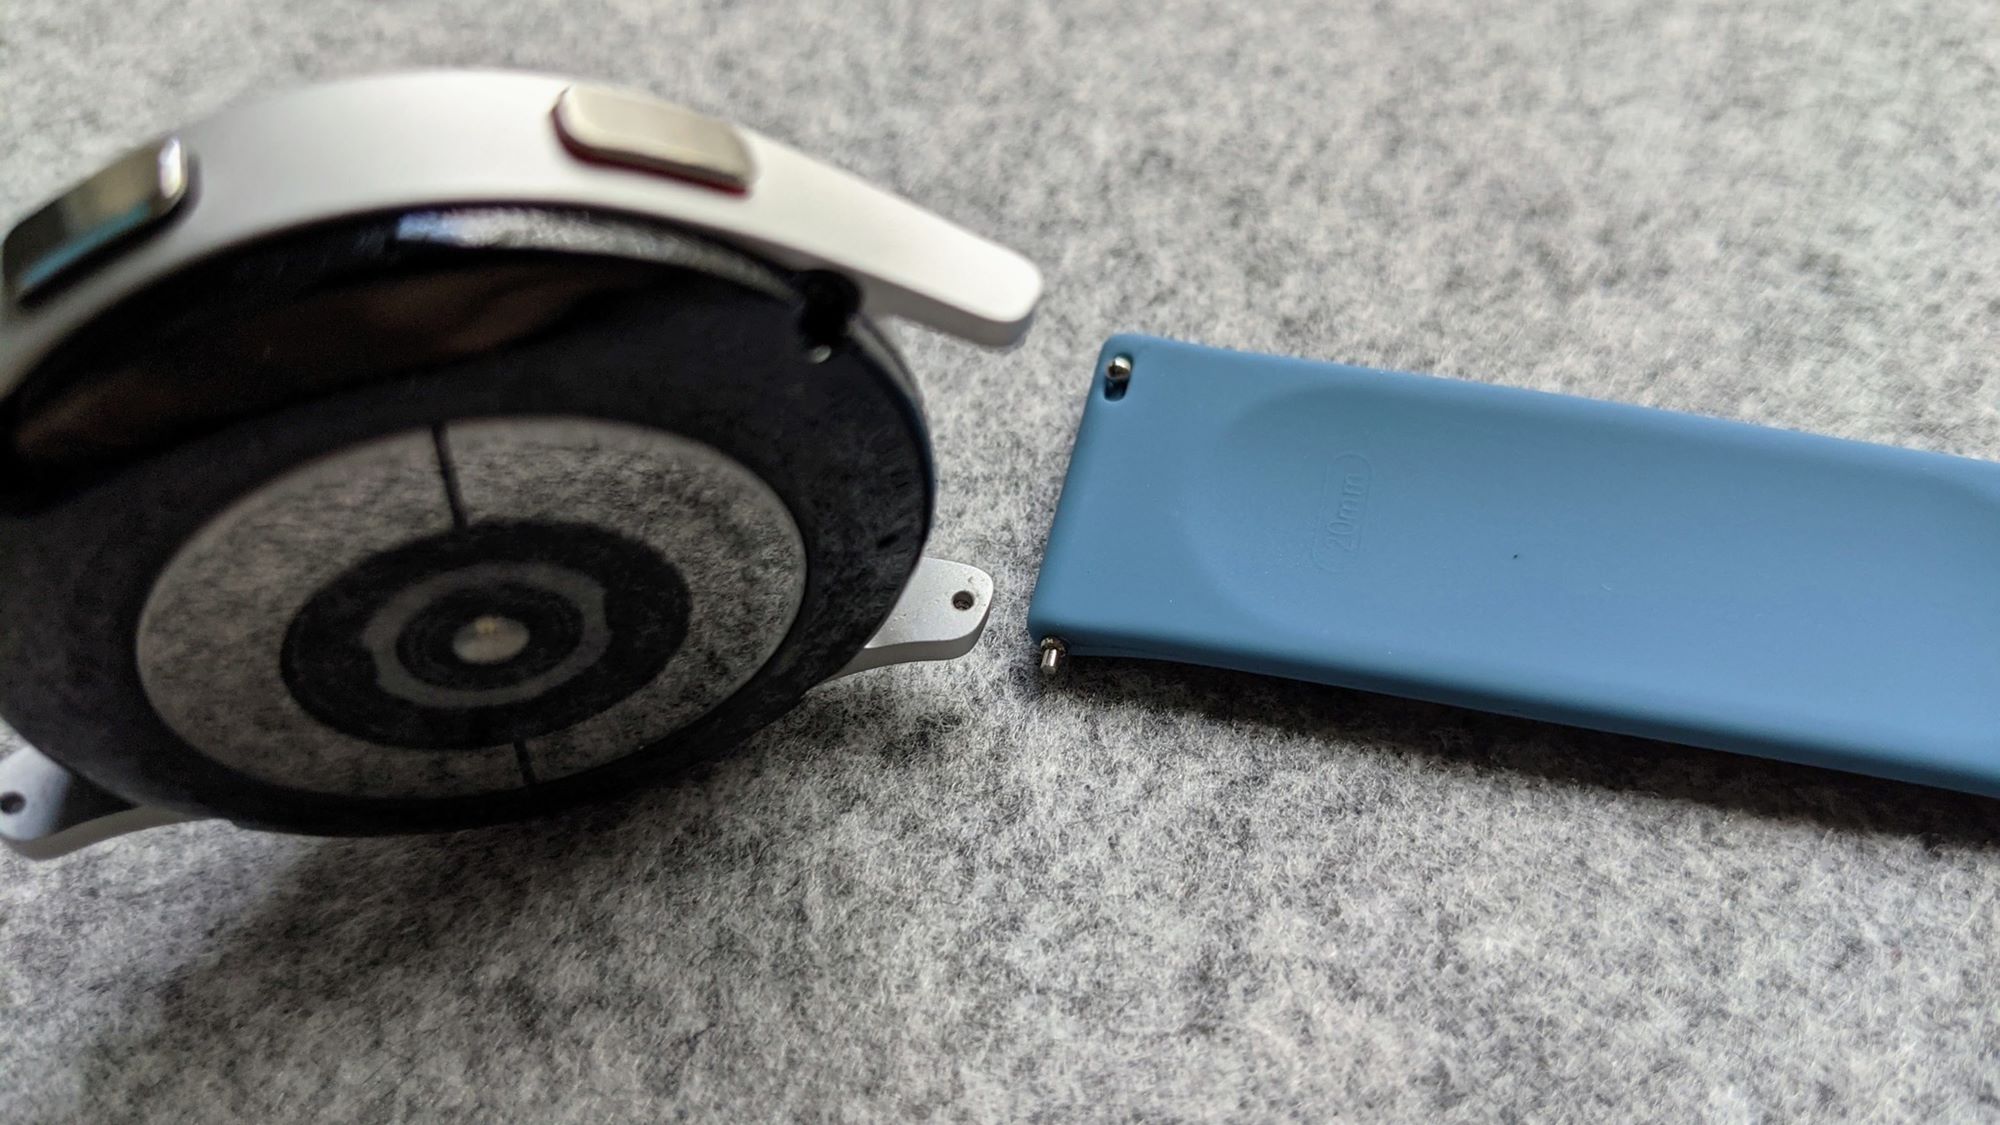
Take a moment to familiarize yourself with the current band attachment mechanism. Different smartwatches may have variations in how bands are secured, such as spring bars, screws, or quick-release buttons. Refer to the user manual or online resources specific to your watch model to understand how the current band is attached and how to remove it safely.
Lastly, exercise patience and caution throughout the entire process. Band replacement requires delicate handling, especially when dealing with smaller parts. If you encounter any resistance during the removal or attachment, do not force it. Take a step back, reassess the situation, and make sure you are following the correct procedure.
By preparing adequately and following these steps, you will be well-equipped to tackle the band replacement process with confidence. With your Galaxy Watch 4 ready for the band swap, it’s time to move on to the next exciting step: removing the old band.
Removing the Old Band
Now that you’ve prepared your workspace and familiarized yourself with the band attachment mechanism, it’s time to remove the old band from your Galaxy Watch 4. This step is crucial in order to make way for the new band and give your watch its refreshed look. Follow these instructions to safely and effectively remove the old band:
-
For watches with spring bars: Locate the small spring bar holes on both sides of the watch’s lugs. Insert the spring bar tool or a small flathead screwdriver into one of the holes. Apply gentle pressure to compress the spring bar and carefully slide the tool towards the center of the watch lug. This will release the spring bar tension and allow you to detach the band from the watch. Repeat this step for the other side of the watch.
-
For watches with screws: Use the appropriate screwdriver to slowly unscrew the small screws securing the band to the watch lugs. Take care not to lose any of the screws during this process. Once the screws are fully removed, gently detach the old band from the watch.
-
For watches with quick-release buttons: Locate the small release buttons on the back of the watch lugs. Simultaneously press both buttons on one side of the watch to release the band from the lug. Repeat this step for the other side of the watch. The old band should easily detach from the watch.
Regardless of the attachment mechanism, handle the old band with care and set it aside. Take this opportunity to clean the area around the watch lugs, removing any dirt or debris that may have accumulated. You can use a soft cloth or a cotton swab slightly dampened with water for this purpose. Make sure the watch is completely dry before proceeding to the next step.
With the old band successfully removed, you’re one step closer to giving your Galaxy Watch 4 a fresh new look. The next section will guide you through the process of attaching a new band to your watch.
Attaching a New Band
Congratulations on successfully removing the old band from your Galaxy Watch 4! Now, let’s move on to the exciting part: attaching a new band and giving your watch a fresh new look. Follow these steps to securely and properly attach the new band:
1.
Ensure that the new band you have chosen is compatible with your Galaxy Watch 4 model and has the correct attachment mechanism. Refer to the instructions provided with the replacement band to verify compatibility.
2.
For watches with spring bars: Insert one end of the spring bar into the lug hole on one side of the watch. Use your finger or the spring bar tool to compress the spring bar and align the other end with the lug hole on the new band. Release the pressure, allowing the spring bar to expand and securely attach the new band. Repeat this step for the other side of the watch.
3.
For watches with screws: Align the holes on the new band with the screw holes on the watch lugs. Carefully insert the screws into the holes and use the appropriate screwdriver to tighten them securely. Take care not to overtighten the screws, as it may damage the threads or the band.
4.
For watches with quick-release buttons: Align the new band with the watch lugs, ensuring that the pins on the new band line up with the holes on the lugs. Press the band firmly towards the lugs until you hear a satisfying click, indicating that the quick-release buttons have securely locked the new band in place. Repeat this step for the other side of the watch.
5.
Once the new band is attached, give it a gentle tug to ensure it is securely in place. Ensure that the band is centered and aligned with the watch face. Take a moment to admire your Galaxy Watch 4 with its stylish new band.
Remember to handle the new band with care, avoiding excessive pulling or twisting that may cause damage. If the new band feels too tight or too loose, you can adjust the fit in the next section.
Adjusting the Fit
Now that you have successfully attached the new band to your Galaxy Watch 4, it’s important to ensure that it fits comfortably on your wrist. Proper fit not only enhances your comfort but also ensures that the watch stays securely in place during daily activities. Follow these steps to adjust the fit of your new band:
1.
Check the positioning: Position the watch on your wrist so that the watch face is centered and aligned with the top of your wrist. This position allows for easy visibility and prevents the watch from sliding around during wear.
2.
Assess the band length: If the band is too loose, you may need to remove some links or make use of the band’s adjustment holes. To remove links, locate the removable links on the bracelet-style band and use a small tool or a pin to push out the necessary links. Alternatively, if the band has adjustment holes, fasten the band using the most comfortable and secure hole that provides the desired fit.
3.
Ensure a snug fit: The band should fit snugly on your wrist without feeling too tight or constrictive. It should be secure enough to prevent the watch from sliding around, yet not so tight that it leaves imprints or causes discomfort. Adjust the fit as necessary to find the right balance.
4.
Test the flexibility: Flex your wrist and ensure that the band allows for easy movement and flexibility. Your watch should not dig into your skin or hinder your range of motion. Make any additional adjustments if needed.
5.
Double-check the fit: Once you have made the necessary adjustments, wear the watch on your wrist for a little while. Pay attention to any discomfort or tightness that may develop during the trial period. If needed, further fine-tune the fit until you achieve optimal comfort and functionality.
Remember, everyone’s wrists are different, so it may take some trial and error to find the perfect fit. Take your time throughout this process to ensure that your Galaxy Watch 4 fits you comfortably and securely.
Now that you have adjusted the fit of your new band, it’s essential to maintain it properly to ensure its longevity and performance. The next section will provide tips on effectively maintaining your Galaxy Watch 4 band.
Maintaining Your Galaxy Watch 4 Band
Now that you have your Galaxy Watch 4 band securely attached and perfectly adjusted, it’s important to maintain it properly to ensure its longevity and keep it looking its best. Follow these tips to effectively care for your Galaxy Watch 4 band:
1.
Clean regularly: Regularly clean your watch band to remove dirt, sweat, and oils that can accumulate over time. For leather or silicone bands, gently wipe them with a soft, damp cloth. For metal bands, use a mild soap and water solution and a soft brush to scrub away any dirt. Avoid using harsh chemicals or abrasive materials that can damage the band.
2.
Store properly: When not wearing your Galaxy Watch 4, store it in a clean and dry place. Avoid exposing it to direct sunlight or extreme temperatures, as these can damage the band material. If you have multiple bands, consider storing them separately to prevent tangling or scratching.
3.
Avoid moisture exposure: While the Galaxy Watch 4 is water-resistant, excessive exposure to moisture can still damage the band. Avoid wearing the watch band when swimming or showering, as prolonged exposure to water can cause discoloration or deterioration of certain materials.
4.
Be mindful of activities: Consider the activities you engage in while wearing your Galaxy Watch 4 band. If you participate in rigorous physical activities or sports that may put strain on the band, opt for a more durable and sport-specific band. This will help prevent unnecessary wear and tear.
5.
Inspect for damage: Regularly inspect your Galaxy Watch 4 band for any signs of damage or wear. Pay attention to the attachment mechanism, stitching (for leather bands), and any signs of discoloration or fraying. If you notice any issues, it may be time to replace your band to maintain optimal performance and aesthetics.
6.
Follow manufacturer’s instructions: Lastly, always refer to the manufacturer’s instructions specific to your Galaxy Watch 4 band. They may provide additional care guidelines or specific cleaning recommendations based on the material and design of your band.
By following these maintenance tips and taking proper care of your Galaxy Watch 4 band, you can enjoy its stylish appearance and functionality for a long time to come.