
Required Tools
Before you begin adjusting the band on your Casio watch, gather the necessary tools to ensure a smooth and successful process. Here are the tools you will need:
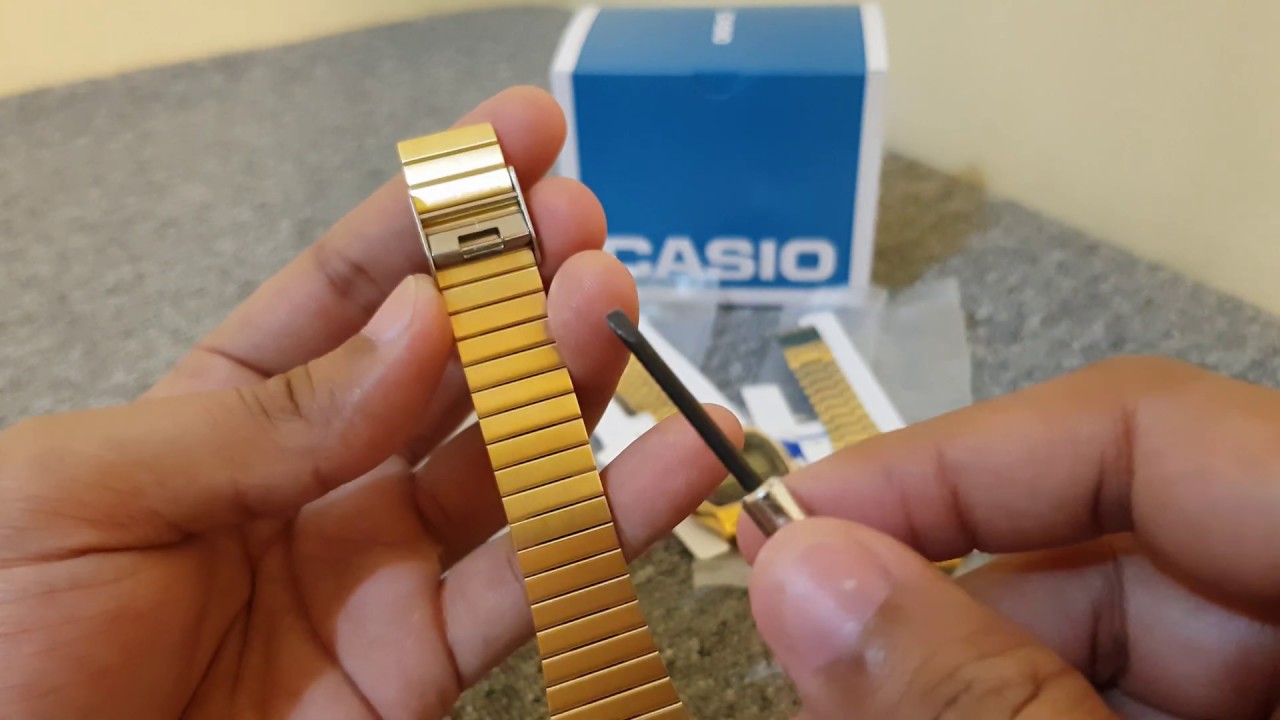
- Screwdriver: Depending on the type of Casio watch band, you may need a small screwdriver to remove links or adjust the size.
- Spring bar tool: This tool is essential for removing and attaching spring bars in leather or resin bands.
- Pliers: If your watch band has a clasp or buckle that requires adjustment, a pair of pliers can help you make the necessary changes.
- Velcro strap cutter: If you have a Casio watch with a Velcro strap that needs resizing, a strap cutter will come in handy.
- Bracelet pin remover tool: If you have a metal Casio watch band with push pins, a bracelet pin remover tool will make it easier to remove and adjust the links.
Make sure you have these tools readily available before you start the band adjustment process. This will save you time and frustration, ensuring that you have everything you need to make the necessary adjustments to your Casio watch band. Once you have all the tools ready, you can move on to the next steps of the process.
Step 1: Determine the Type of Band
Before you can adjust the band on your Casio watch, you need to determine the type of band it has. Casio watches come in various band materials, including metal (such as stainless steel), leather, resin, and even Velcro straps. Each type of band requires a slightly different method for adjustment.
If your Casio watch has a metal band, it may have links that can be removed to resize the band. In this case, you will need to identify which links need to be taken out to achieve the desired fit. Some metal bands also have clasp adjustments, where the clasp can be adjusted along the band for a better fit.
For leather or resin bands, the adjustment process typically involves removing and reattaching spring bars. These bars secure the band to the watch case and can be removed with a spring bar tool. By removing the spring bars, you can adjust the length of the band to your preference.
If your Casio watch has a Velcro strap, you may need to resize it by cutting off excess material. Velcro straps usually come with marked lines indicating where you can cut to achieve the desired fit. A strap cutter is recommended for precise and clean cuts.
By determining the type of band on your Casio watch, you can move on to the appropriate steps for adjustment. Understanding the specific requirements for each band material will ensure that you make the correct adjustments without causing any damage to your watch. Once you have identified the type of band, you can proceed to the next step of the adjustment process.
Step 2: Remove the Links from Metal Bands
If your Casio watch has a metal band that needs adjustment, you may need to remove some links to achieve a comfortable fit. Here’s how you can do it:
- Identify the links: Examine your Casio watch band to identify the links that need to be removed. Look for removable links that have small arrows imprinted on them or appear slightly different from other links.
- Locate the pins: The links on the Casio metal band are typically held together by pins. Use a magnifying glass if needed to locate the pins and identify the direction they need to be pushed out.
- Use the bracelet pin remover tool: Place your Casio watch on a clean, stable surface and position the bracelet pin remover tool over the pin that needs to be removed. Apply steady pressure to push the pin out in the direction indicated by the arrow on the link. Repeat this process for each link you want to remove.
- Store the extra links: Keep the extra links in a safe place in case you need to add them back later or if you want to resize the band again in the future.
Be cautious while removing the links to avoid scratching the band or damaging the pins. It’s recommended to cover the band with a soft cloth or use a watch band holder tool as added protection.
After removing the desired links, try on the watch to assess the fit. If it’s still too loose or too tight, you may need to remove or reattach additional links until you achieve the desired comfort.
Now that you have successfully adjusted the metal band of your Casio watch, you can move on to the next steps to ensure that the band fits perfectly on your wrist.
Step 3: Adjust Leather or Resin Bands
If your Casio watch has a leather or resin band that needs adjustment, you can easily resize it to achieve a comfortable and secure fit. Follow these steps to adjust the band:
- Identify the spring bars: Examine the sides of your Casio watch band to locate the spring bars. These small metal bars secure the band to the watch case.
- Use a spring bar tool: Insert the forked end of the spring bar tool between the end of the spring bar and the watch case. Apply gentle pressure to compress the spring bar, allowing you to slide it out of its hole. Be careful not to lose the spring bar when removing it.
- Adjust the band length: Once you have removed the spring bar, determine the desired length of the band. You can remove or add additional sections on both sides to achieve the perfect fit. Remember to keep the band balanced by removing the same number of sections from each side.
- Reattach the spring bars: With the band adjusted to the desired length, reinsert the spring bars into the corresponding holes on the watch case. Use the spring bar tool to compress the spring bar and guide it back into place. Ensure that the spring bar is securely fastened before moving on to the next step.
After adjusting the leather or resin band, try on the watch to check if it fits comfortably on your wrist. If necessary, repeat the steps to fine-tune the adjustment until it feels just right.
Remember to handle the spring bars with care, as they are small and can be easily lost. If you are not confident in performing the adjustment yourself, consider taking your Casio watch to a professional watchmaker or jeweler for assistance.
With the leather or resin band properly adjusted, you are one step closer to enjoying a comfortable and secure fit on your Casio watch.
Step 4: Resize the Velcro Straps
If your Casio watch features a Velcro strap that needs adjustment, you can easily resize it to ensure a snug and comfortable fit on your wrist. Follow these steps to resize Velcro straps:
- Identify the resize lines: Examine the Velcro strap to locate the marked resize lines. These lines indicate where you can cut the strap to adjust its length.
- Measure and mark: Determine the desired length of the Velcro strap by wrapping it around your wrist. Once you have established the appropriate size, use a ruler or measuring tape to measure the distance from the end of the strap to the intended resize line. Mark this measurement on the strap using a pen or marker.
- Use a strap cutter: Align the marked measurement with the cutting slot of the strap cutter. Apply steady and even pressure to cut along the resize line. Be careful to follow the line accurately to ensure a clean and precise cut.
- Smooth the edges: After cutting the Velcro strap, use a small piece of sandpaper or a nail file to gently smooth out any rough edges created during the cutting process. This will prevent any discomfort or irritation when wearing the watch.
Once you have resized the Velcro strap, try it on and ensure that it fits comfortably around your wrist. Make any additional adjustments if needed by cutting the strap along other resize lines, following the same steps outlined above.
Keep in mind that once you have cut the Velcro strap, it may not be possible to restore it to its original length. Therefore, measure and cut with precision to achieve the desired fit.
By resizing the Velcro strap, you can enjoy a secure and customized fit for your Casio watch, ensuring it stays comfortably in place throughout the day.
Step 5: Secure the Band in Place
Once you have adjusted the band of your Casio watch to the desired size, it’s important to ensure that it is securely fastened in place. Here’s how you can secure the band:
- Use the clasp adjustments (for metal bands): If your Casio watch has a metal band with clasp adjustments, slide the clasp along the band to the desired position. Make sure the clasp is securely locked, preventing the band from slipping or becoming loose during wear.
- Reattach the pins (for leather or resin bands): After adjusting the length of a leather or resin band and reinserting the spring bars, make sure the spring bars are fully engaged and secure. You can gently tug on the band to ensure that it is firmly in place.
- Check the Velcro strap (for Velcro straps): If your Casio watch features a Velcro strap, ensure that the Velcro surfaces are aligned and firmly pressed together. This will provide a strong grip and prevent the strap from coming loose during activities.
- Double-check the fit: Once you have secured the band in place, try on the watch again to verify that it fits comfortably and snugly on your wrist. It should not be too tight or too loose, allowing for a full range of motion while maintaining a secure fit.
By ensuring that the band is properly secured, you can enjoy peace of mind knowing that your Casio watch will stay in place throughout the day. This is especially important during physical activities or when wearing the watch for extended periods.
If you encounter any difficulties in securing the band or have concerns about its stability, consider seeking assistance from a professional watchmaker or jeweler to ensure optimal functionality.
With the band securely fastened, your Casio watch is now ready to be worn with confidence and comfort!
Step 6: Test the Fit
After adjusting and securing the band of your Casio watch, it’s crucial to test the fit to ensure that it is comfortable and provides the desired level of snugness. Follow these steps to test the fit:
- Wear the watch: Put on your Casio watch and fasten the band securely.
- Check for comfort: Pay attention to how the watch feels on your wrist. It should not feel too tight, causing discomfort or restricting blood circulation. Similarly, it should not feel too loose, allowing the watch to slide around or flop. The band should provide a secure and comfortable fit.
- Assess movement: Move your wrist in different directions and perform everyday activities. Ensure that the watch stays in place and does not shift or slide excessively. The band should allow for a full range of motion without compromising the security of the watch.
- Take note of any adjustments needed: If you find that the band is still not providing the desired fit, make a mental note of any areas that may require further adjustment. Consider whether the band needs to be slightly tightened or loosened. This will help you make any necessary modifications in the next step.
By testing the fit of your Casio watch, you can ensure that it is comfortable to wear and stays securely in place throughout the day. Remember that personal comfort preferences may vary, so make adjustments based on your individual preferences and needs.
If you find that additional adjustments are required, refer back to the appropriate steps based on the type of band your Casio watch has. Fine-tune the fit until you achieve the perfect balance of comfort and security.
Once you are satisfied with the fit, you can move on to the final step to complete the band adjustment process.
Step 7: Reassemble the Watch
After adjusting and testing the fit of your Casio watch band, it’s time to reassemble the watch to ensure everything is properly secured. Follow these steps to reassemble your watch:
- Reattach the watch case: If you had to remove the watch case during the band adjustment process, carefully align it with the bracelet or strap and slide it back into place. Ensure that it sits securely and evenly on the band.
- Insert the pins (for metal bands): If you adjusted a metal band, reinsert the pins into the appropriate holes on the links. Use a gentle push with your fingers or the bracelet pin remover tool to secure the pins in place.
- Slide the clasp into position (for metal bands): If your Casio watch has a clasp, make sure it is properly aligned and slide it into the desired position for a comfortable fit. Ensure that the clasp locks securely and does not accidentally open.
- Check the spring bars (for leather or resin bands): For leather or resin bands, double-check that the spring bars are fully engaged in their respective holes. Gently tug on the band to confirm that it is securely attached to the watch case.
- Secure the Velcro strap (for Velcro straps): If your Casio watch features a Velcro strap, make sure the Velcro surfaces are pressed firmly together. This will provide a strong grip and prevent the strap from coming undone.
Once you have reassembled the watch, take a moment to inspect the overall appearance, ensuring that everything looks aligned and neat. Double-check that all components are securely in place and that there are no loose or protruding parts.
Now that your Casio watch is fully reassembled, you can admire its adjusted fit and enjoy wearing it comfortably on your wrist. The band is now tailored to your preferences and should provide a secure and comfortable experience.
Remember, if you encounter any difficulties during the reassembly process or have concerns about the watch’s functionality, seeking assistance from a professional watchmaker or jeweler is always a good option.
With the watch properly reassembled, you can proudly showcase your adjusted Casio timepiece!